In this article I will guide you how to fix Playback Devices error in Skype on [ Windows 10 ], this is one of the errors that Skype users on Win10 operating system often encounter.
Although [ Skype ] is currently one of the most popular messaging services in the world, many Windows 10 users have shared that they encountered a Playback Devices related error in Skype, when this error occurred. Users will not be able to hear other people talking during Skype calls, causing inconvenience and discomfort during the use of the user.
However, if you encounter the above error, people can still fix this error by following the solutions that I will guide the following.
1. Delete audio device
With Playback related issues, you will not be able to make Skype calls and that could seriously affect your Skype experience. The steps are as follows:
Step 1: Press the shortcut Windows + X and select Device Manager from the list.
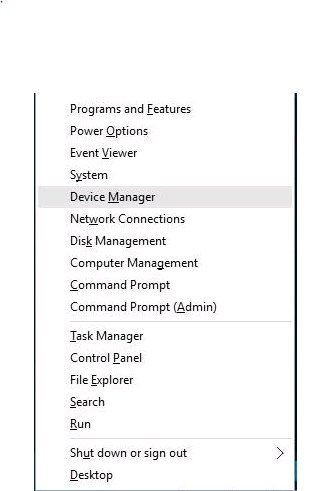
Step 2: Navigate to Sound, video and game controllers and navigate to audio device .
Step 3 : Right-click the audio device and select Uninstall .

Step 4: Once the audio device has been uninstalled, reboot your computer and then Windows 10 will automatically install it. Finally check to see if the problem has been resolved.
2. Temporarily turn off the audio device
You follow the steps as follows:
Step 1: Open the Device Manager section by pressing the shortcut Windows + X and selecting Device Manager from the menu.
Step 2: When Device Manager pops up, navigate to your audio device, right-click on the device and select Disable .
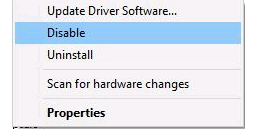
Step 3: Right-click on the device again and select Enable from the menu.
Step 4: Close Device Manager and check if the error persists.
3. Restart Skype
A simple way to resolve the Skype error with Playback Devices on Windows 10 is to restart Skype. To do this, you just need to find the Skype application icon on the taskbar, then right-click on the icon and select Quit.
After you have closed the Skype application, try restarting the computer and check to see if the problem is resolved.
4. Ensure the playback device is installed correctly in Skype
The steps are as follows:
Step 1 : Open Skype and select Tools> Options.
Step 2: Navigate to Audio settings and expand the Speakers section menu .
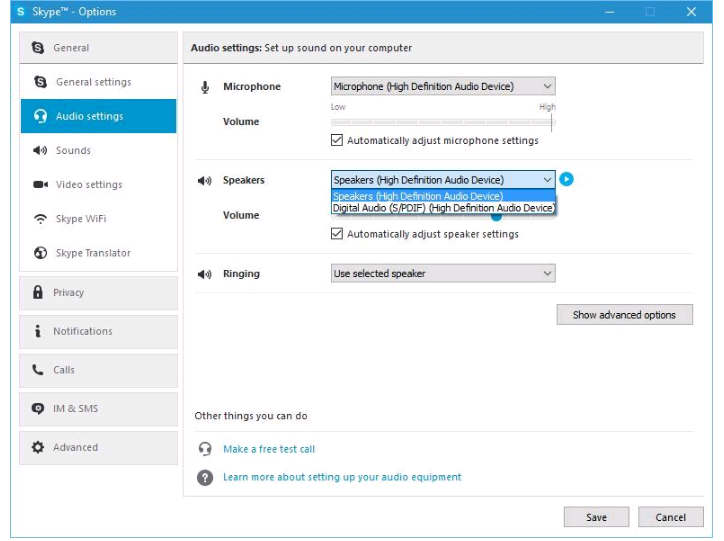
Step 3: Select the appropriate audio device and click Save to save changes.
Step 4: Now check again to see if the problem has been resolved. In addition, you will probably have to try a few different audio devices before finding the device that best suits your computer.
5. Turn off the Automatically adjust speaker settings option
Another way to fix Skype errors and playback devices is to turn off the Automatically adjust speaker settings option in the speaker settings.
To turn off this option, simply navigate to Tools> Options> Audio settings in Skype. Then go to Speakers, and uncheck the Automatically adjust speaker settings box, finally click Save to save changes.
6. Enable and disable the speaker
Step 1: Right-click the speaker icon in the lower right corner of the screen and select Playback devices line .
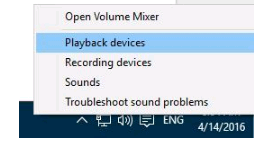
Step 2: Right-click an empty space in the Playback Devices window and check the boxes of Show Disabled Devices and Show Disconnected Devices.
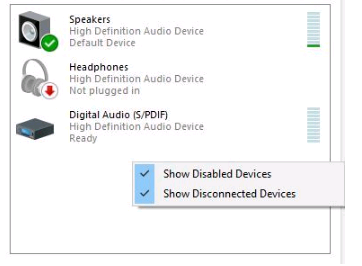
Step 3: Right-click on your audio device and select Disable to turn it off.
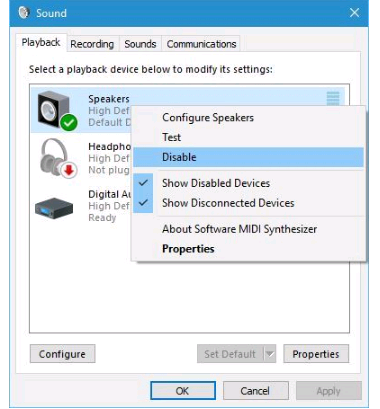
Step 4: Right-click on the device again and select Enable . Then click Apply and OK to save these changes.
7. Turn off the audio software that is running in the background
According to some users, you can fix playback errors on Skype by turning off applications that are using sound cards on the computer.
For example, if you have a multimedia player running in the background, you will have to turn it off before starting a Skype call.
8. Reset Skype configuration file
The steps are as follows:
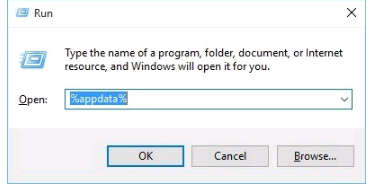
Step 1: Close the Skype application. Press the keyboard shortcut Windows + R and type % appdata% into the search box and then press Enter or OK to continue.
Step 2: In a new window, locate the Skype folder and rename it to Skype.ol d. By renaming this Skype folder, your message history will be deleted from Skype, but they will still be saved in the Skype.old folder when you want to recover.
Step 3: After you rename the Skype folder, restart this app and check to see if the problem is resolved.
9. Update audio driver
Playback errors in Skype can occur if the audio driver of the computer is not updated and is currently using the old version.
Therefore, you should proceed to update the audio driver by visiting the mainboard manufacturer's website or audio card on the computer you are using, then download the latest driver version and install it.
With this method, the issue of Playback device error in Skype will be solved.
In case you don't know how to update drivers manually, you should use Tweakbit 's driver update tool, created by Microsoft and Norton Antivirus . This is the best automation solution you should use.
Here is a quick guide for you to do this:
Step 1: Download and install TweakBit Driver Updater here.

Step 2: Once the installation is complete, the tool will start scanning your computer for outdated driver versions based on the latest cloud database and suggest appropriate updates. well suited. All you need to do is wait for this scan to complete.
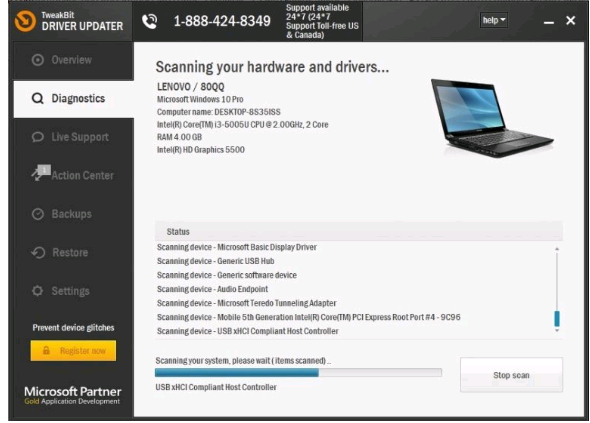
Step 3: After the scan is complete, you will receive a report on all the problematic drivers found on your computer. Now review the list and decide whether to update each driver individually or all at once. To update multiple drivers at a time, click the ' Update driver ' link next to the driver name. Or just click the ' Update all ' button at the bottom to automatically install all the recommended drivers.
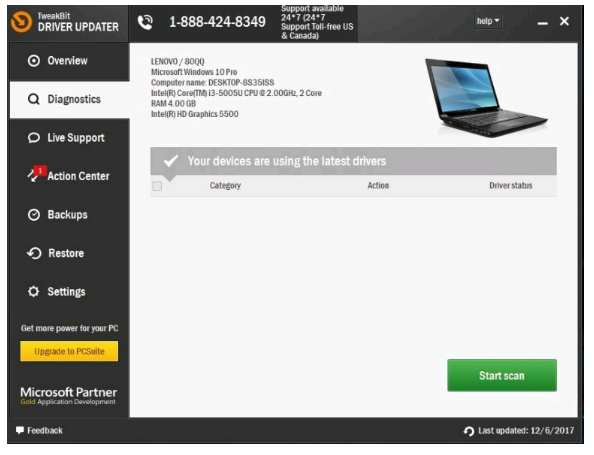
Note: Some drivers will need to be installed in several steps, so you will have to press the 'Update' button repeatedly until all the components of the update are installed successfully.
10. Reinstall Skype
Many users also suggest that playback errors in Skype can be overcome by deleting and reinstalling Skype. Then try installing an older version of Skype to check if they fix this problem.
11. Switch to Skype UWP version
If you are unable to make calls with the standard desktop version of Skype, then try using the Skype UWP version specifically for Microsoft users.
Truth be told, the Skype UWP application is still not the most stable application at the moment, but it is being improved and updated more often.
Another plus point is that you will not need to install the Skype UWP version on your computer, because it is already installed on the computer system already.
12. Use the Audio Troubleshooter tool
The steps are as follows:
Step 1 : Go to Settings> Updates & Security> Troubleshooting.
Step 2: Search for and click the Audio Recording line .
Step 3: Now, go to the Run the troubleshooter tool .
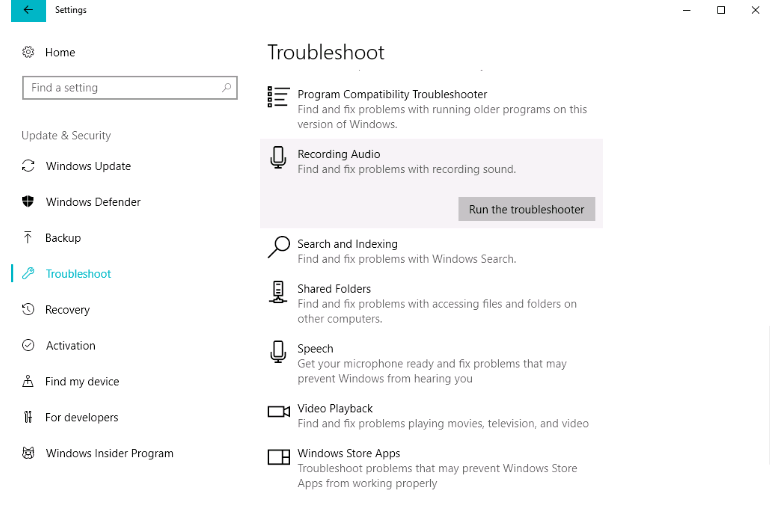
Step 5: Follow the instructions on the screen to proceed to fix the problem. Once completed, please restart the computer.
So, I have shown you the easiest ways to fix Playback Devices in Skype on Windows 10. Hopefully this article will be helpful to you. I wish you successful implementation!
 Search around here, how Zalo used to find friends, interface 2020
 Zalo closed group QR code: How to add members with QR codes
 The most common Zalo errors and effective solutions
 How to download and install Zalo on your computer
 How to use Peer2School to create classrooms online
 Microsoft released Edge Chromium on Windows 7 and 8.1