Table of Contents
This updated guide explains how to Extend System Volume through clear steps, practical examples, and important checks that help prevent common errors.
Method 1 of 2:
On Windows
-
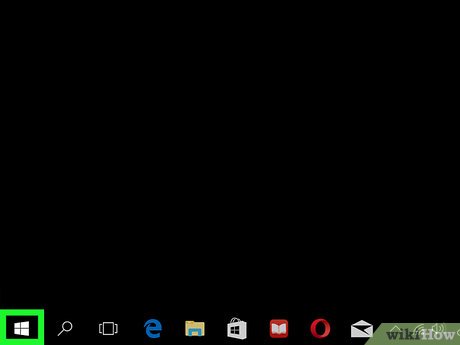 Open Start. Click the Windows logo in the bottom-left corner of the screen.
- You can also press the ⊞ Win key on your computer's keyboard.
-
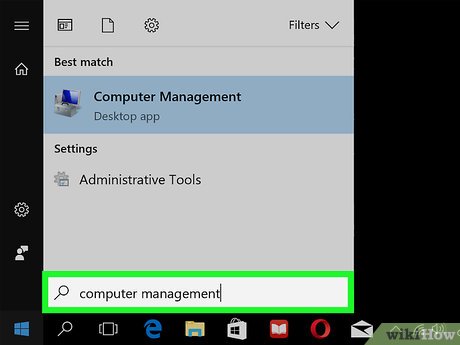 Type computer management into Start. This will search your computer for the Computer Management program.
 -
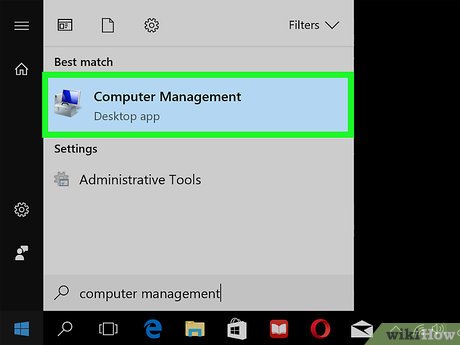 Click "Computer Management". It's at the top of the Start window. Clicking this opens Computer Management.
- You may not be able to access this program if you're not using an administrator account.
-
 Click the Disk Management tab. You'll find this in the sidebar on the left side of the Computer Management window.
- If you don't see this option, first double-click the Storage tab.
-
 Select your hard drive. In the window near the bottom of Computer Management, click your hard drive's box. This box should have the hard drive's letter (e. g., "(C:)") as well as the number of gigabytes (GB) of storage currently available.
- You should see your partition to the right of the hard drive box.
-
 Click Action. This menu item is in the upper-left side of the Computer Management window. A drop-down menu will appear.
 -
 Select All Tasks. It's near the bottom of the drop-down menu. Selecting it prompts a pop-out menu.
 -
 Click Extend Volume.... You'll see this option near the middle of the pop-out menu. A new window will appear.
 -
 Click Next. It's at the bottom of the new window.
 -
 Enter an amount to remove, then click Next. Type in a number of megabytes that you may need to remove from the partition.
- For example, if the partition is 1000 MB, you would type "500" to remove half of the partition.
- If you may need to remove the whole partition, click Next .
-
 Click Finish. This will extend your hard drive's space to include the amount of the partition that you removed.
Method 2 of 2:
On Mac
-
 Click Go. This tab should be in your Mac's menu bar at the top of the screen.
- If you don't see Go , click the desktop or open a new Finder window to make it appear.
-
 Click Utilities. It's at the bottom of the Go drop-down menu.
 -
 Double-click Disk Utility. This icon resembles a Mac hard drive with a stethoscope on it. Doing so will open the Disk Utility program.
 -
 Select your hard drive. Click your Mac's hard drive in the upper-left side of the Disk Utility window, just below the "Internal" heading.
 -
 Click Partition. This tab is at the top of the Disk Utility window.
 -
 Click -. It's below the pie chart. Doing so won't immediately delete the partition, but it will allow you to make changes to the system drive.
 -
 Select the system drive partition. Click the piece of the pie chart that represents your Mac's system. It will usually be on the right side.
 -
 Enter a new size. Click the "Size" field, then type in a new size in gigabytes for your Mac's system drive.
- For example: if your Mac's system drive is 250 gigabytes and the partition is 250 gigabytes, typing 400 into the "Size" field will set your Mac's drive size at 400 gigabytes, leaving 100 gigabytes for the resized partition.
-
 Click Apply. This option is in the bottom-right corner of the window. Doing so will begin extending the Mac's system drive and resizing your selected partition.
 -
 Click Done when prompted. This will complete the extending process. Your Mac's main hard drive partition should now be resized.
FAQ
What is the easiest way to Extend System Volume?
Start with the requirements in this guide, then follow each step in order. Check the result after every major change so problems are easier to identify.
Can beginners follow these instructions?
Yes. The process is organized into practical steps, and you can repeat any step before moving forward.
What should I check if the method does not work?
Confirm your software or device version, permissions, settings, file format, and internet connection when the task depends on online services.
Related Articles
 Fix Extend Volume of Hidden C Drive Extremely Effectively8 minutes read
 How to Change Volume on Mac: Practical Guide4 minutes read
 What Is the 'System Volume Information' Folder, and Can This2 minutes read
 Ways to Adjust System Volume on Windows 115 minutes read
 How to Change the Volume on a Mac3 minutes read
 Button: How to Adjust the Master Volume in Windows 72 minutes read
Reader Comments 0
Sign in with email or Google to join the discussion.