How to Unpartition a Hard Drive
Method 1 of 2:
Windows
-
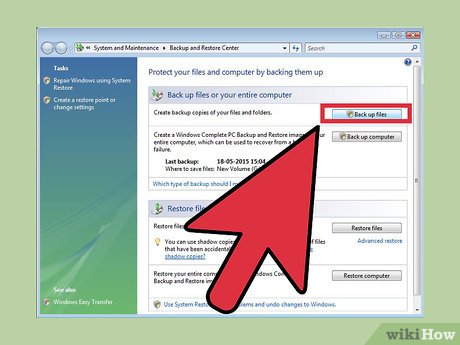
 Back up all data from the partition that you want to keep. You will have to delete all the data from the partition in order to unpartition your drive. Look at our article on how to back up your computer for a detailed guide on how to do this.
 -
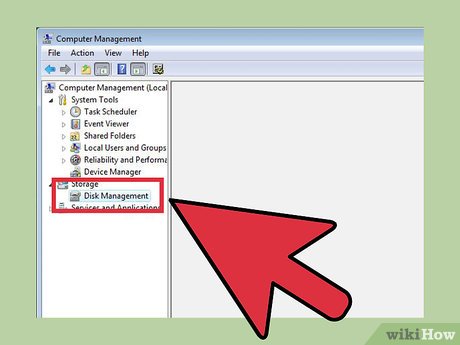
 Access Windows' Disk Management tool. Your Windows computer will have come with this tool pre-installed. This tool lists all drives and will show how each drive partitions the data. Access the tool through either of these methods:
- Press the start key, type "compmgmt.msc" in the search field and press Enter. Select Disk Management from the options on the left of the Computer Management window.
- Access Disk Management directly by pressing the Start key, typing "Disk Management" and pressing enter. The Disk Management window should pop up.
-
 Remove all data from the partition. In the Disk Management window, you should see a list of Disks, starting with Disk 0. The drives associated with each disk will be listed horizontally.
- Right-click the partition you want to delete and click "Delete Volume" from the menu. Look for what you called the drive when you originally partitioned it. This will delete all data from this partition, which is the only way to unpartition a drive.
- For Windows 7 and Vista users: Right click the same partition and select "Delete Partition" from the menu.
- You should now see the partition as unallocated space. The partition should be highlighted on the top with a black bar, as opposed to a purple bar for the other partitions.
- Right-click the partition you want to delete and click "Delete Volume" from the menu. Look for what you called the drive when you originally partitioned it. This will delete all data from this partition, which is the only way to unpartition a drive.
-
 Allocate the space back to the partitioned drive. Allocating space back to the original drive will take away memory from the partition and add it back to the original drive. The original drive is essentially absorbing the partition. If the partitioned drive is C, right-click on C and select "Extend Volume" from the menu.
 -
 Extend the volume of the partitioned drive with the Extend Volume Wizard. The Wizard should have automatically popped up when you clicked "Extend Volume."
- Keep on clicking Next to progress through the Wizard. Click Finish when available.
-
 You should now no longer see the partition listed if all was done correctly. Your original drive will no longer be partitioned and all the space will be on that disk.
Method 2 of 2:
Mac
-
 Back up all data from the partition that you want to keep. You will have to delete all the data from the partition in order to unpartition your drive. Look at our article on how to back up your computer for a detailed guide on how to do this.
 -
 Open up the Disk Utility tool. This tool can be found by opening Finder and searching for "Disk Utility" in the search bar.
 -
 Locate and click on the correct disk. From the list of disks on the left side of the window, locate the disk that houses your partitioned drive. If you have never added any additional storage space, you should only see one SSD. The different drives will be listed beneath each disk, so find the disk with the drive that you wish to remove.
- Click on the name of the disk, rather than any drives beneath the disk, such as Main.
-
 Click on the Partition tab. You should see five tabs on the top of the main section of the window; click on the one that says Partition. It should be in between Erase and RAID.
- After clicking, you should see a header titled "Partition Information" beneath the tabs.
-
 Select the partition. Beneath the "Partition Layout" title, you should see the different partitions on the disk as white boxes.
- After clicking, be sure there is a blue border around the white box.
-
 Click the minus symbol beneath the boxes. When prompted from a drop-down dialog box, click "Remove."
- Again, be sure you have backed up any data you want to preserve. This step will delete any data on the partition.
-
 Expand the box titled Main. There should now be empty gray space where the previous box (partition) used to be. Click on the three lines in the bottom right of the "Main" box and drag the box all the way down. While dragging, you should see the value in "Size" increase.
 -
 Click on Apply in the bottom right corner of the window. Click on Partition on the drop-down dialog box when prompted.
- This step may take a little while depending on how much data is on the main drive. The disk is being reformatted, so give it time.
Share by
Jessica Tanner
Update 04 March 2020
You should read it
- ★ 2 ways to hide hard disk partitions on Windows
- ★ Partition to create the second hard drive on Windows
- ★ How to delete a drive cannot be deleted with Disk Management
- ★ Minitool Partition Wizard - Redistribute hard drive with Minitool Partition Wizard
- ★ How to Convert MBR to GPT Disk with AOMEI Partition Assistant


