Table of Contents
1. Adjust video volume with Adobe Premiere Pro
This guide provides a practical overview of 3 Ways to Increase, Decrease the Volume for Video, including its main features, benefits, limitations, and important considerations.

Step 2: You name the Project (1) => OK (2) .

Step 3: Switch to the Audio tab (1) => double-click on Import media to start (2) .

Step 4: Choose the video you need to adjust (1) => Open (2) .

Step 5: You drag the video in the Project and drop into the Timeline to edit.
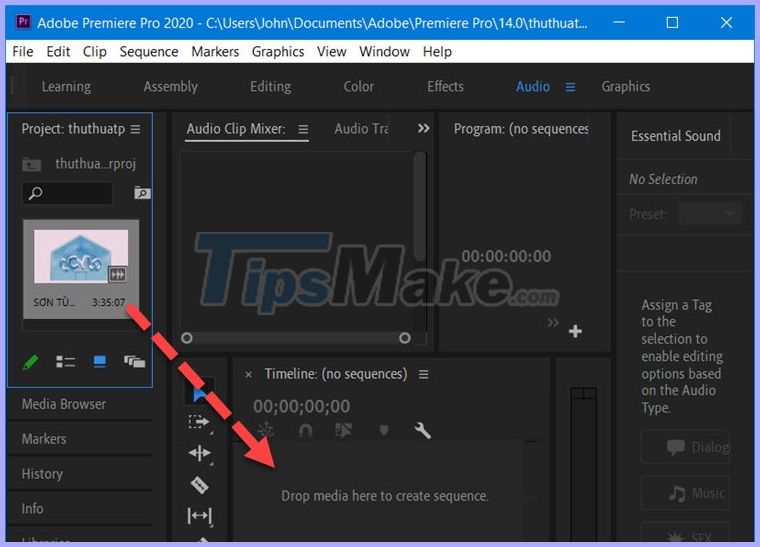
Step 6: After moving the video into the Timeline section, the editing interface will appear. You click and move the volume switch big or small in the Audio Clip Mixer section .
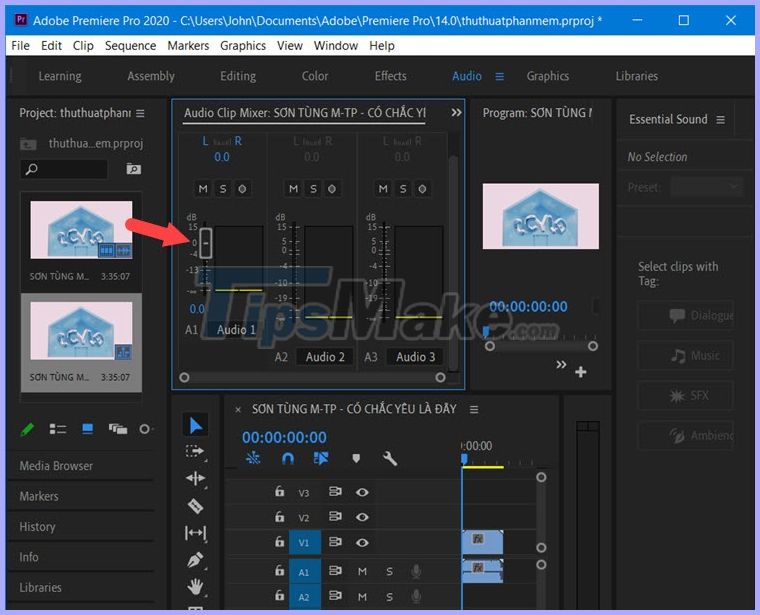
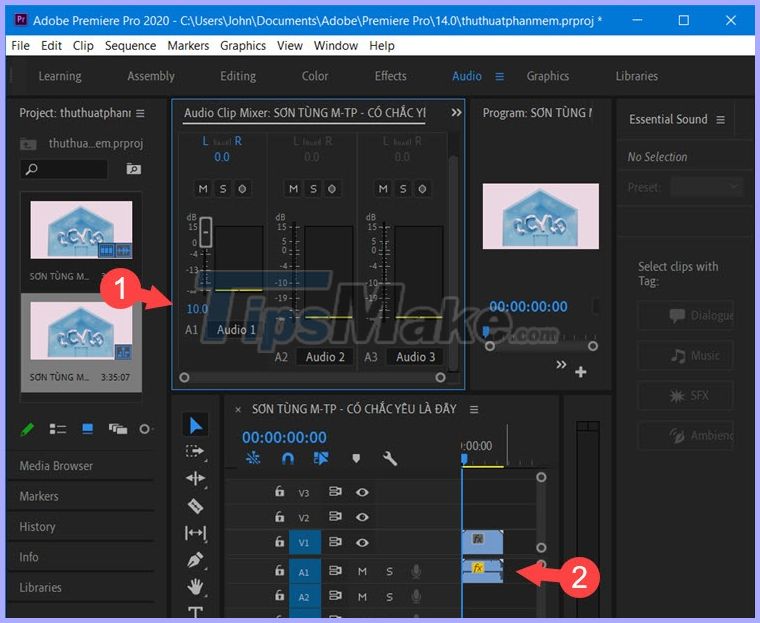
As shown below, I adjusted the video volume by 10dB (1) and then you will see the icon (Fx) (2) yellow means that the sound effect is being applied.
L priority in mind: You should adjust the volume level to small level 10dB ± refill to the sound quality is the best.
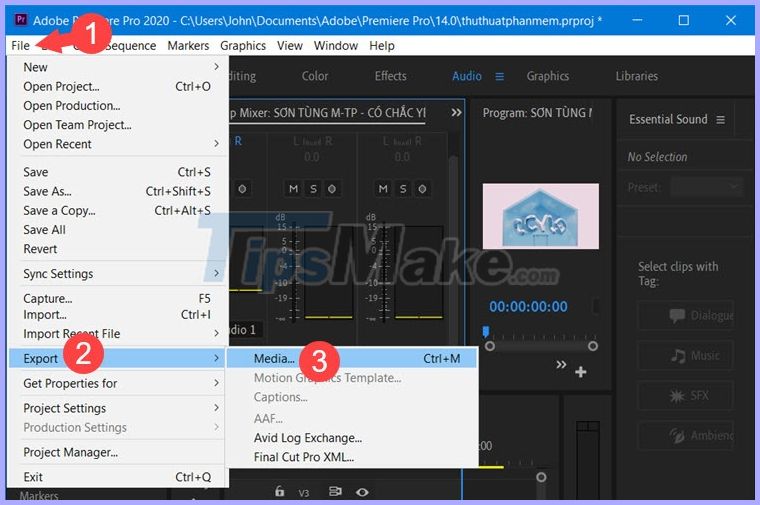
Step 7: Go to File menu (1) => Export (2) => Media. (3) .
Step 8: Next, select Scale To Fit (1) in the Source Scaling section . If you want to keep the video parameters, then click on Match Sequence Settings (2) . Next, you name the file (3) and finally click Export (4) to export the video.
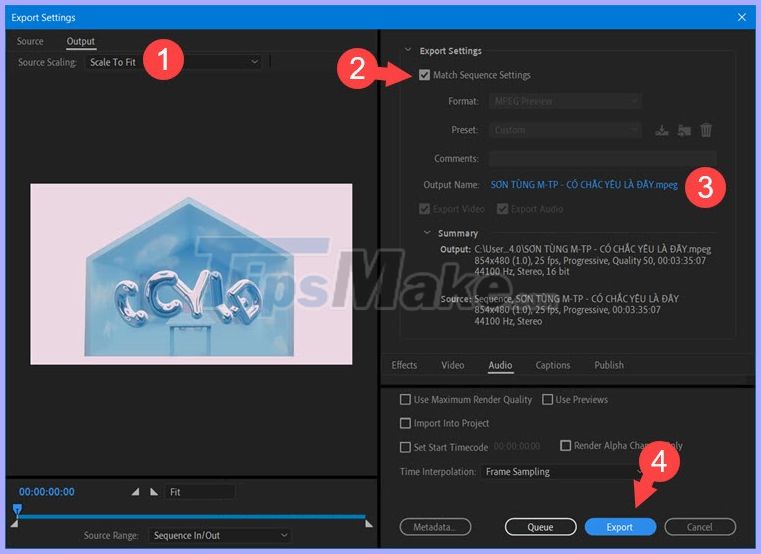
Then the rendering will take place and you wait.

2. Increase and decrease the volume of online video with VideoLouder
Step 1: You access the website https://www. videolouder. com/
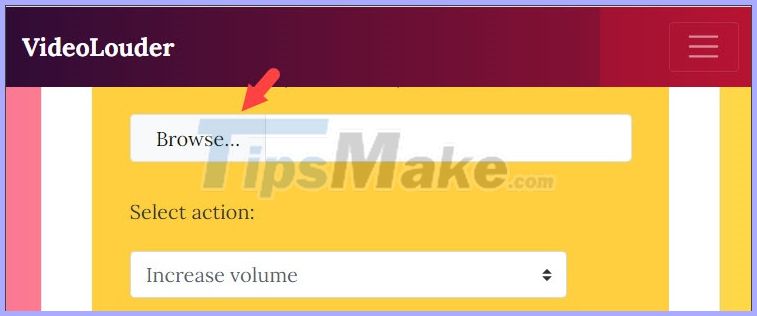
Next, click Browse. to open the video file on your computer.
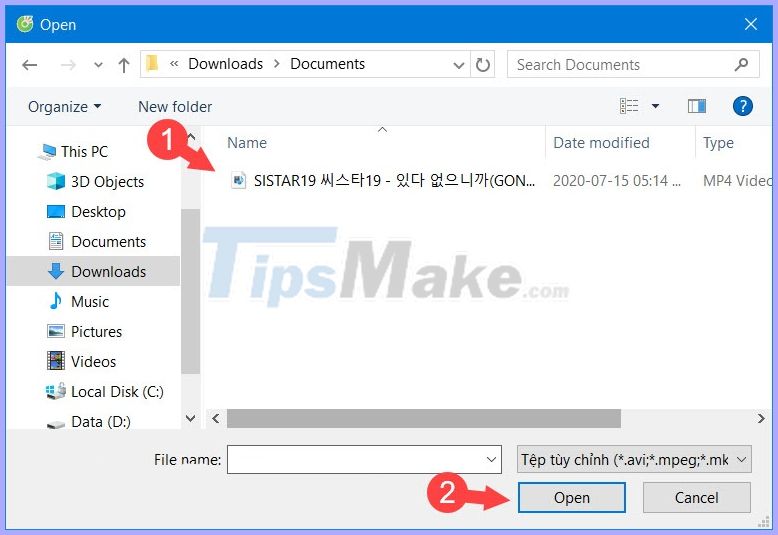
Then, you select the video file (1) => Open (2) to open.
Step 2: Click Select action (1) => select Increase volume to increase the volume or Decrease volume (2) to decrease the volume.
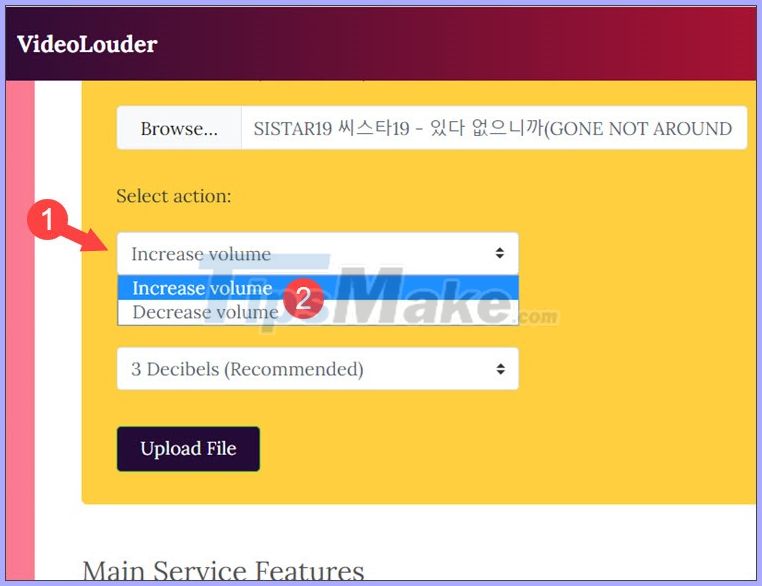
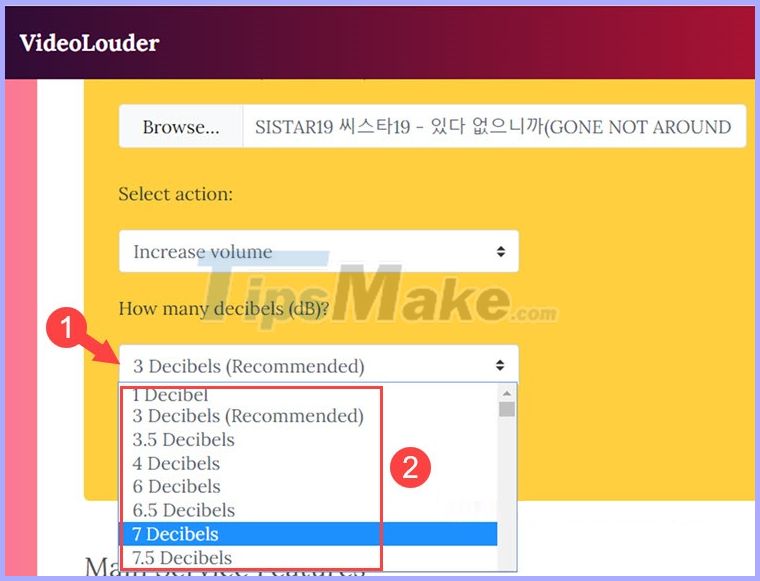
Step 3: Click on How many decibels (dB)? (1) and select the volume level up and down (2) accordingly.
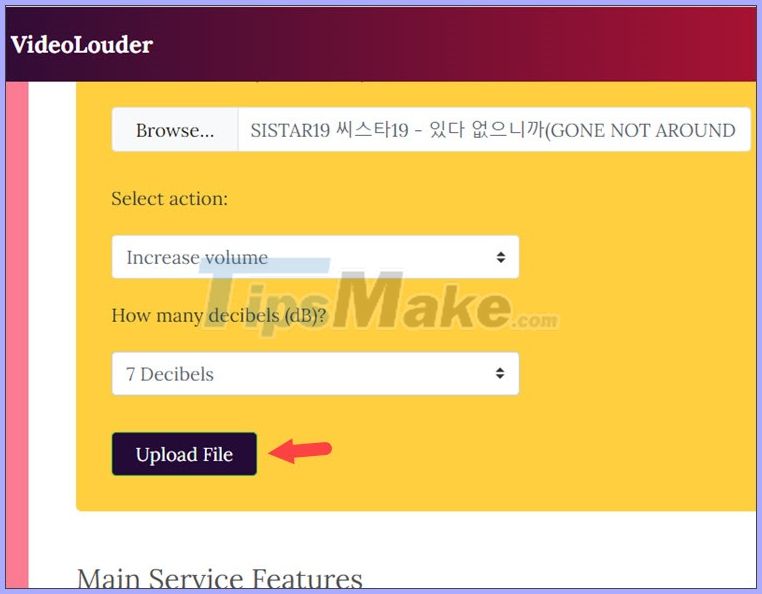
Step 4: After setup is complete, click Upload File to complete.
Step 5: After the process of editing the video volume is complete, please click Download File to download the file to your computer.

3. Increase, decrease video volume with TechSmith Camtasia
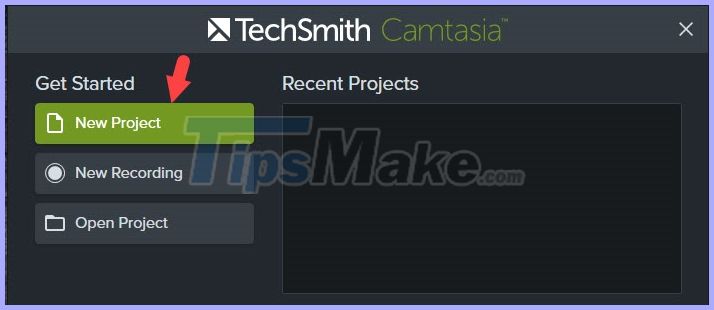
Step 1: Open Camtasia and click on New Project to create a new project.
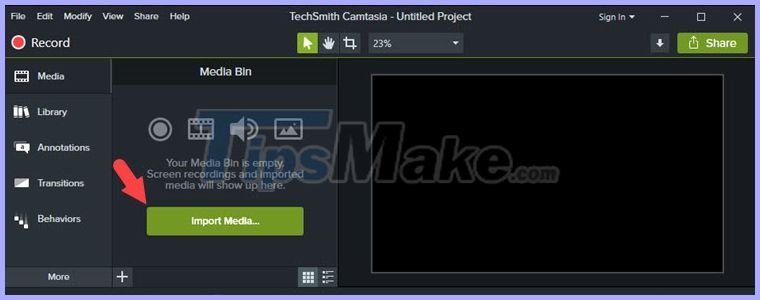
Step 2: Click Import Media. to continue.
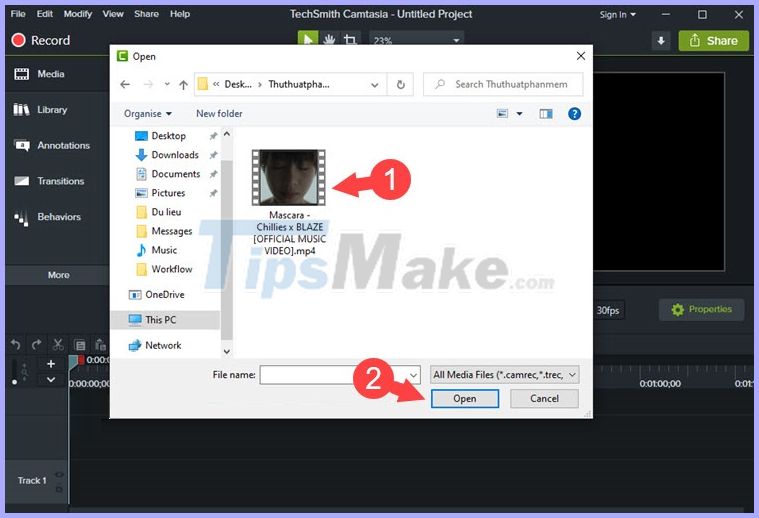
Next, you find and click on the video (1) to increase or decrease the volume => Open (2) .
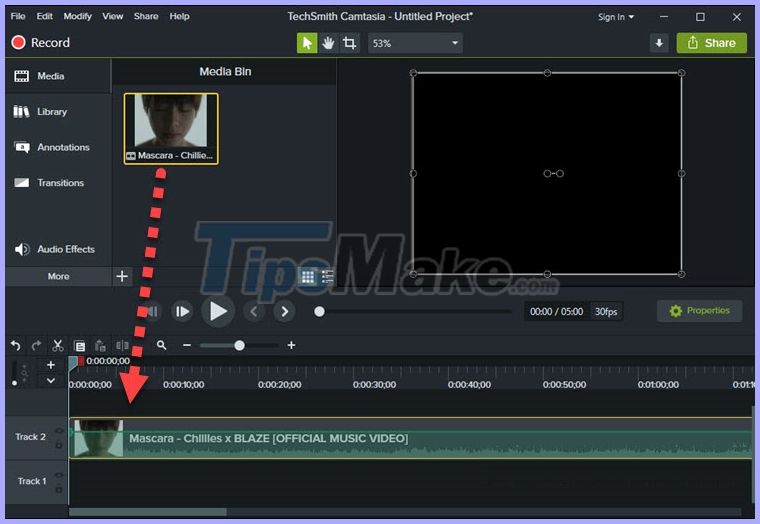
Step 3: Click the left mouse button and hold the video in Media Bin and drag and drop to Track 2 as shown below.
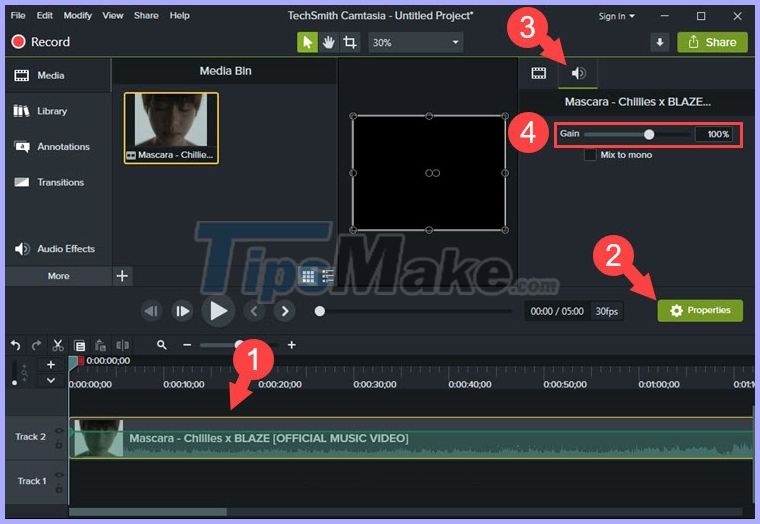
Step 4: Click once on the video Track 2 (1) to select that video. Next, click on Properties (2) => click Audio icon (3) => Adjust loud and small volume in Gain (4) by sliding the slider left or right.
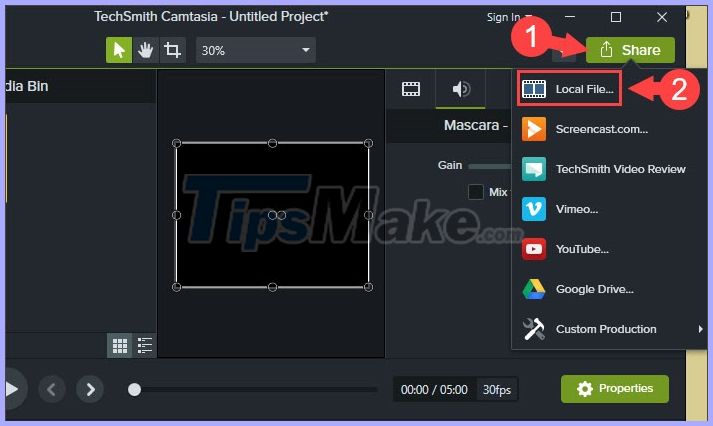
Step 5: After adjustment is complete, please save the video by clicking Share (1) => Local File. (2) .
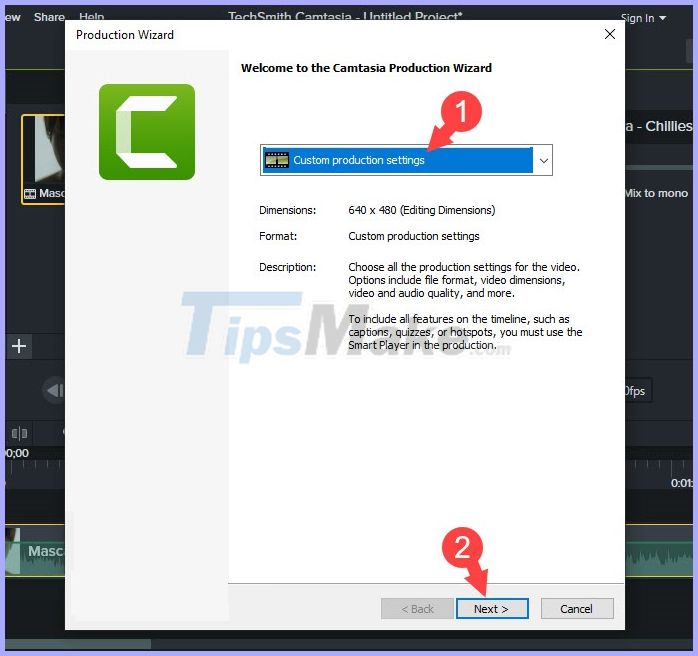
Step 6: Choose Custom production settings (1) => Next (2) .
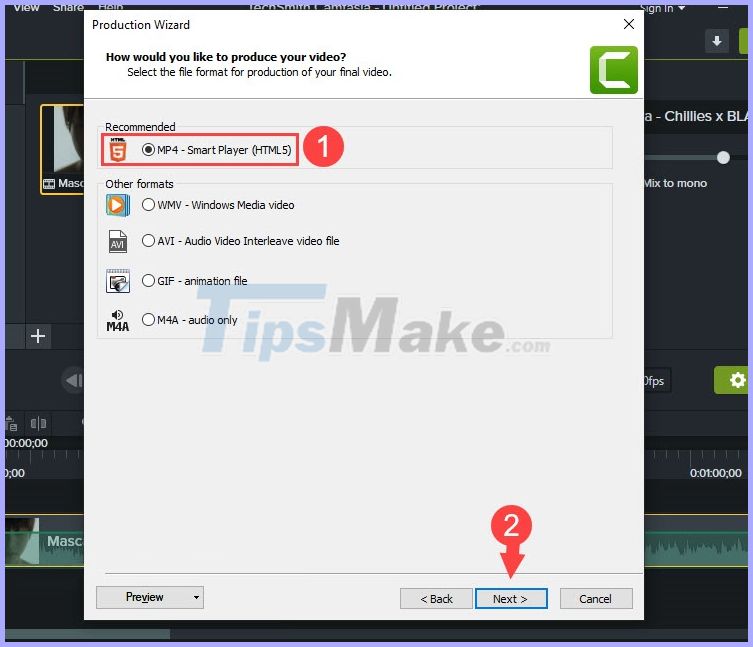
Step 7: Select the video format as MP4 (1) => Next (2) .
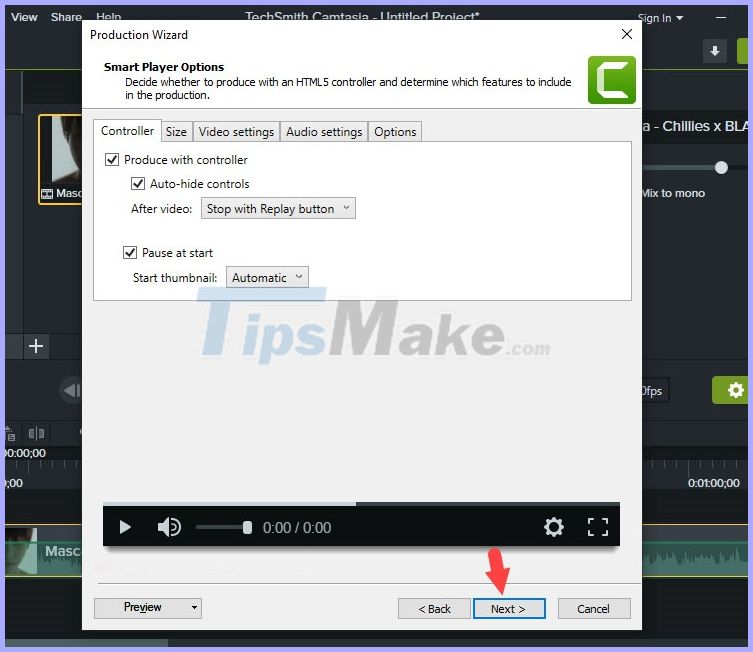
Step 8: Click Next to continue.
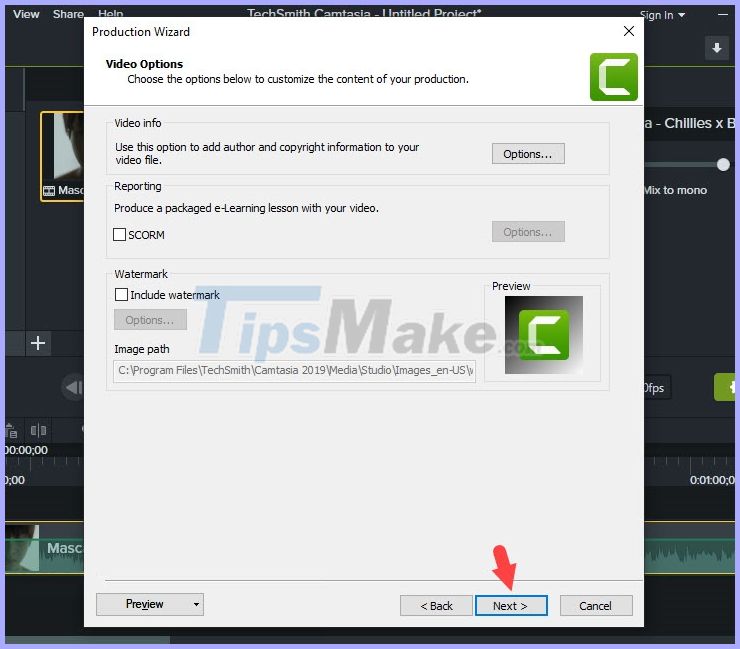
You continue to click Next to move to the next step.
Step 9: You name the File (1) , choose where to save the file (2) => Finish (3) to finish.
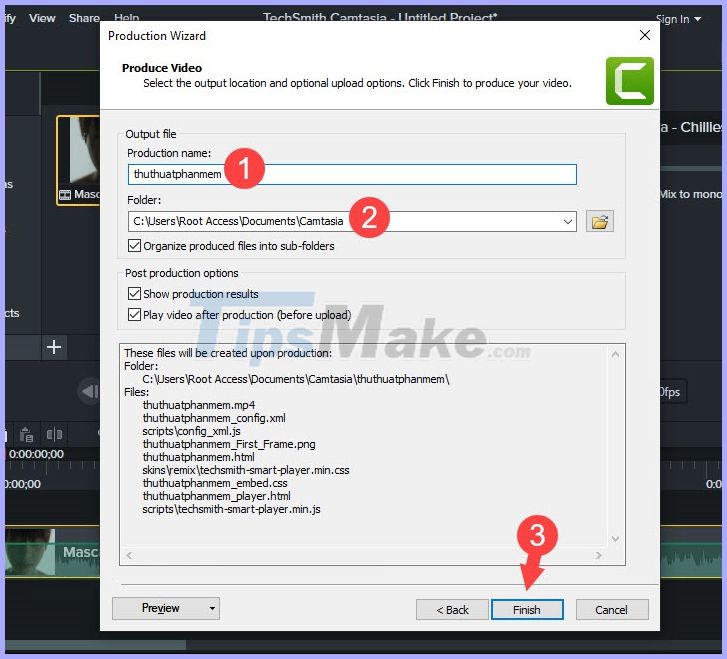
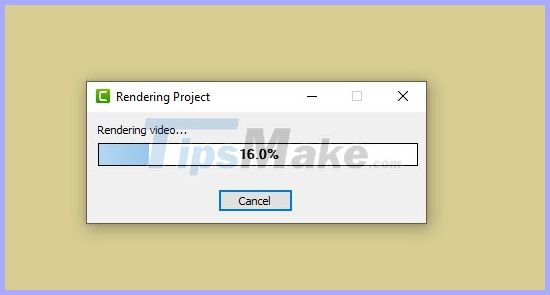
After that, the video rendering process will take place and you should wait a moment.
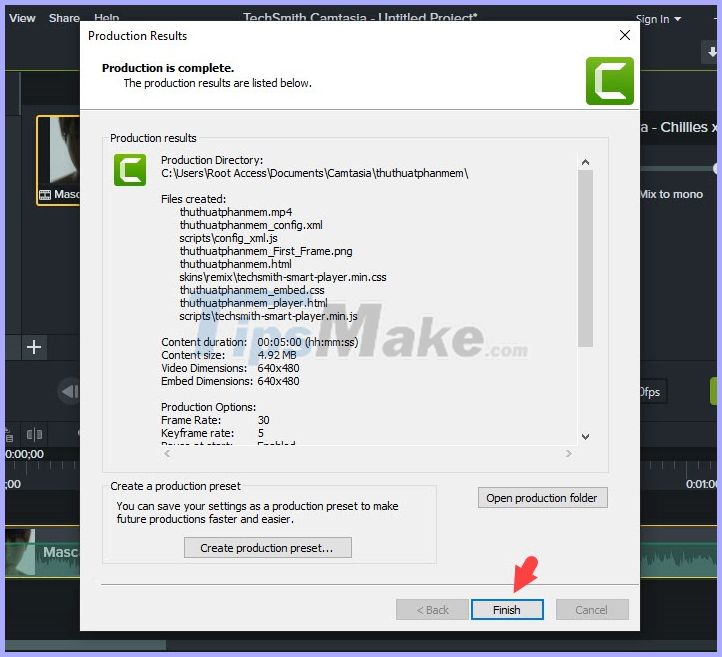
Step 10: Once completed, the message as shown below will appear. Click on Finish to complete.
With the ways to increase or decrease the volume in the video, you can customize the volume as you like quickly and easily. You should also note that the volume should be adjusted to a moderate level of 10-15dB or 150% to avoid the sound is timid or inaudible if the volume level is too loud or too small. Good luck!
FAQ
What should I know about 3 Ways to Increase, Decrease the Volume for Video?
Focus on the key features, requirements, limitations, and practical use cases explained in this guide.
How do I get the best results with 3 Ways to Increase, Decrease the Volume for Video?
Follow the recommended steps, use current software or information, confirm compatibility, and review settings before major changes.
Are there any risks or limitations?
Potential limitations depend on compatibility, data quality, cost, privacy, support, and how the product or method is used.
Related Articles
 YouTube Vanced Can Swipe to Change Brightness and Volume, Invite Download and Experience5 minutes read
 Steps to Fix Volume Automatically Increase/decrease in9 minutes read
 How to Use Sound Booster to Increase Computer and Laptop6 minutes read
 Ways to Adjust System Volume on Windows 115 minutes read
 Tips to Increase Speaker Volume on iPhone Without Software5 minutes read
 How to Change Volume on Mac: Practical Guide4 minutes read
Reader Comments 0
Sign in with email or Google to join the discussion.