How to export Hyper-V virtual machines in Windows 10
You can use Hyper-V export and import functions to quickly copy virtual machines. Virtual machines that are accessed can be used for backup or as a way to migrate a virtual machine between Hyper-V servers.
Table of Contents
General information
Hyper-V allows running virtual computer systems on a physical server.These virtualized systems (also known as guest) can be used and managed like physical computer systems, but they exist in a virtualized and isolated environment.
You can use Hyper-V export and import functions to quickly copy virtual machines.Virtual machines that are accessed can be used for backup or as a way to migrate a virtual machine between Hyper-V servers.
The import function allows you to restore virtual machines.You don't need to export a virtual machine to import it.
When performing a virtual machine export, all linked files will be grouped together.They include configuration files, hard drive files, and any existing test files on the system.
The instructions below will show you how to export one or all Hyper-V virtual machines (clients) on your Windows 10 computer (server).
Note : You must be logged on as an administrator to be able to export Hyper-V virtual machines.
Export Hyper-V virtual machines using the Hyper-V Manager
1. Open the Hyper-V Manager (Hyper-V Manager).
2. Select the Hyper-V server (for example, "BRINK-DESKTOP") from the left pane of the screen, then select one or more virtual machines in the middle pane to export and import, and then click the Export button in the task pane on the right of the screen (see screenshot below).
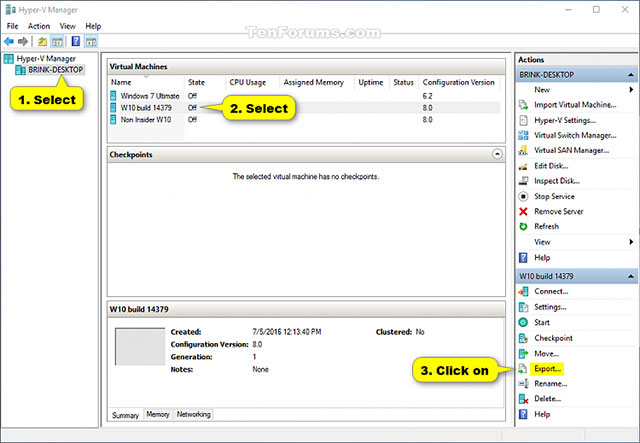
Note :You can press and hold the Ctrl key and click on any virtual machine (s) to select them for retrieval, then release the Ctrl key when you're done.
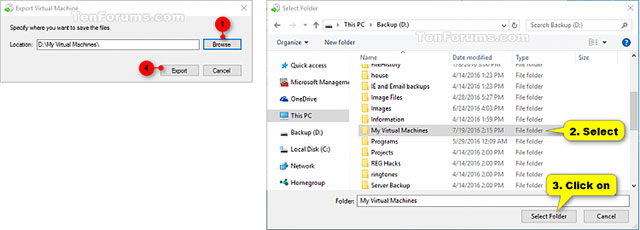
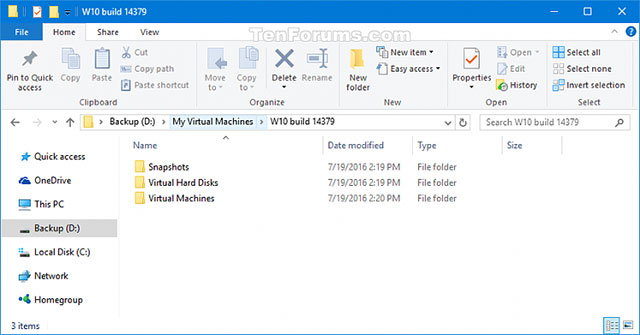
3. Click the Browse button, navigate to and select the appropriate folder (eg "My Virtual Machines") that you want to export, then click Select Folder and click Export . (see screenshot below).
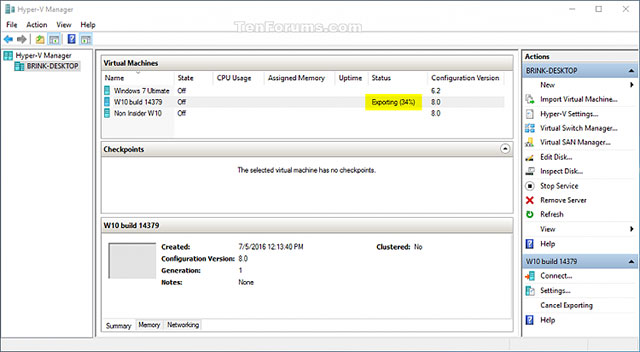
4. Now the virtual machine (s) will be exported.This action may take some time to complete (see screenshot below).

5. When this process is complete, you can close the Hyper-V Manager if you wish.
Export all Hyper-V virtual machines using PowerShell
1. Open PowerShell.
2. Copy and paste the command below into PowerShell and press Enter.
Get-VM | Export-VM -Path 'Full path of directory to export to'
Note: Replace the full path of the directory to export to the above command with the full path of the directory location you want to export the file of the virtual machine to.
3. When done, you can close PowerShell if you want.
Note: The process of exporting virtual machine (s) to this designated directory location may take some time to complete.
Export a single Hyper-V virtual machine using PowerShell
1. Open PowerShell.
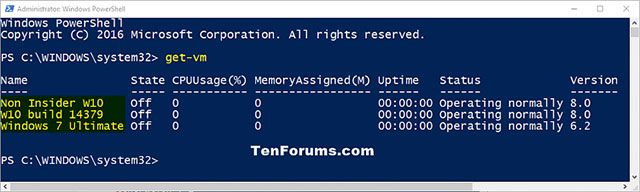
2. Type the command below into PowerShell, press Enter and note the name of the virtual machine you want to export (eg "w10 build 14379"), (see screenshot below).
Get-vm
3. Type the command below into PowerShell and press Enter (see screenshot below).
Export-VM -Name 'Name of virtual machine' -Path 'Full path of directory to export to'

Attention:
Replace the virtual machine name in the above command with the name of the virtual machine from step 2 above.
Replace the full path of the directory to export to the above command with the full path of the directory in which you want to export the virtual machine.
For example:
Export-VM -Name 'w10 build 14379' - Path 'D: My Virtual Machines'
4. Virtual machine will be exported.This action may take a while to complete (see screenshot below).

5. When done, you can close PowerShell if you want.
See more:
- 4 free virtualization software solutions on Windows
- What is the future of server virtualization?
- Is Windows Virtualization (Virtualization) testing enabled?
- How to attach and split VHD and VHDX files in Windows 10
Was this article helpful?
Your feedback helps us improve.
Related Articles
 How to Export and Import Virtual Machines in Hyper-V5 minutes read
 How to import Hyper-V virtual machines in Windows 1013 minutes read
 Create virtual machines with Hyper-V on Windows 8 and Windows 1015 minutes read
 How to rename Hyper-V virtual machines using PowerShell and Hyper-V Manager5 minutes read
 Create virtual machines in Hyper-V on Windows Server 20082 minutes read
 How to check if your computer is running Windows 10 Hyper-V?2 minutes read
Reader Comments 0
Sign in with email or Google to join the discussion.