Instructions for installing Hyper-V
To install Hyper-V, open the Server Manager tool and click the Add Roles link. Next, in the Select Server Roles dialog box, click on the Hyper-V role. At this point, follow the step-by-step instructions to install Hyper-V on the server..
TipsMake.com - To install Hyper-V, open the Server Manager tool and click the Add Roles link. Next, in the Select Server Roles dialog box, click on the Hyper-V role. At this point, follow the step-by-step instructions to install Hyper-V on the server.

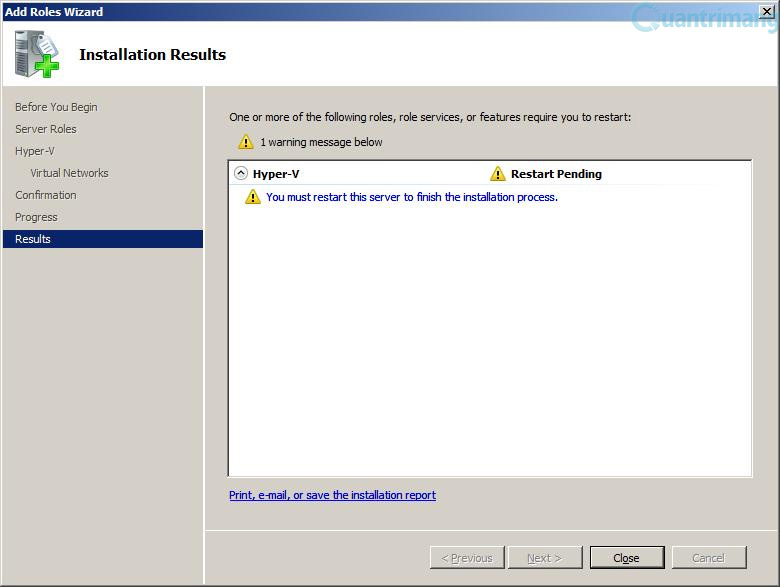
When the Installation Results screen appears and requires a restart of the computer, do this to complete the Hyper-V installation.
Next, proceed to create virtual machines on Hyper-V. To do this, open the Hyper-V Manager screen in the Start menu. Next, go to File > New > Virtual Machine menu.
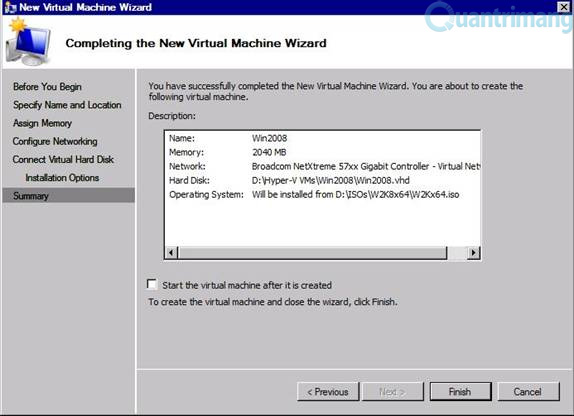
In the next steps, you enter the virtual machine name, specify the storage location, specify the RAM size, select the network card, create a virtual hard disk for your virtual machine. Finally, in the Completing the New Virtual Machine Wizard screen , click the Finish button to create the virtual machine.
After creating the virtual machine, right-click on the virtual machine and select Connect . Next, in the Virtual Machine Connection screen, go to Action > Start menu to start installing the operating system on the virtual machine.