Monitor Hyper-V with the command line (Part 4)
Among the hardware resources that are usually assigned to virtual machines, perhaps the memory is most fixed. This tutorial will show you how to manage virtual machine memory through Windows PowerShell.
Table of Contents
TipsMake.com - Among the hardware resources that are usually assigned to virtual machines, perhaps the memory is most fixed. This tutorial will show you how to manage virtual machine memory through Windows PowerShell.
Before starting, remember to enter the Hyper-V monitoring library into PowerShell each time you use Hyper-V related commands. The library entry statement is:
Import-Module 'C: Program FilesModulesHypervHyperv.psd1'
The full commands to download and install the Hyper-V monitoring library are presented in Part 1 of this article series.
Create a memory usage report
Because memory resources are finite, it is important to determine the amount of memory allocated to virtual machines. While this is relatively simple to implement from Hyper-V, this monitor does not have a reporting function. Fortunately, users can still build their own memory usage performance reports directly from Windows PowerShell.
The command is used to check the size of memory a virtual machine is using is Get-VMMemory. The command syntax is as follows:
Get-VMMemory - MF '
In theory, '-Server' is the required parameter, but if this parameter is omitted, the Get-VMMemory command will query the local server by default. Often the user will specify a certain server but can also specify multiple servers. If the query to multiple servers runs Hyper-V, we must enter all the names of the servers. Wildcard doesn't work here.
The virtual machine name parameter is different. This parameter is not catch. If you omit the virtual machine name, PowerShell will display the memory allocation status for all virtual machines on the specified server. If you want to shorten the list range, specify one or more virtual machines.
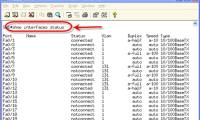
If only the Get-VMMemory command is entered without the parameter attached, the command will display the memory allocation status for each virtual machine in the local server.

As you can see in the figure, the command lists the virtual memory size, limit, and reserved memory for each virtual machine.
Although it is very handy to be able to see virtual memory size, limit and reserve memory for each virtual machine, you can actually use Get-VMMemory to get more memory related information. half. To do this, we will need to know the names of the attributes supported by the Get-VMMemory cmdlet.
To see a list of all available properties, enter the following statement:
Get-VMMemory | Get-Member –MemberType * Property | Select-Object Name
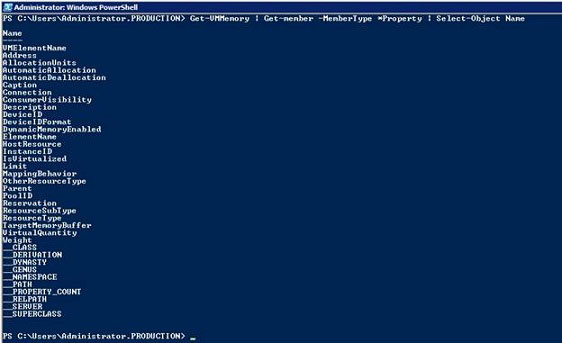
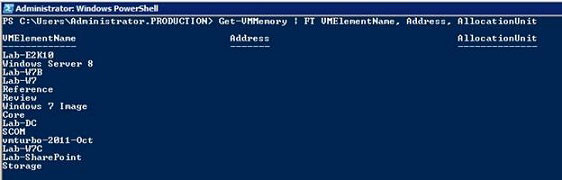
As shown above, VirtualQuantity, Limit and Reservation are among the listed properties, but there are many other properties. You can use the Get-VMMemory command to display any attribute set. Suppose when you want to see VMElementName, Address and AllocationUnits, enter the following statement:
Get-VMMemory | FT VMElementName, Address, AllocationUnits
Create a memory report
If you want to save memory information for later use, there is a solution to export the Get-Memory cmdlet output into an HTML file.
Use the following statement:
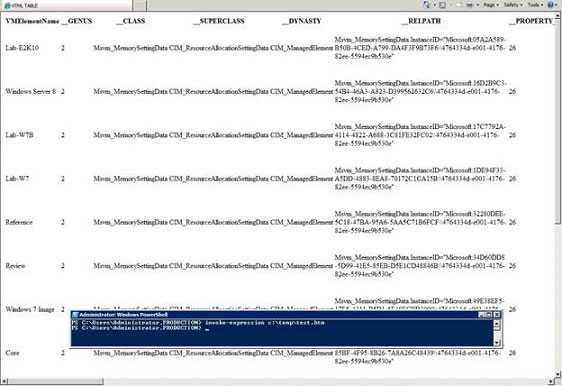
Get-VMMemory | ConvertTo-HTML | Out-File C: tempTest.HTM
As shown below, this statement does not show the output. That's because the command output is being redirected into an HTML file named C: temptest.htm. You can use Windows Explorer to allocate and open files, but you can also open files without leaving PowerShell. Just enter the following command:

Invoke-Expression C: temptest.htm
If you look at the figure below, we will see that this command launches Internet Explorer and displays the HTML file we created. Furthermore, reports in HTML format look a lot different than the report above, although both commands use Get-VMMemory without any extra parameters. In fact, if you look at the bottom of the report screen, you will see a scroll bar indicating that more data is displayed.
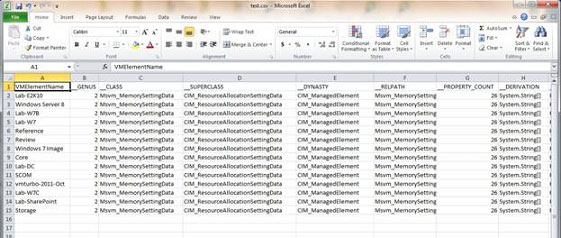
This information can be useful to create a CSV file that can be viewed with Excel as a table in Excel rather than as a Web page. Fortunately, PowerShell also has this capability. The command that we will use to accomplish this is similar to the command used to create an HTML report. However here, instead of using HTML ConvertTo, we are using ConvertTo-CSV. The full statement is:
Get-VMMemory | ConvertTo-CSV | Out-File C: temptest.csv
After the CSV file is created, you can double-click the file to open it in Excel. However, it will not display the correct information. To get complete and accurate information, open Excel first, then open the file. Excel will launch the Text Import Wizard. Set up the Wizard to start importing files with Row 2 and perform data separation as shown below.

Next, set the comma-separated data option. Then click on Finish . Data will be entered as shown below.
So, you know how to get data about the virtual machine memory situation from PowerShell. In the next article, we will learn how to change the memory allocated for these machines.
Was this article helpful?
Your feedback helps us improve.
Related Articles
 Monitor Hyper-V with the command line (Part 1): Install the monitoring library5 minutes read
 Monitor Hyper-V with the command line (Part 3): Check virtual machine status6 minutes read
 Monitor Hyper-V with the command line (Part 2): Basic monitoring commands5 minutes read
 Install Windows Hyper-V Server 200818 minutes read
 Command line parameter in C4 minutes read
 The basics of Cisco Switch Management - Part 14 minutes read
Reader Comments 0
Sign in with email or Google to join the discussion.