Instructions for taking and editing photos in Word simply and quickly
You can take screenshots and edit images directly in Word without the need for external tools. This method helps to operate quickly and conveniently for office work and study.
Taking screenshots and editing right in Word helps optimize time, suitable for office workers, teachers and students. Discover the easy steps with TipsMake.
How to take a screenshot in Word using Screenshot
Step 1: At the main interface of Word 2016, click Insert > Screenshot .
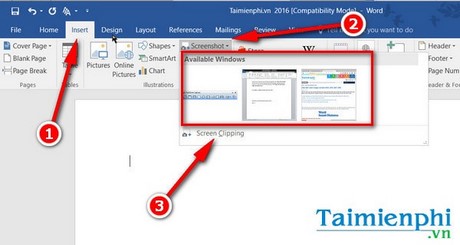
The Available Windows section is where you can see screenshots of your current desktop, which are the applications and folders that can be included in Word 2016.
Step 2: If you want to take a photo in Word 2016, click Screen Clipping .
You can freely select the desired frame by dragging and dropping on the desktop screen. This way of taking screenshots is quite similar to using some software such as FastStone Capture, Snagit, PhotoScape.
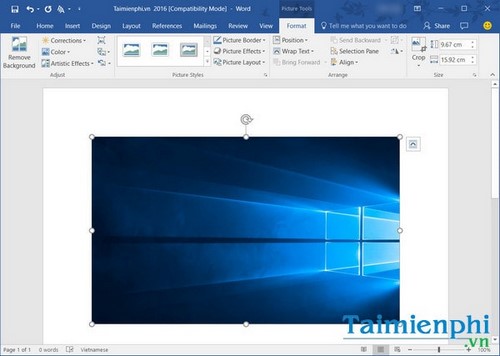
Step 3: Start editing photos in Word 2016 using the tools available in Word 2016. Here, Word 2016 provides users with many pre-built templates including frames, effects, etc. You can choose more templates by clicking on the triangle icon to display.
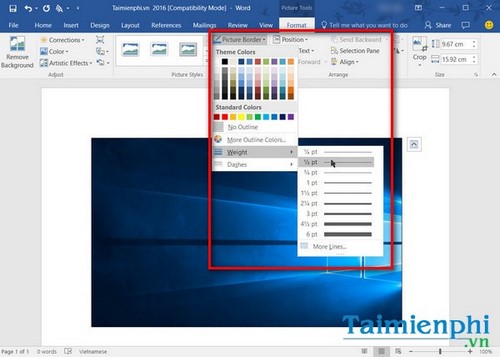
- Picture Border: This item allows you to change the Color , Weight and Dashes of the border.
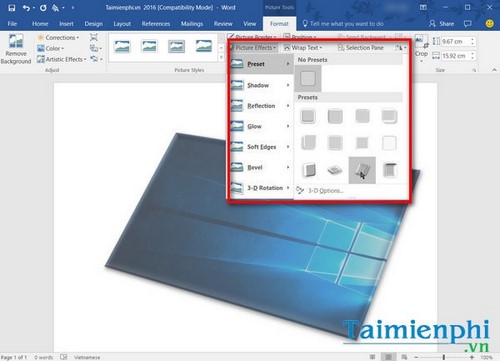
- Picture Effect : Edit effects in Word such as Shadow, Reflection, Bevel, 3D Rotation,.
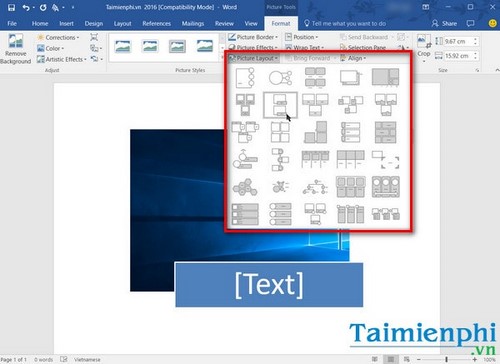
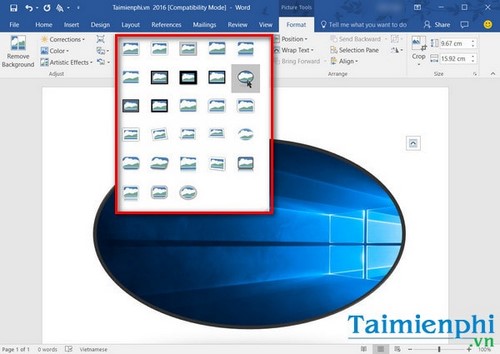
- Picture Layout : A collection of table formats that can be combined with screenshots in Word 2016.
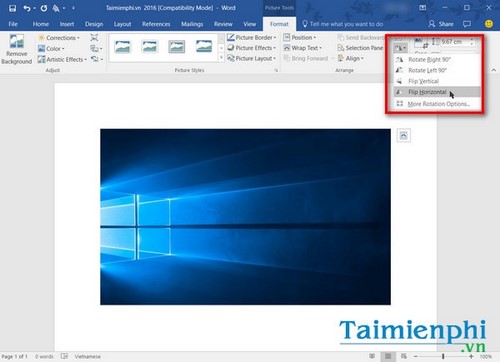
Step 4: Edit images in Word by rotating and flipping the image.
The Rotation icon next to the Crop item is the item that gives you options to rotate the image in many directions with different angles.
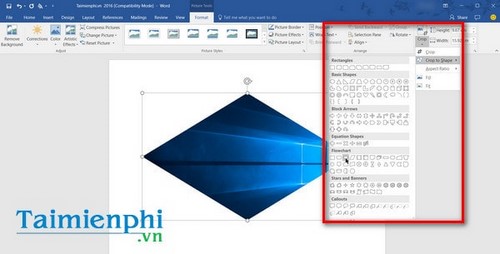
Step 5: Crop images in Word 2016 with the Crop tool.
Here you can select the image shapes you want to crop the image in Word or use the Fill and Fit options .
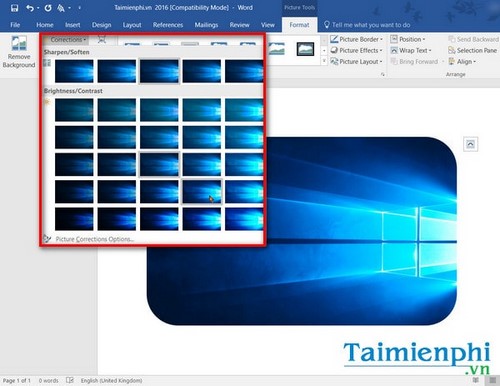
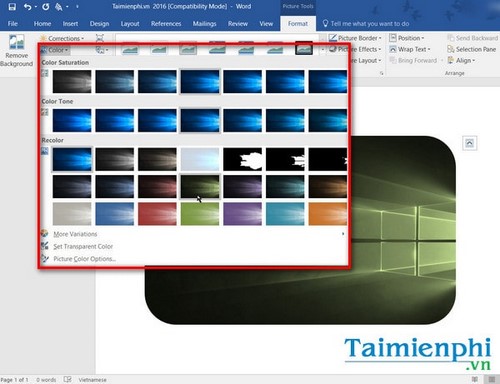
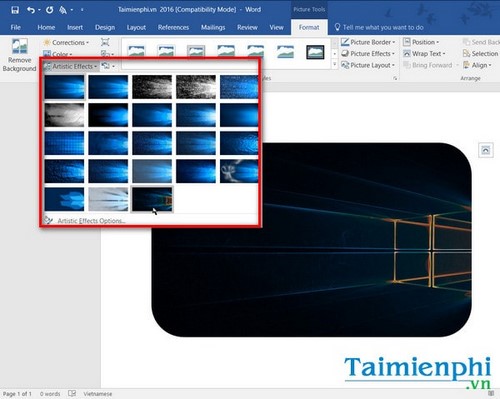
Step 6: Edit images in Word 2016 using color filters
- Corrections : Function to adjust, sharpen and soften the image (Sharpen and Soften) or increase brightness and contrast (Brighten and Contrast).
- Color : Provides many beautiful color filters for users.
- Artistic Effects: A collection of artistic effects that help your photos after taking photos in Word 2010 become more sparkling and artistic.
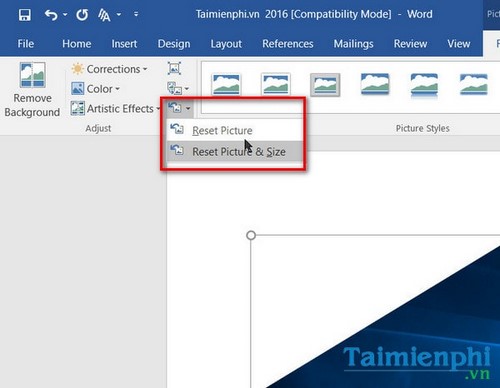
Step 7: In addition, the photo editing tool in Word 2010 also allows you to easily reset the photo to its original state through the Reset Picture and Reset Picture & Size functions .
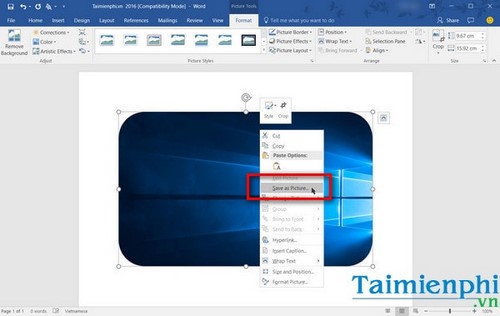
After finishing taking and editing images in Word 2016, you can easily get the image from the Word file by saving it to your computer. Right-click on the image and select Save as Picture to get the image from the Word file and save it to your computer.
You can take a screenshot of your laptop or computer directly in Word 2016 without using any additional software. This is a useful tip to quickly insert images into your document without any complicated operations.
However, if you are familiar with software like FastStone Capture, Snagit, PhotoScape or Paint, you can combine both methods.
- How to create videos from photos quickly and simply
- How to create a digital signature in Word simply and quickly
- No need to use software, here are 3 ways to get images from Word files fastest
- 4 ways to take photos with rain give the picture more romantic part
- How to install PDF to Word Converter on your computer quickly and simply
- Fix sticky text error in Word quickly
- Pocket basic terms in photography - P1
- Instructions on how to crop photos with Paint
- How to insert and create tables in Word 2016
- How to add AutoText in Word 2016 document quickly
- Instructions for merging text in Word 2016 easily
- How to easily transfer Excel content to Word 2016
- The simplest way to delete all links in Word 2016
- How to create a folder tree in Word 2016 simply and easily
- How to merge text, merge Mail Merge messages in Word 2016
- Full Word tutorial 2016 (Part 26): Create SmartArt graphics
- Tutorial for Word 2016 (Part 27): How to use Style
- How to create bookmarks in Word 2016


-
 These are some free software options that can replace Microsoft Word.
-
Wordle hint: Tips and strategies for playing Wordle
-
Comparing Google Docs and Word Online, which one should you use?
-
How to quickly display the Ruler in Word using keyboard shortcuts.
-
How to write fractions in Word simply and quickly.
-
How to print a document in Word without errors, easily.
 These are some free software options that can replace Microsoft Word.
 Wordle hint: Tips and strategies for playing Wordle
 Comparing Google Docs and Word Online, which one should you use?
 How to quickly display the Ruler in Word using keyboard shortcuts.
 How to write fractions in Word simply and quickly.
 How to print a document in Word without errors, easily.
-
Application
-
Web Email
-
Website - Blog
-
Web browser
-
Support Download - Upload
-
Software conversion
-
Social Network
-
Simulator software
-
Online payment
-
Office information
-
Music Software
-
Map and Positioning
-
Installation - Uninstall
-
Graphic design
-
Free - Discount
-
Email reader
-
Edit video
-
Edit photo
-
Compress and Decompress
-
Chat, Text, Call
-
Archive - Share
-
-
System
-
Mac OS X
-
Hardware
-
Game
-
Tech info
-
Technology
-
Science
-
Life
-
Electric
-
Program
-
Mobile