How to use Paint 3D to edit images
Paint 3D does not just stop at helping us design our own drawings but it also helps us to edit images.
Step 1: Open the image to be edited
The first step to starting the photo editing process is to open the image you need to edit in Paint 3D.
You select Menu item in the left corner.

Select Open (Open)> Select Browse files (Browse files).

Step 2: Use editing tools
+ Add image on top of existing pictures
To add a new picture to an existing one, you need to use the Insert tool in the Menu menu.
You click on Menu > Select Add (Insert).

Then you can customize the images you need to add such as logo, watermark, .
Use the Selection tool
Similar to Microsoft Paint, you can use the Select tool to crop part of an image.
To use the Selection tool, you open Selection (Select)> Drag the mouse at the position you want to cut.
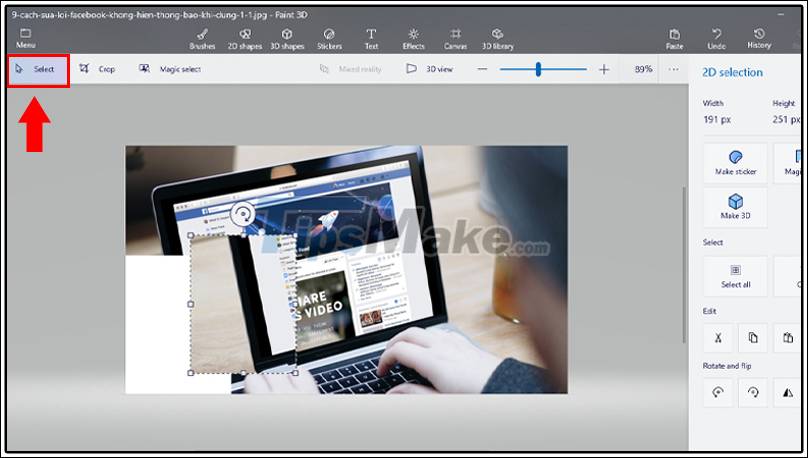
Not only that, with the Selection tool, you can either create stickers and engrave 3D objects or copy the selected area, rotate or flip the area. You can access all of these options from the right sidebar when you choose anywhere on the photo.
Use the Cut tool
For Paint 3D, you can easily crop photos. You can also use the previous default sizes to crop the image, or drag and drop the mouse and crop to your liking. Not only that, you can also lock the frame rate to keep the length and width you want.
To crop a photo, you select the Crop (Crop)> Select the frame rate you want to cut.

Then simply drag the frame to the position you want to cut and press Done .
+ Use Smart Selection tool
The Smart Selection Tool is a regular selection tool but has magic features. You can specify the details of the area you want to keep in your selection. This tool is very useful for removing background or unnecessary parts from images.
You click Smart select (Magic select)> Drag and drop borders appear on the image to the position you want to select> Select Next (Next) in the right bar.
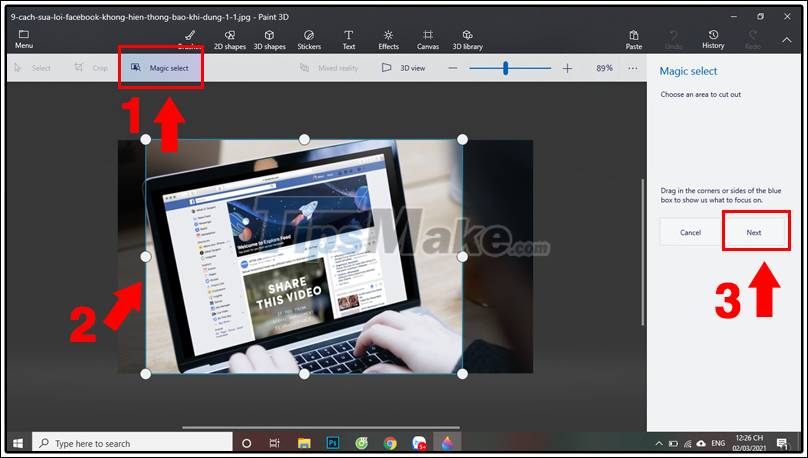
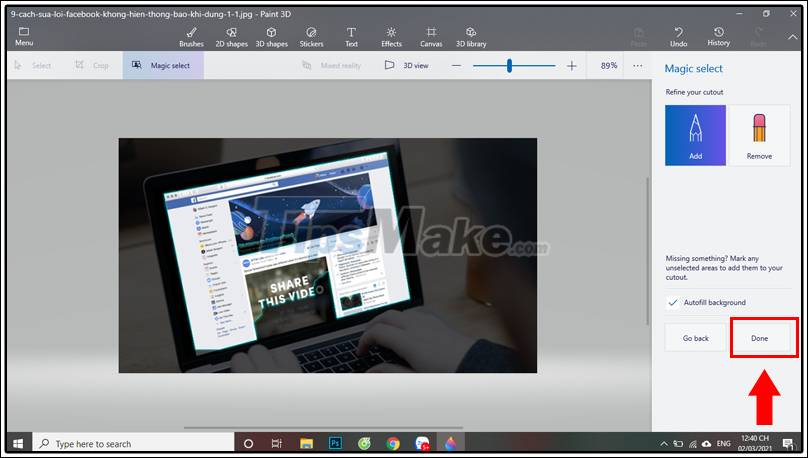
Use the Add or Remove tool in the right sidebar to customize your selection. When you're finished, click Done (Done).
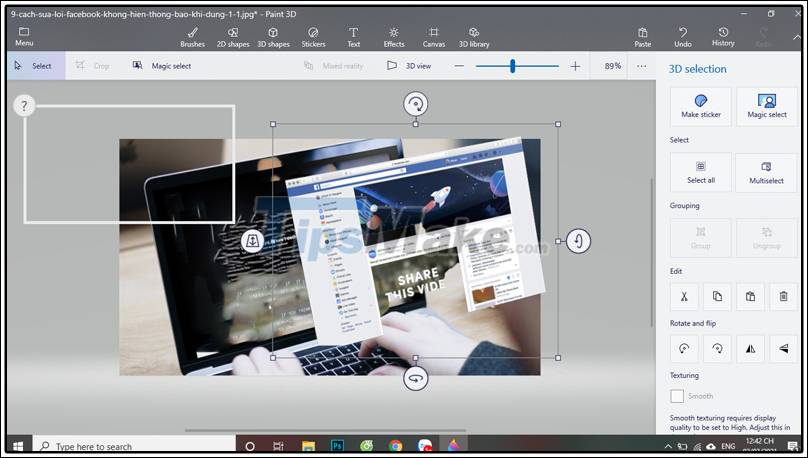
The part you cut out becomes a standalone image. You can save it as sticker or image for use in other purposes.
+ Draw freely on the picture
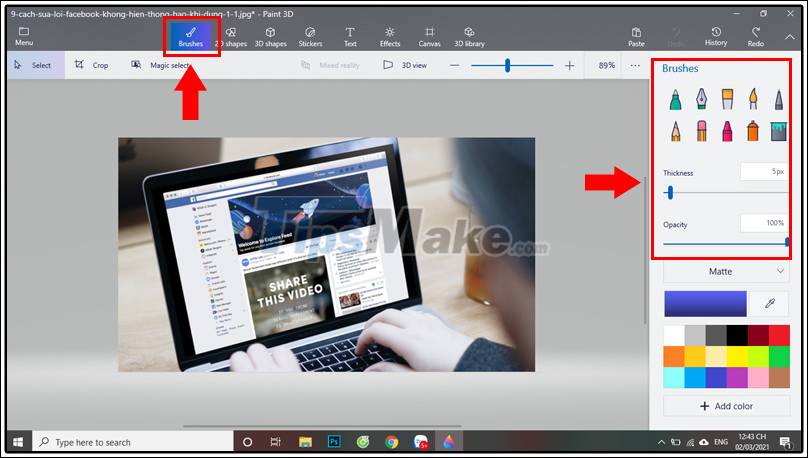
You can find many different kinds of brushes such as markers, pens and calligraphy, watercolor, pencil and even a coloring tool for Window Brush (Brushes). You can change the thickness, opacity and color of the selected brush.
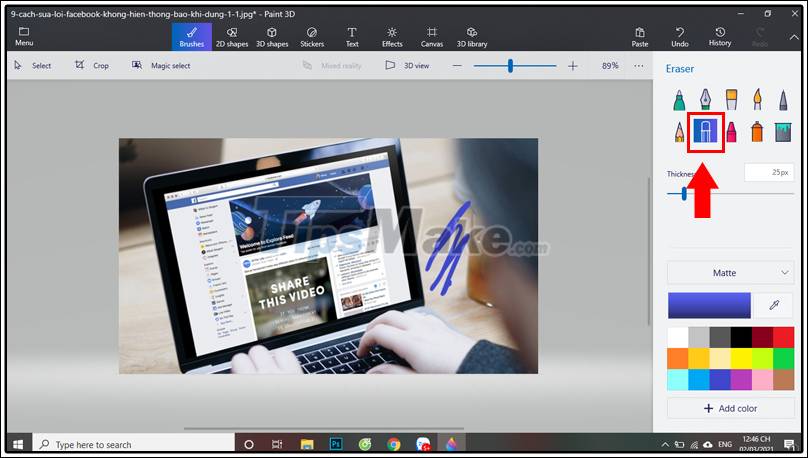
To clear the error details, you can use the Purge (Eraser) in liquidation right to delete them.
+ Add lines, arrows and other shapes
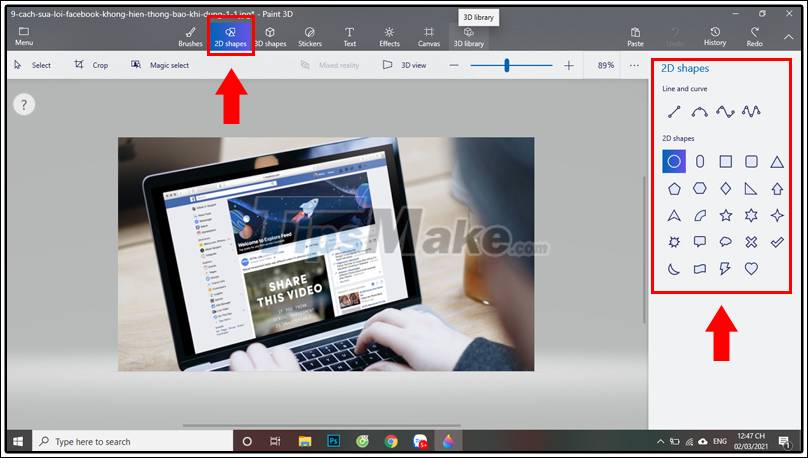
With Paint 3D, you can create any graphics like flowcharts, shapes like arrows, circles, square boxes, .
You just need to click to choose 2D image (2D shapes)> Select the picture you want in the right bar> Drag and drop that image on the image.
You can also change the color of that shape, adjust its thickness, rotate, and flip the shape using the options available in the right bar.
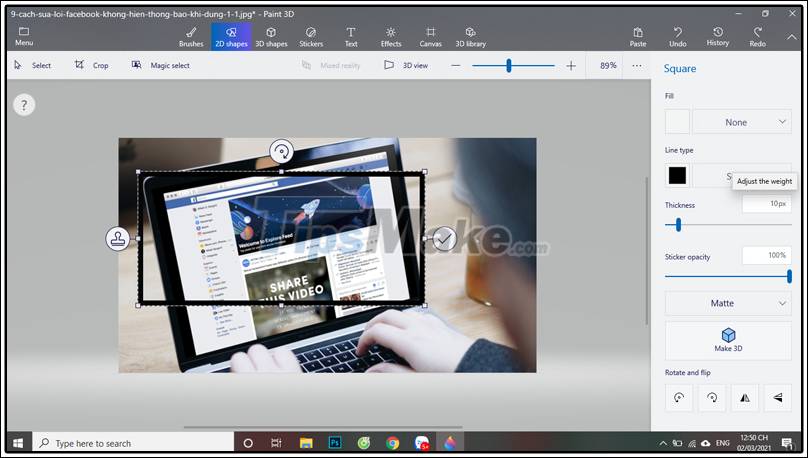
You can also use the selection boxes on the shape to adjust its size and position.
+ Add 3D image
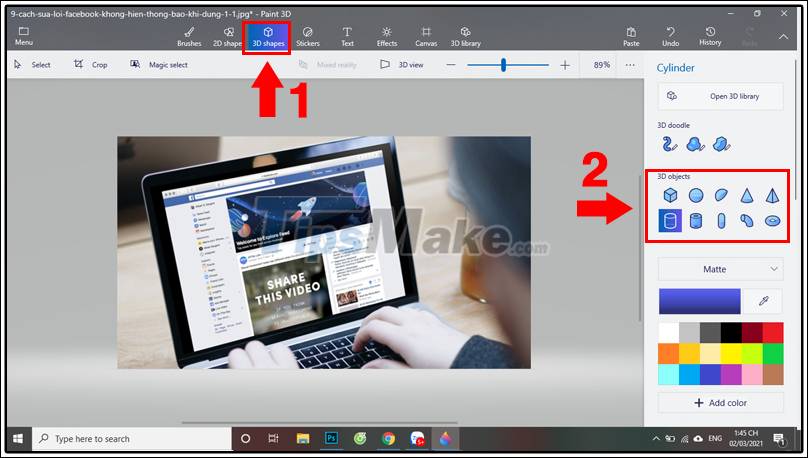
Paint 3D is characteristic of 3D images that you can add, so you can't ignore this amazing tool.
To add a 3D image, you click Pictures 3D (3D shapes)> Select Objects 3D (3D objects).
+ Add labels
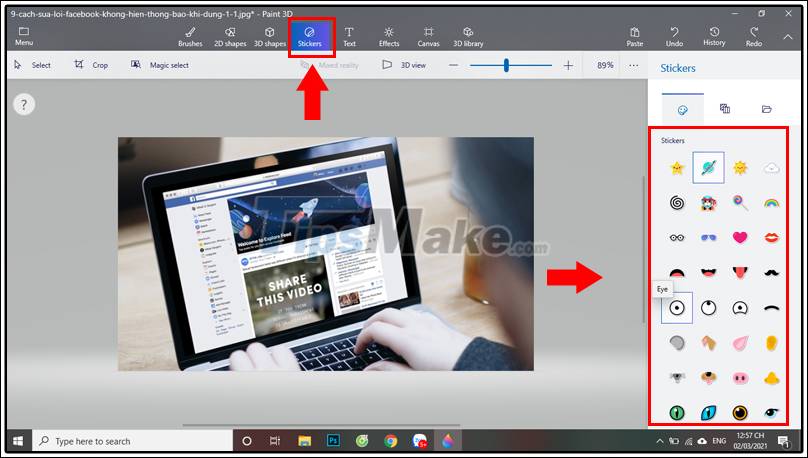
Another feature that cannot be ignored is the addition of stickers.
To add a sticker, you choose sticker (stickers)> Select the label you want to add photos> Pull sticker on the position you desire in Fig.
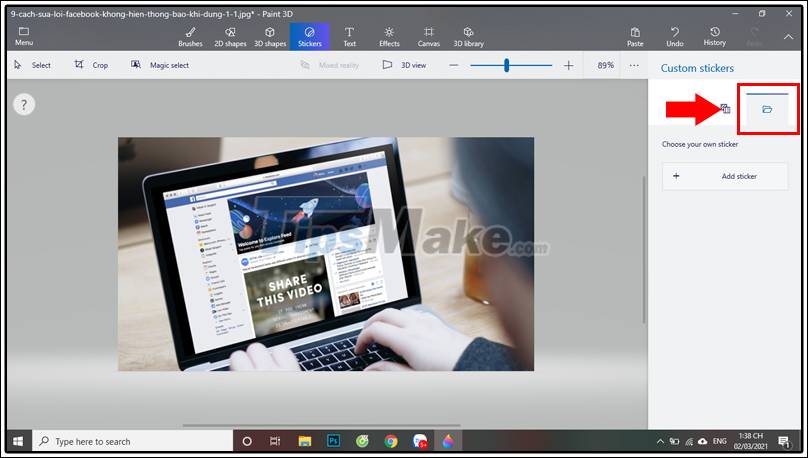
You can also add your own stickers by opening the file icon in the right sidebar.
One more special thing you cannot ignore is that you can also add stickers to 3D images. As the 3D object moves, the sticker will also move parallel to the object.
+ Add character
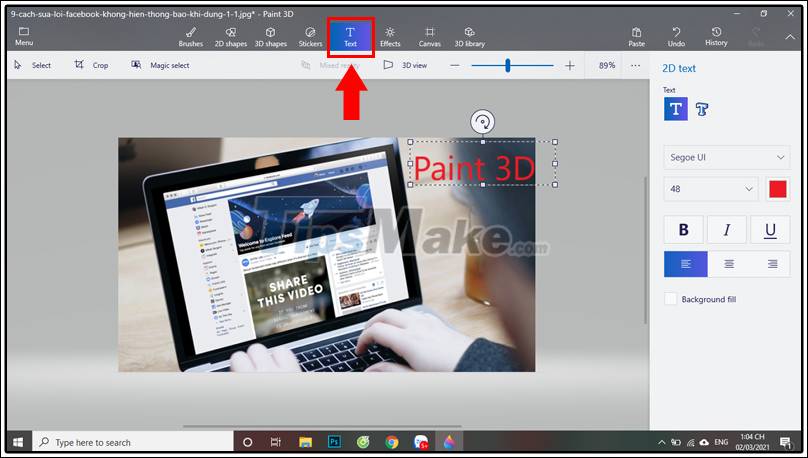
Adding text is an indispensable feature of Paint 3D. You can add custom 2D or 3D text.
Text can be formatted using the font style, size, color, and alignment tools in the bar on the right side of the screen.
Step 3: Save the image
After you have finished editing the images you want, you need to save the edits. To save the edited picture, select Menu > Choose Save (Save As)> Select Image (Image).
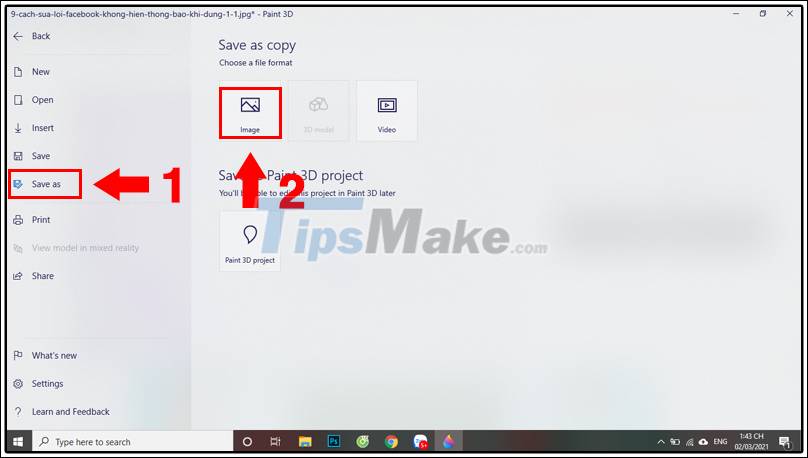
Then type a name for the new image and save.
Above is the article on how to use Paint 3D to edit images. Thank you for watching and please look forward to the next article!