Table of Contents
This guide explains how to create Squares in Word, with clear steps, practical tips, and important checks before you begin.

First, to create checkboxes in Word you need to open this function in the Word ribbon.
Click open File ribbon on the toolbar.
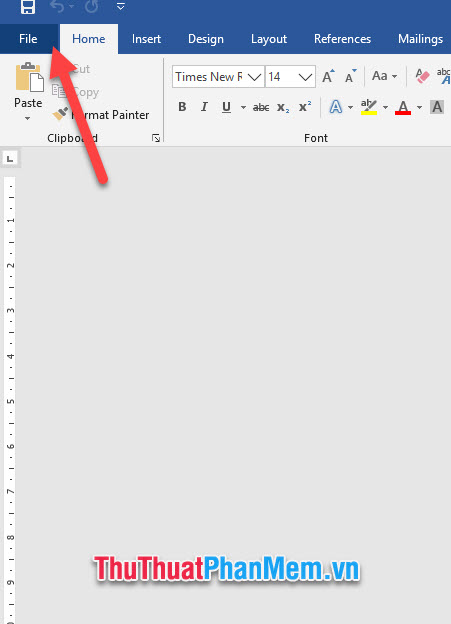
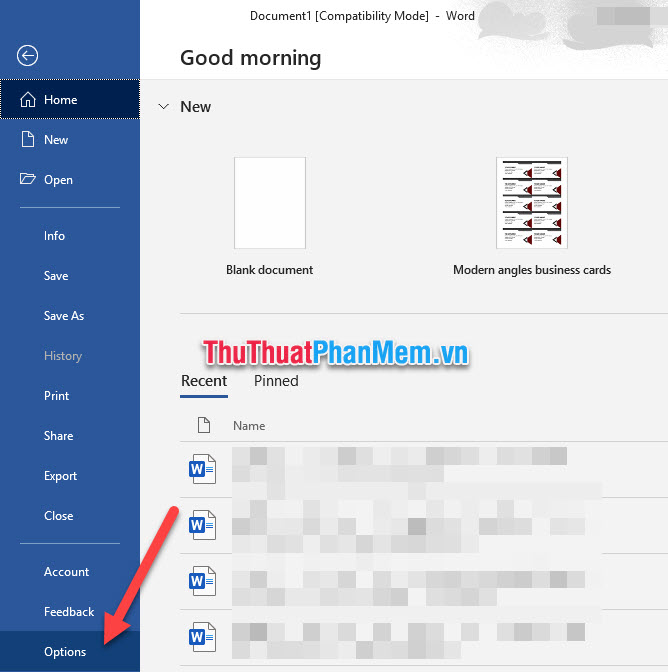
In the displayed list of File , click Options at the bottom.
The Word Options function window will open. You switch to the Customize Ribbon tab, in this tab you can adjust the options related to Word's ribbon.
Looking at the Main Tabs list on the right, you can see a tab called Developer has been turned off by default. This is the tab that contains the function to create the checkboxes we need.
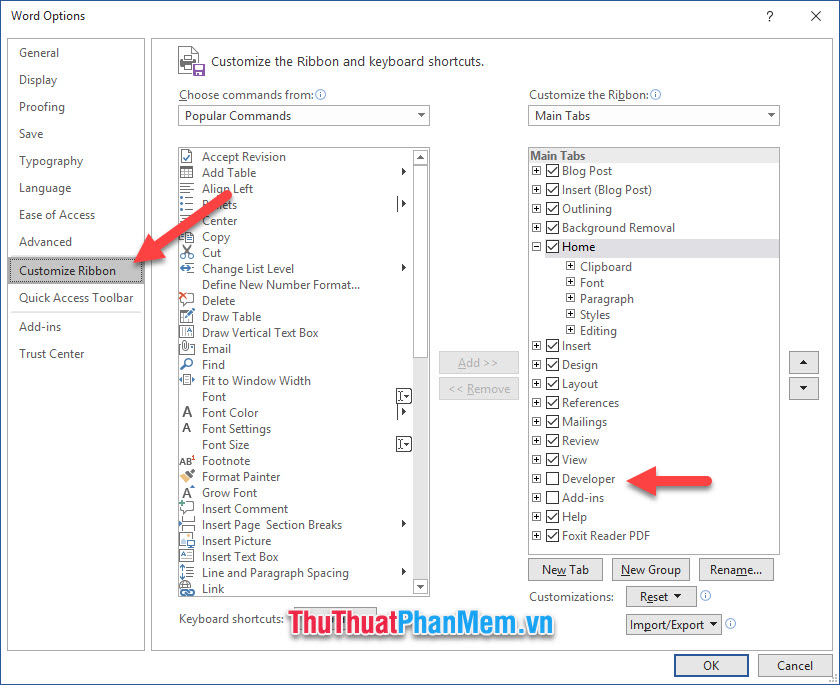
You click to check the box before Developer and then click OK to confirm the changes to the settings.
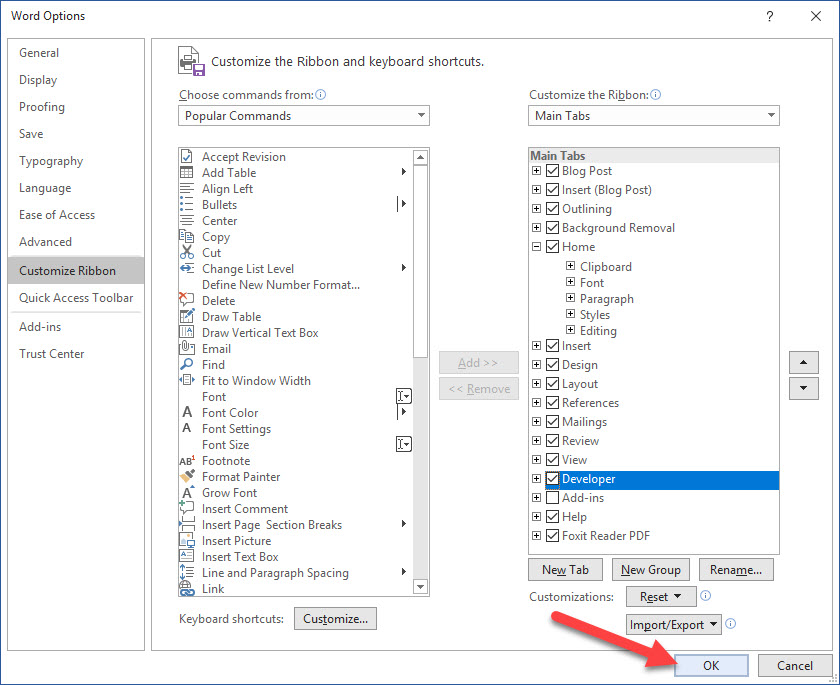
Then you will see a new ribbon added in the list is the Developer ribbon.
In this ribbon, there are Controls , you can find checkboxes in this section.
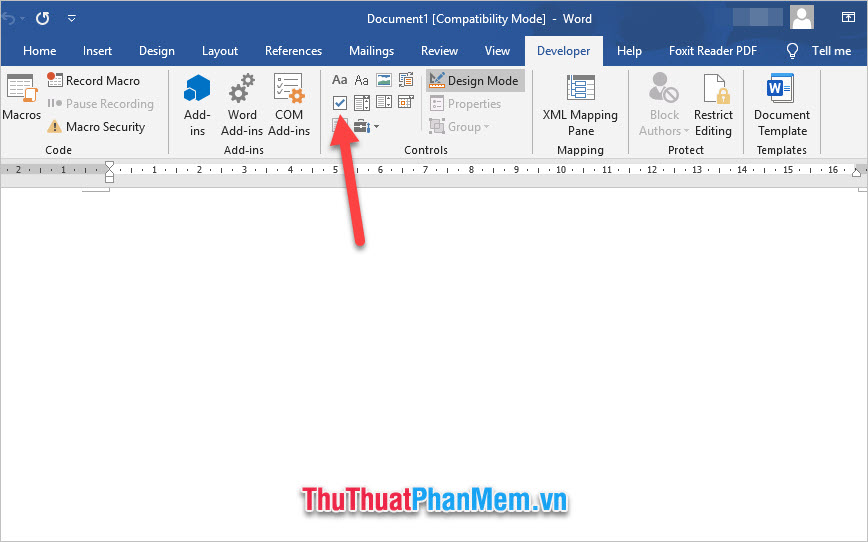
You click on it to create checkbox squares for your list.
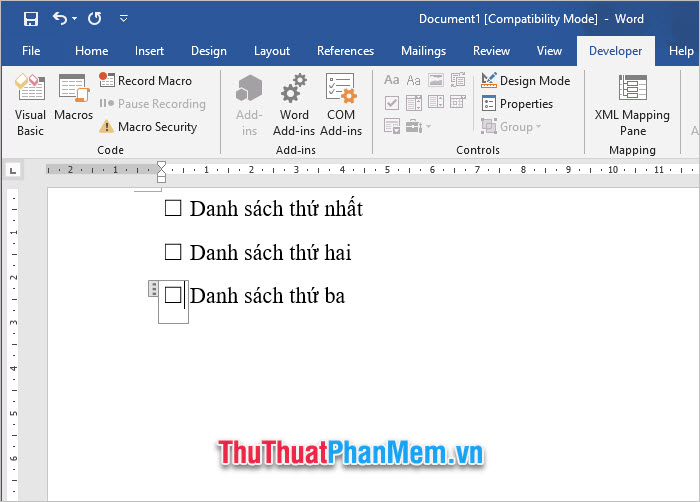
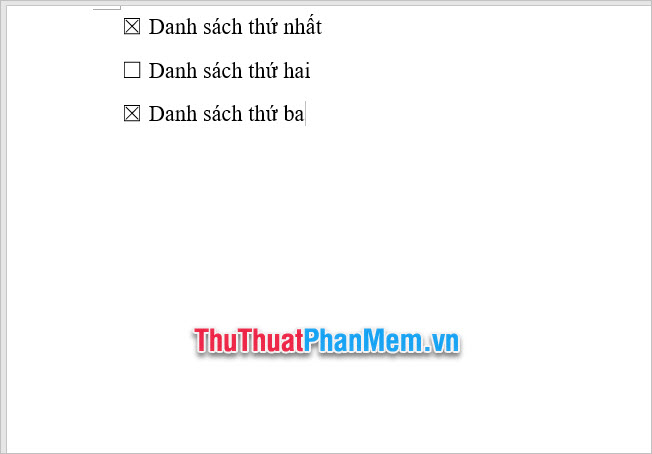
To use tick mark for checkbox checkbox, all you need to do is to click on the square.
Thank you for reading our article TipsMake. com . The article How to create squares in Word is here to end, wish you can successfully create squares in your posts. See you in other tips and tricks.
FAQ
What should I know about Create Squares in Word?
Focus on the key features, requirements, limitations, and practical use cases explained in this guide.
How do I get the best results with Create Squares in Word?
Follow the recommended steps, use current software or information, confirm compatibility, and review settings before major changes.
Are there any risks or limitations?
Potential limitations depend on compatibility, data quality, cost, privacy, support, and how the product or method is used.
Related Articles
 Squeeze Squares in Word and Print Word Cups: Word Processor5 minutes read
 Word 2013 Complete Guide (Part 17): Drawings and How to Create10 minutes read
 How to Create a Checkbox in Word: Insert Checkbox Word5 minutes read
 How to Show Grid Lines and Squares in Word3 minutes read
 Inserting Traces into Word: Insert Traces in Words4 minutes read
 Create a Quick Dot (……………) LINE in Microsoft Word4 minutes read
Reader Comments 0
Sign in with email or Google to join the discussion.