How to Create Custom Settings in Windows Live Movie Maker
When you save a video after editing on Windows Live Movie Maker, you can choose which among the existing preset settings you want to use to optimize the video for playback on specific devices. However, if you want to publish the video...
Table of Contents
Part 1 of 2:
Create a Custom Setting
-
 Click on the Menu button. It is located on the top-left corner of the window. This will open the menu panel.
 -
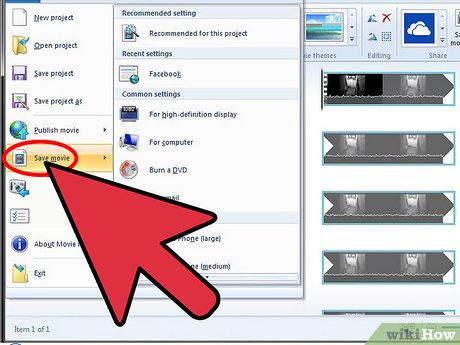 Click on 'Save Movie." This will open up a new sub-menu to the right.
 -
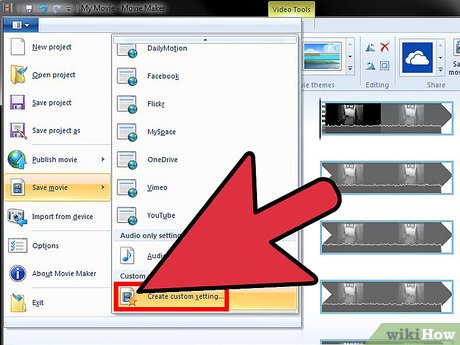 Scroll down the sub-menu to the 'Custom Settings' section. Then click on 'Create Custom Settings' at the very end of the sub-menu.
 -
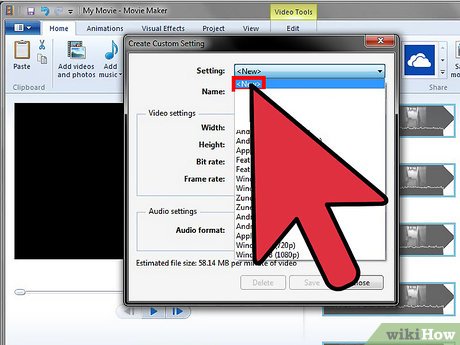 Create a custom setting. To create a custom setting, you either make a new one or modify an existing one. Click on the setting's drop-down list and choose '' to start from scratch, or select any of the existing settings on the list you want to edit.
- When you create a custom setting from scratch, you need to type in its name on the 'Name' text field provided.
Part 2 of 2:
Adjust Settings
-
 Adjust the video settings. Set the video height and width, its bit rate, and the frame rate speed.
 -
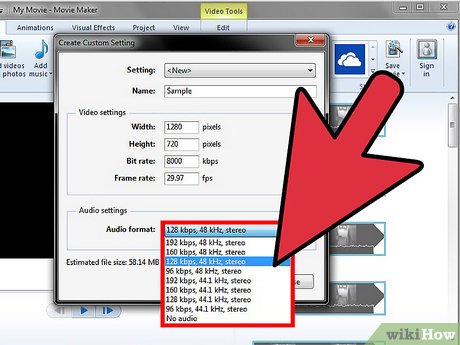 Set the audio settings. Click on the drop-down list and select the audio settings you want.
- Remember, the higher the bit rate (kbps), the better the quality, but it also means a bigger file size.
-
 Check the estimated file size. When you make any adjustments on the settings, an estimated file size is displayed at the bottom of the window. This file size refers to per minute of the video' meaning, if it shows an estimated size of 5 MB and your video's length is 4 minutes, then the estimated file size of the published video would be around 20 MB.
 -
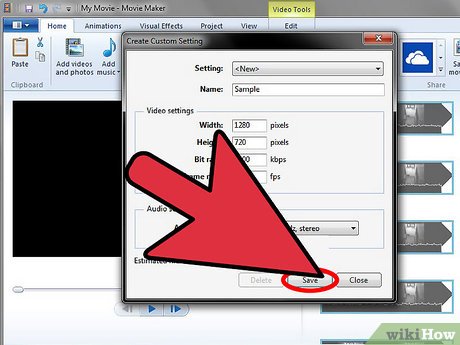 Finalize adjustments. Click on 'Save' to do this. You now have a custom setting of your own that you can use whenever you save or publish a video.
Was this article helpful?
Your feedback helps us improve.
Related Articles
 How to rotate the video in reverse, tilt with Windows Movie Maker4 minutes read
 How to Use Windows Movie Maker14 minutes read
 How to Create a Video in Windows Live Movie Maker4 minutes read
 How to Make a Slideshow with Windows Movie Maker6 minutes read
 How to Use Story Remix4 minutes read
 50 useful shortcuts for Windows Movie Maker4 minutes read
Reader Comments 0
Sign in with email or Google to join the discussion.