Table of Contents
This updated guide examines Click: How to Add Text to a Movie in Windows Movie Maker and organizes the essential facts, background, and practical takeaways in clear American English.
Part 1of 3:
Adding a Title Card
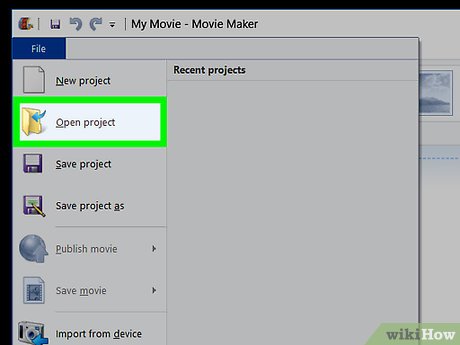 Open your project in Windows Movie Maker.
 Click theHometab.
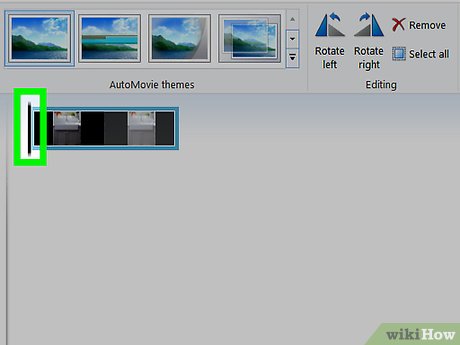 Click the clip you want to place the title in front of. Title cards can be inserted before, after, and in between clips in your project.
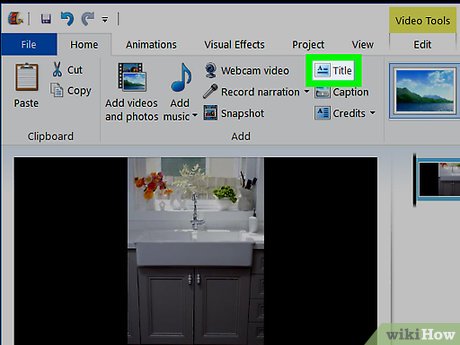 Click theTitlebutton in the Home tab.
 Type in the text that you want to appear. You'll see it appear in the preview to show how it will look in the final video.
 Use theFontandParagraphtools to format your text. You'll find these in the Text Tools Format tab that appears when you are working with text.
 Adjust theStart timeandText durationvalues. BY default, title cards will last for 7 seconds.
 Click an effect to change how the text appears. You'll see a preview for each effect as you hover over it.
- Clicking the ▼ button on the right side of the Effects list will show more available effects.
 Insert multiple title cards for multiple pieces of text. If you want different text to appear and then disappear multiple times before the video starts, you can do so by creating multiple titles and adjusting their individual length accordingly.
 Split a clip to put a title card in the middle. If you want to add a title card to a point inside of a clip, you can split the clip and insert the title card:
- Click the clip that you want to split.
- Drag the black bar on the timeline to the exact spot you want to insert the title card.
- Click the Edit tab.
- Click Split .
- Click the Home tab and click Title to insert a title card at the split point.
Part 2of 3:
Adding Captions
 Click the clip you want to add a caption to. Captions appear over the video that is playing, and can be used for subtitles, labels, or anything else you can think of.
 Drag the black bar to the exact point you want the caption to appear. The black bar can be found on the timeline after clicking a clip.
 Click theHometab.
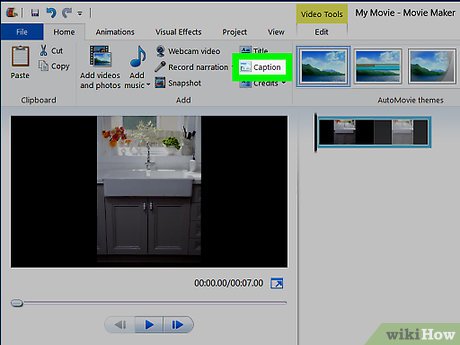 Click theCaptionbutton.
 Type the text that you want to appear in the caption. You'll see the preview appear of how it will look on the screen.
 Use theFontandParagraphtools to format the caption text. If you don't see these, select the text box and click the Format tab at the top of the screen.
 Click and drag the caption around the screen to change position.
 Adjust theText durationvalue. This will change how long the caption appears on the screen.
 Click an effect to change how the caption appears. You can hover your cursor over the different effect options to see a preview of what it will look like. You can click the ▼ button on the right side of the list to options.
 Continue adding captions. You can keep adding caption boxes, but two captions cannot exist at the same time. This means that every time you want to change the text, you'll need to create a new caption for it.
Part 3of 3:
Adding a Credits Sequence
 Click theHometab.
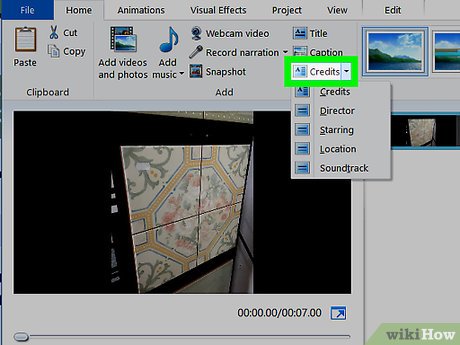 Click theCreditsbutton. This will add a Credits card to the end of your project.
- The credits card doesn't have to stay at the end of the project. You can click and drag it to move it to another location. Like the Title cards, it can be before, after, or in between clips.
 Type in the names for your credits. You can add all of the names for your credits sequence to the same text box and it will automatically scroll through all of them.
- You can only have one text box for the credits sequence, so just add each name and title to a new line.
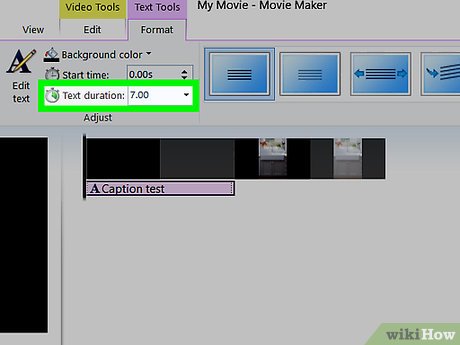 Adjust theText durationvalue. If your credits sequence is long, it will scroll very quickly to get through the entire text in the default 7 seconds. If you want the credits to scroll slower, increase the text duration value.
- The text duration cannot exceed the duration of the credits card itself.
 Double-click the credits card. This will open the editing tools for the card itself.
 Adjust theText Durationvalue. This will set how long the credits card will appear for. Use this to extend the credits if you have a lot of names to get through.
FAQ
What is Click: How to Add Text to a Movie in Windows Movie Maker about?
It provides a structured overview of click, explains the main context, and highlights practical takeaways for readers.
Why does this topic matter?
Understanding the main concepts helps readers evaluate the issue, avoid common mistakes, and make better-informed decisions.
How should readers use this information?
Use the guidance as a practical starting point, confirm details that may have changed, and follow current product, safety, or security recommendations.
Related Articles
 Click: How to Use Windows Movie Maker14 minutes read
 How to Rotate the Video in Reverse, Tilt with Windows Movie Maker6 minutes read
 Click: How to Make a Slideshow with Windows Movie Maker6 minutes read
 Choose: How to Use Story Remix4 minutes read
 50 Useful Shortcuts for Windows Movie Maker4 minutes read
 Add: How to Make a Video in Windows Movie Maker8 minutes read
Reader Comments 0
Sign in with email or Google to join the discussion.