
How to Create a Private Minecraft Server
Prepare the router
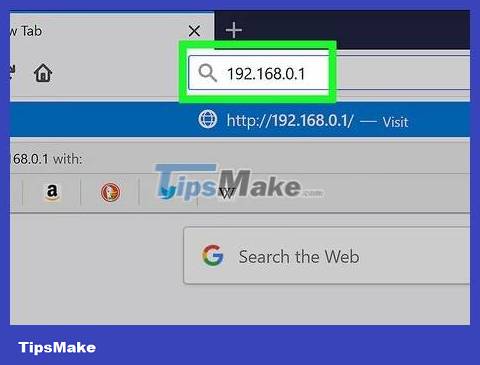
Open the router's website . To set up a static (unchanging) address for your computer and port forwarding for your Minecraft server, you'll need to go to your router's page. You can access this page by typing your router's address into your browser.
Since almost every router model has its own page, you will likely need to consult the user manual or online text for detailed instructions on address assignment and port forwarding.
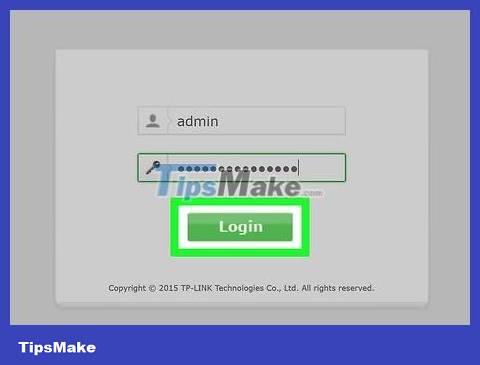
Sign in if required. If you are asked to log in with a username and/or password, you will need to enter the correct information to log in to the router's page.
If you've never set this information up but are still asked to enter it, you'll need to check your router's instructions for the default username and password.
Assign a static IP address to the computer. Using a static IP address for your computer helps ensure that your computer is not assigned a new address at an unexpected time, thus ensuring that you do not need to change information or port forwarding to your computer. after that:
Search the router's list of connected things.
Select your computer.
Change the computer's number if necessary.
Save your changes. Click the Save or Apply button , then wait for the router to reboot if necessary.
Because the router assigns a new address to the computer when it reboots, and it often reboots after setting up port forwarding, assigning a static IP address is important.
Look for the "Port Forwarding" section. You'll usually find it in the Advanced setup section , but if you can't find it, take a closer look at the router setup page.
Since router pages are often different, you may need to look at the router's text instead of straining to find the "Port Forwarding" section.
Create a new server named "Minecraft". For some routers, you just need to type Minecraftin the description; On other routers, you may need to click New rule (or something similar) and enter the router's information.
Enter your computer's static IP address. Type your computer's static IP address (usually "192.168.2.number") in the "IP" or "Address" section of the new server.
Select both TCP and UDP. In the "TCP" or "UDP" drop-down menu near your server information, click TCP & UDP .
Minecraft port forwarding. Type 25565in both Port sections to fill in.
Port 25565 is the default port used by Minecraft servers.
Allow server. If the server has not been previously authorized, you need to check the box or click Enabled .
Save your changes. Click the Save or Apply button and wait for the router to reboot if necessary. After the router successfully reboots, you can continue with the step of installing the Minecraft server on your Windows or Mac computer.
Install on Windows
Make sure that Java is updated to the latest version. Visit https://java.com/en/download/installed.jsp using Internet Explorer (other browsers may not be able to access this page), then click Agree and Continue and follow the on-screen instructions.
If the Java on your computer is not the latest version, you may encounter some problems when hosting the server.
Install Java JDK if you don't have it already. You need to install it on your computer before running the Java command:
Visit the JDK website
Click "Accept License Agreement" below the words "Java SE Development Kit 8u241".
Click the jdk-8u241-windows-x64.exe download link to the right of "Windows x64".
Double-click the installation file, then follow the onscreen instructions.
Download the server file. Visit https://minecraft.net/en-us/download/server in your computer's web browser, then click the minecraft_server.1.15.2.jar link in the middle of the page.
Create a new folder. Right-click on the desktop, select New , click Folder , then type Minecraft Serverand press ↵ Enter.
Move the server file into the "Minecraft Server" folder. Click and drag the downloaded JAR file into the "Minecraft Server" folder, then drop it there.
You can also click on the server file to select it, press Ctrl+ C, open the "Minecraft Server" folder and press Ctrl+ Vto paste the file.
Run the server file. Double-click the Java file named server in the "Minecraft Server" folder to do this. You will see many files and folders inside that folder.
Accept terms of use. Once you see the text file named "eula" in the "Minecraft Server" folder, you need to follow the steps below:
Double-click the "eula" file.
Edit the line "eula=false" to "eula=true"
Press Ctrl+ Sto save the changes.
Close text.
Double click the hosts file again. This file will continue to run in the pop-up window, and more files will be added to the "Minecraft Server" folder.
Close the server when finished running. After seeing the word "Done!" at the bottom of the main server window, you need to click on the text box in the lower left corner of the server window, then type stopand press ↵ Enter.
Search for the file "server.properties". This file is located inside the "Minecraft Server" folder.
Rename the file. Right-click the "server.properties" file, click Rename , remove the period from the name, then press ↵ Enter. This step changes it to a normal file called "serverproperties" that you can open.
Open the file "serverproperties". Double-click the file, then double-click Notepad in the pop-up menu.
Add your computer's static IP address to the file. Search for the line "server-ip=", then type the computer's static IP that you set up before just to the right of the "=" sign.
For example, if your computer's static IP address is "192.168.2.30", you need to type server-ip=192.168.2.30it here.
Save the file. Press Ctrl+ Sthen exit Notepad.
Creates server executable file. You can run the server by double-clicking the server file , but doing so will limit the server's memory. You can solve this problem by creating a server executable file inside the "Minecraft Server" folder:
Open Notepad (you may need to click Start and type notepadto find it).
Type java -Xmx3G -Xms1G -jar server.jarin Notepad.
Click File , then click Save As. in the drop-down menu.
Type run.batin the "File name" text box.
Click the "Save as type" drop-down menu, then click All Files .
Select "Minecraft Server" as the save location.
Click Save
Install on Mac
Make sure that Java is updated to the latest version. Go to https://java.com/en/download/, click Free Java Download , open the installation file and follow the instructions.
If the Java on your computer is not the latest version, you may encounter some problems when hosting the server.
Install Java JDK if you don't have it already. You need to install it on your computer before running the Java command:
Visit the JDK website
Click "Accept License Agreement" below the words "Java SE Development Kit 8u241".
Click the jdk-8u241-macosx-x64.dmg download link to the right of "Mac OS X x64".
Double-click the DMG file, then drag the Java icon into the "Applications" folder.
Follow the instructions on the screen.
Download the server file. Visit https://minecraft.net/en-us/download/server in your computer's web browser, then click the minecraft_server.1.15.2.jar link in the middle of the page.
Create a new folder. Click the desktop, then click File , click New Folder , type Minecraft Serverand click ⏎ Return.
Move the server file into the "Minecraft Server" folder. Click and drag the downloaded JAR file into the "Minecraft Server" folder, then drop it there.
You can also click on the server file to select it, press ⌘ Command+ C, open the "Minecraft Server" folder and press ⌘ Command+ Vto paste the file.
Run the server file. Double-click the Java file named server in the "Minecraft Server" folder to do this. You will see many files and folders inside that folder.
Accept terms of use. Once you see the text file named "eula" in the "Minecraft Server" folder, you need to follow the steps below:
Double-click the "eula" file.
Edit the line "eula=false" to "eula=true"
Press ⌘ Command+ Sto save the changes.
Close text.
Double click the hosts file again. This file will continue to run in the pop-up window, and more files will be added to the "Minecraft Server" folder.
Close the server when finished running. After seeing the word "Done!" at the bottom of the main server window, you need to click on the text box in the lower left corner of the server window, then type stopand press ↵ Enter.
Search for the file "server.properties". This file is located inside the "Minecraft Server" folder.
Open the file. Click on the "server.properties" file, then click File , select Open With and click TextEdit to open it.
If you can't open the file, you'll need to click it, click File , click Rename , remove the period between "server" and "properties" (you may have to click the down arrow to the right of the "Name" box, and Uncheck "Hide Extensions"), then click Save .
Add your computer's static IP address to the file. Search for the line "server-ip=", then type the computer's static IP that you set up before just to the right of the "=" sign.
For example, if your computer's static IP address is "192.168.2.30", you need to type server-ip=192.168.2.30it here.
Save the file. Press ⌘ Command+ S, then exit TextEdit by clicking the red circle in the upper left corner of the window.
Creates server executable file. You can run the server by double-clicking the server file , but doing so will limit the server's memory. You can solve this problem by creating a server executable file inside the "Minecraft Server" folder:
Open Spotlight , type textedit, double-click TextEdit , and click New Document .
Type java -Xmx3G -Xms1G -jar server.jarin TextEdit.
Click Format , then click Make Plain Text and click OK .
Click File , then click Save in the drop-down menu.
Type runin "Name", then click the down arrow to the right of the "Name" box.
Uncheck the "Hide Extension" box, then replace ".txt" in the "Name" box with .command.
Select the "Minecraft Server" folder as the save location, click Save and click Use .command when prompted.
Install on Linux
Download the server file from https://mcversions.net .
Create a new folder called Minecraft Server .
Move files to folder.
Open this folder in Terminal and start the following commands:
chmod +x *
sudo java -jar *
Accept eula. Do this by clicking on eula.txt and changing falseit to true.
Restart the command line: sudo java -jar *.jar .
Wait for the word "Done" to appear. Then type stop.
Click on minecraft.properties and edit various settings:
If you want the offline version to be accessible to the server (crack), just change it online modeto false.
You can change the game mode and other aspects of the game.
Add your computer's IP address to this file. In the line server-ip, you need to add IP like 192.168.1.16.
Save the file and exit.
Run your server. You just need to start the following command line:
sudo java -jar *.jar
Connect to the server
Search for public IP addresses. This is the address you need to give to the people you want to connect to the server. Remember that anyone with this address can enter your game.
If your friends are on the same network as you, they will need a static IP address from your computer.
Start the server using the "run" file. Close the server if it's running, then double-click the run file you created in the "Minecraft Server" folder and wait for it to finish loading before continuing.
The server window should always be open when you are hosting the server.
Open Minecraft. Double-click the Minecraft icon that looks like a block of dirt with grass on top, then click PLAY at the bottom of this Launcher.
You may be asked to sign in with your Minecraft email address and password if you haven't opened Minecraft in a while.
Click Multiplayer . It's in the Minecraft menu.
Click Add Server . This button is located in the lower right corner of the window.
Enter the server name. In the "Server Name" text box at the top of the window, you can type whatever name you want for your Minecraft server.
Enter the address of the computer. In the "Server Address" text box, you need to type the computer's static IP address.
If you have changed the "port", you should add a : sign and then type the port number (eg: 50.32.56.8:5555) but if the port is "25565" then you don't need to add anything.
Click Done . This button is at the bottom of the window. This is the step to create the server.
Server selection. Click the server's name at the top of the window.
Click Join Server . This button is at the bottom of the window. This is the step that opens the world of the server.
Invite friends to join. You can do this by sending your public IP address to up to 19 friends and telling them to follow these steps:
Open Minecraft and click Multiplayer
Click Direct Connect
Enter your computer's public IP address ( not the IP address you entered to host the server, unless they are on a Wi-Fi network).
Click Join Server
Turn off the firewall if necessary. If your friends can't access the game, you may need to turn off your computer's firewall. Remember that this leaves your computer vulnerable to attacks by strangers, so you should only do this when playing with people you trust.
You should read it
- How to Create a Minecraft PE Server
- How to set up Minecraft server with Hamachi
- How to Create a Free Minecraft Server
- How to Create a Minecraft Server Using Hamachi
- How to store your own Minecraft server
- What is Virtual Private Server (VPS)?
- Instructions for creating your own Minecraft mods to play games in your style
- How to set up Minecraft server on Raspberry Pi
- How to join a multiplayer server in Minecraft PE
- How to Copy and Paste in Minecraft
- How to make things in Minecraft games
- How to build a game server on Linux
Maybe you are interested
Facebook and Instagram are about to sell green ticks, the price is higher than Twitter What is Bluetooth Low Energy? How does BLE work? How to scan viruses on Windows with Process Explorer Things to do after buying a new computer 8 makeup tips to make you look 'more attractive' New technology removes salt from water with the lowest energy consumption