How to Create a Free Minecraft Server
Today's TipsMake will show you how to create a free Minecraft server. There are many Minecraft server hosting services that you can sign up for. Minehut is one of the services that allows users to host Minecraft servers for free. Note that the Minehut server only works with Minecraft: Java Edition. This article will show you how to create a free Minecraft server using Minehut.
Table of Contents
Create a Minehut account
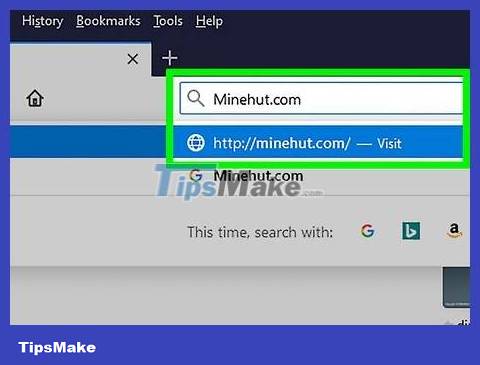
Visit https://minehut.com/ using your computer's web browser. Minehut is one of many Minecraft server hosting services. This website is very easy to use, one of the services on it allows you to host a Minecraft server for free. Minehut allows users to host 2 Minecraft servers and up to 10 players for free. You can buy credits if you want to allow more than 10 players or on 2 servers.
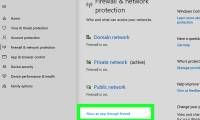
Or, you can host a free Minecraft server on your computer, this method works for all versions of Minecraft. Note: the setup process is relatively complicated, uses a lot of RAM and Internet bandwidth (in addition to the resources needed to play games and run the computer's operating system).
Minehut servers only work with Minecraft: Java Edition. If you want to create a server for Minecraft version: Windows 10/mobile device/console, you can do so using Realms or Aternos. Additionally, you can also host a Minecraft server on your computer. Server software for Minecraft: Bedrock Edition can be downloaded at https://www.minecraft.net/en-us/download/server/bedrock/
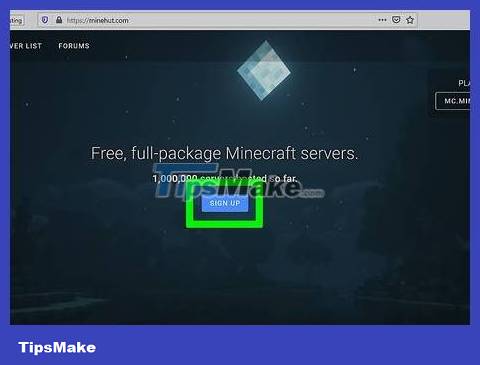
Click Sign Up . This button is blue and located in the middle of the page.
If you already have a Minehut account, click Log In in the upper right corner and sign in with the email address and password associated with your Minehut account to access the Dashboard.
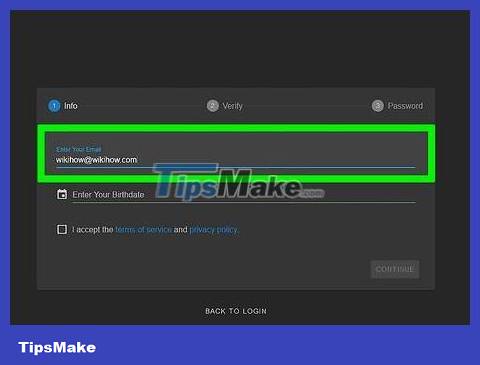
Enter your email address. Enter the email address you are using in the "Enter your email" text box. This is the first line at the top of the page.
Note: this must be an email address that you have access to, as you'll need to log in to verify this information now.
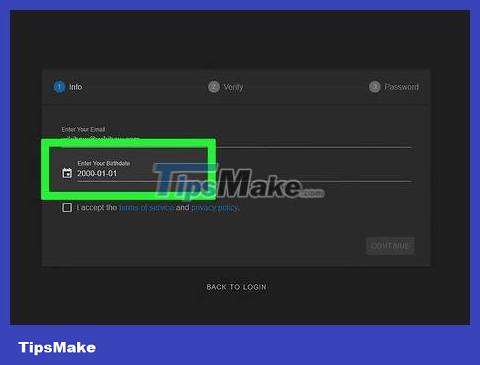
Enter date of birth. To enter your date of birth, click on the second line on the page. Click your birth year from the drop-down menu. Then, choose a date from the calendar that pops up.
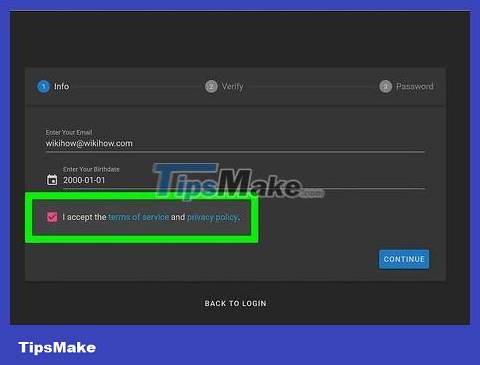
Click the check box at the bottom of the form. This ensures that you accept Minehut's terms of service and privacy policy. You can read both policies by clicking on the blue text in the sentence at the bottom of the form.

Click Continue in the lower right corner of the form.

Verify email address. Open your inbox and find the Minehut Account Verification email. You may need to look in your Spam or Junk folder. Once found, follow these steps to verify the email address:
Open the email address's inbox.
Click on the Minehut Account Verification email coming from "info".
Look for the 8-character code in the email body.
Enter the 8-character code into the "Verify" text box on the Minehut site.
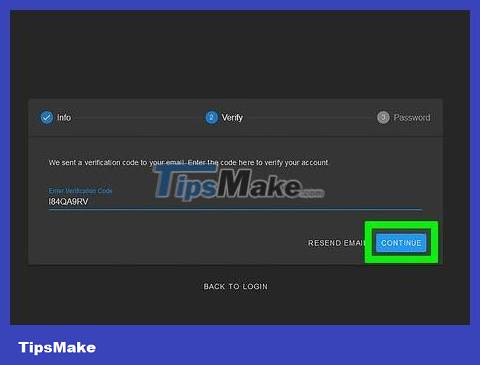
Click Continue . The verification code will be applied and if correct, the password generation page will appear.
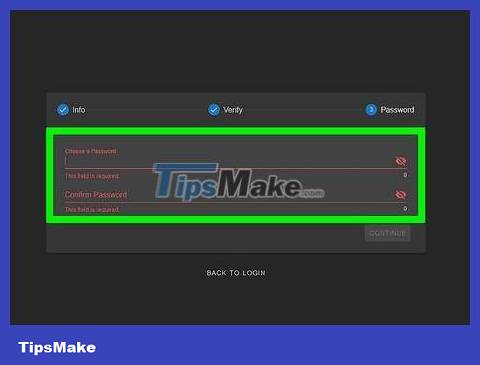
Create a password. In the "Choose a password" text box, select the password you want to set. Then, re-enter this exact password on the second line to confirm.
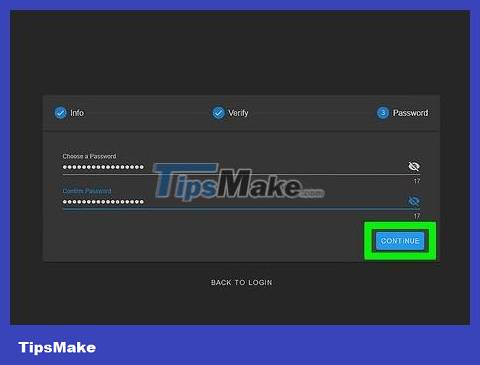
Click Continue . A Minehut account will be created and you will go to the server creation page.
Server setup
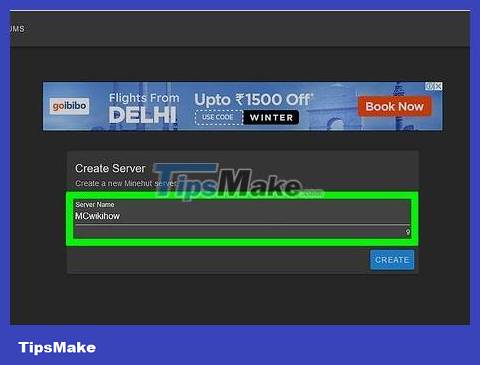
Enter a name for the server. Enter a simple name for the server domain in the text field in the middle of the page.
The server name cannot be more than 10 characters.
The server name cannot contain special characters or spaces.
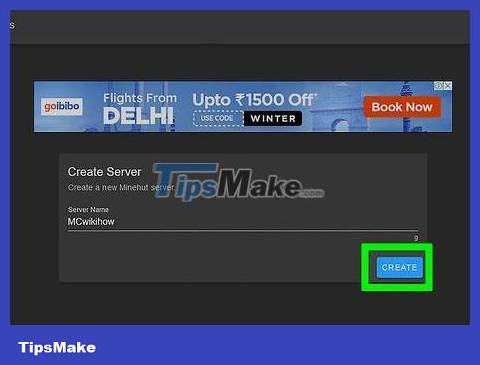
Click Create . This blue button is in the lower right corner. The server will be created, and the Dashboard will appear.

Click Activate . This blue button is located to the right of the server status on the Dashboard. It may take a minute for your server to connect to a high-performance DDoS protected server.
If the server is disconnected at any time during setup or installation, click Activate to reconnect.
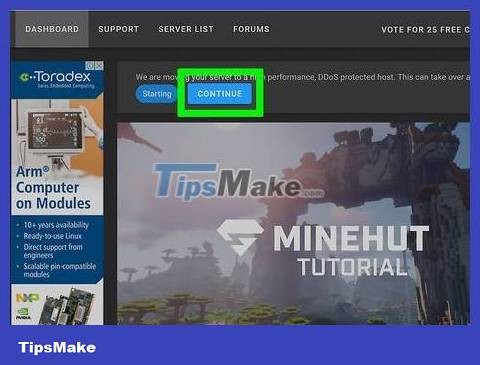
Click Continue . Once the server has moved to the new storage location, a blue "Continue" button will appear next to the "Online" button.
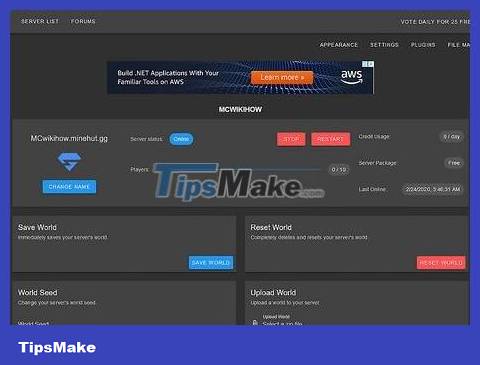
Change server settings
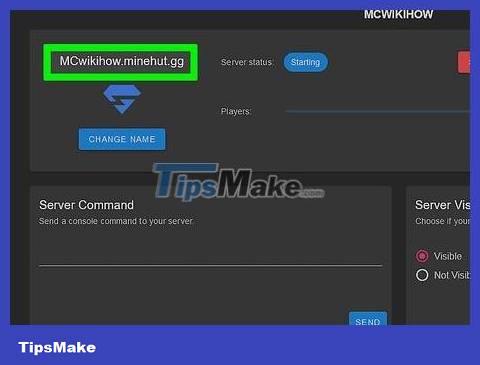
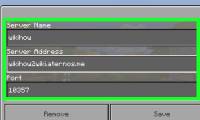
Determine the server's address. This option is in the upper left corner of the first frame at the top. Below the options there is a blue shield icon.
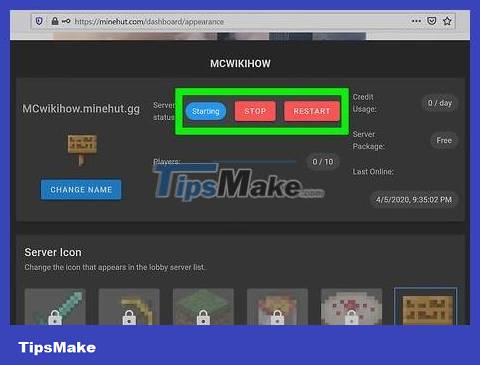
Stop or restart the server. If you need to stop or restart the server, click the red Stop or Restart button at the top of the page.
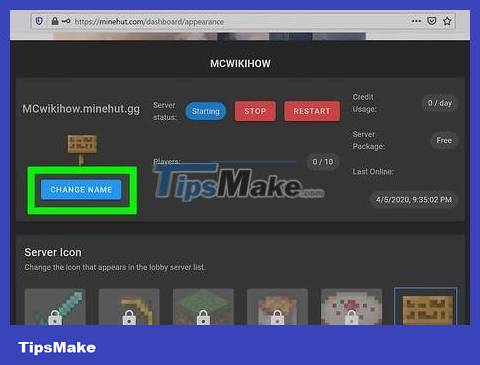
Rename the server. To change the server name, click the blue Change Name button below the server address. Enter a new name for the server and click Apply .
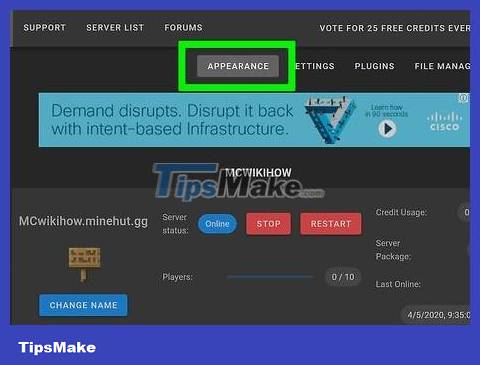
Change server display settings. To change server settings, click the Appearance tab at the top. Use the following fields to change the server's display settings:
Server Command — If you want to send a command to the server, enter it in the "Server Command" line and then click Send .
Server Visibility — Click the radio button next to "Visible" or "Not visible" to choose to make the server public or hidden. Then click Update .
MOTD Server — Enter a description for the server below the "MOTD Server" line at the bottom of the page. Then click Update .
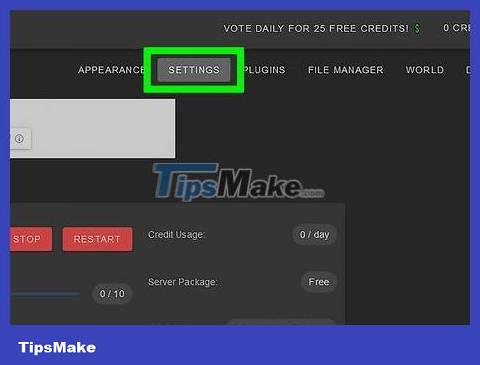
Change the content of the Settings section. To change server settings, click the Settings tab at the top of the page and do the following:
Max Players — Click the radio button next to the maximum number of players you want to allow on the server, then click Save . You will need to purchase credits if you want to allow more than 10 players.
Level Type — To change the level type, click the radio button next to "Default", "Flat", Amplified", "Large Biomes". than the default world), or "Customized". Then click Save .
Level Name — To name the world, you can enter a name in the field provided and click Save .
Generator Settings — Enter any pre-set level generators you have in the space provided and click Save . The level type must be set to "Flat" for preset flat world sets and "customized" for any given settings.
Gamemode — To select a game mode, click the radio button next to "Survival," "Creative," "Adventure," or "Spectator." fake) and then click Save .
Force Gamemode — To force the selected gamemode to the server, click the switch below the "Force Gamemode" heading and click Save .
PVP — To enable/disable PVP (Player vs Player) mode, you can click the switch located below the "PVP" heading and select Save .
Monster Spawning — Click the switch below the "Monster Spawning" heading to toggle monster spawning mode on/off. Then click Save .
Animal Spawning — Click the switch under "Animal Spawning" to turn animal spawning mode on/off. Then you click Save .
Flight — Click the switch under "Flight" to allow or disallow players from flying over the server. Then you click Save .
Difficulty — To change the difficulty on the server, click the radio button next to "Peaceful," "Easy," "Normal," or "Hard." ) below the "Difficulty" heading. Then click Save to save.
Hardcore (Very Hard) — Click the switch below the "Hardcore" heading to enable or disable extreme difficulty on the server. Then, click Save to save.
Command Blocks — Click the switch below the Command Blocks heading to enable or disable the use of command blocks on the server. Then click Save to save.
Announce Player Achievements — Click the switch below the "Announce Player Achievements" heading to enable or disable announcing achievements to other players on the server. Then click Save to save.
Nether World — Click the switch below the "Nether World" heading to enable or disable Nether on the server. Then click Save to save.
Structures — Click the switch below the "Structures" heading to enable or disable random structure creation on the server. Then click Save to save.
Resource Pack — If you have a resource pack URL, enter it in the line provided and click Save .
Resource Pack Hash — To add a resource pack hash, enter the SHA-1 Hash code in the line provided and click Save .
View Distance — To increase or decrease the view distance on the server, click and drag the slider below the "View Distance" heading. Then click Save to save.
Spawn Protection — To increase or decrease the spawn protection radius in the server, you enter a number greater than or equal to 0 in the given line (current default is 16). Then click Save to save.
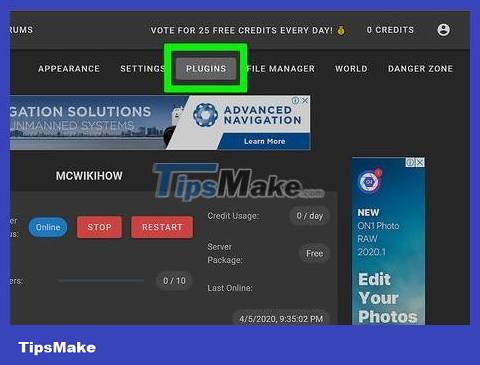
Add the plug-in to the server. If you want to add a plug-in to your server:
Click the Plugins tab in the upper right corner.
Scroll down and browse, or enter the plug-in name in the search bar.
Click the plug-in name.
Click Install Plugin .
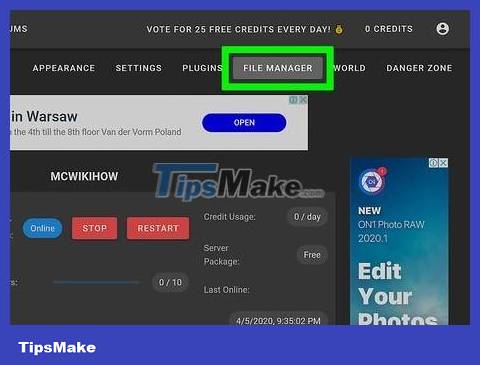
Manage server files (for advanced users only). If you want to modify the server files, follow these steps:
Click the File Manager tab in the upper right corner.
Click the file you want to edit from the list. Then click Save to save the file.
Click the cloud icon to upload files from your computer.
Click the paper icon to create a new file.

Change world settings. To change world settings, click the World tab in the upper right corner and use the following options:
Save World — Click Save World to immediately save the world to the server.
Reset World — Click Reset World to delete and reset the world on the server.
World Seed — To change the world's coordinates, enter the coordinate number of your choice in the line below the "World Seed" heading and click Update.
Upload World — To upload a world to the server, you need to save the world data in a zip file. Click the paperclip icon below the "Upload World" heading and select the zip file containing the world you saved and click Open . Then, click Upload to upload.
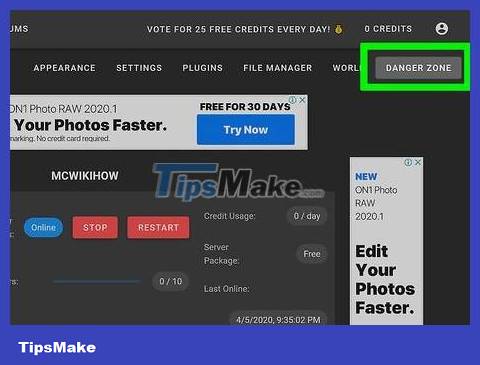
Access the "Danger Zone" settings. The danger zone setting contains several emergency measures you can take. To access Danger Zone settings, click the Danger Zone tab in the upper right corner. Then proceed as follows:
Force Hibernate Server — To force the server to hibernate, click the red Force Hibernate button located below the "Force Hibernate Server" heading.
Reset Server — To reset the server, click the red Reset Server button below the "Reset Server" heading .
Repair Files — To repair corrupted files that are causing your server to not function properly, you'll need to click the red Repair Files button located below the "Repair Files" heading.
Connect to the server
Leave the server console open. Thus, you will be able to adjust the server quickly by minimizing the Minecraft window and maximizing the browser window.

Open Minecraft. Minecraft: Java Edition has a grass block icon. Click this icon to open the Minecraft launcher.
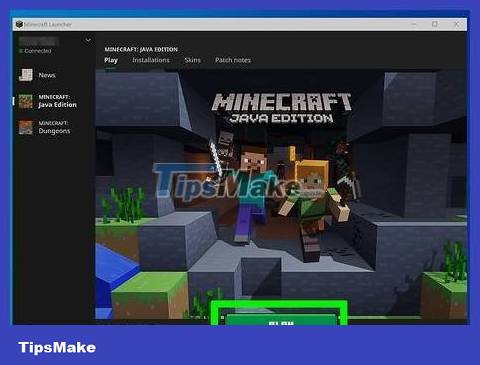
Click the green Play button located on the Minecraft Launcher. Minecraft will start launching.

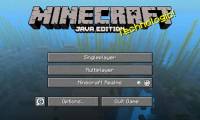
Click Multiplayer . This option is located near the middle of the Minecraft title page.

Click Direct Connect . This option is at the bottom of the multiplayer menu in the middle of the page.
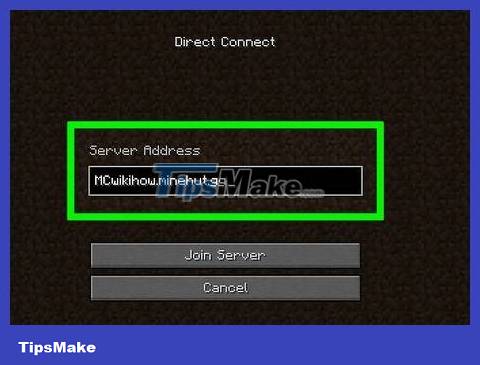
Enter the server address. Enter the server address in the box next to the "Connect" heading that appears in the middle of the page.

Click Join Server . This option is at the bottom of the page. You will start connecting to the server and enter the world within it.
Was this article helpful?
Your feedback helps us improve.
Related Articles
 TOP free Minecraft server creation tools12 minutes read
 How to Create a Minecraft PE Server6 minutes read
 How to Create a Minecraft Server Using Hamachi11 minutes read
 How to set up Minecraft server with Hamachi7 minutes read
 How to Create a Private Minecraft Server16 minutes read
 How to store your own Minecraft server6 minutes read
Reader Comments 0
Sign in with email or Google to join the discussion.