How to Create a Minecraft Server Using Hamachi
This article shows you how to create a Minecraft server on your Windows or Mac computer using a free program called Hamachi. Remember that this method only applies to the Java version of Minecraft on desktop computers; This means you can't try to use this method for Windows 10, Pocket Edition, or console versions of Minecraft..
Prepare to create a server

Download Hamachi. Visit https://www.vpn.net/ in your computer's web browser, then click the green Download now button in the middle of the page. The Hamachi installation file will be downloaded to your computer.
If you're using a Mac and VPN.net is about to download a Windows file, click the Mac link below the Download now button to request a download of the Mac version.

Install Hamachi. After downloading Hamachi, you will install it into your operating system:
On Windows — Double-click the Hamachi installation file, select the language and click Next , check the "I have read" box and click Next , click Next and then click Install . Click Yes if prompted during installation, then click Finish when prompted.
On Mac — Open the ZIP folder, double-click the extracted Hamachi installation file, click Open , verify the download if necessary, check the "I have read" box, and click Install . Enter your password if prompted, then click Finish when prompted.

Download the Minecraft server file. Visit https://minecraft.net/en-us/download/server in your computer's web browser, then click the minecraft_server.1.15.2.jar link in the middle of the page. This is the step to download the Minecraft Java server file to your computer.

Create folders on the desktop. You will place and run your Minecraft server in this directory. To create an empty folder, follow these steps:
On Windows — Right-click on the desktop, select New , click Folder , then type Minecraft Serverand press ↵ Enter.
On Mac - Click File , click New Folder , type Minecraft Serverthen press ⏎ Return.
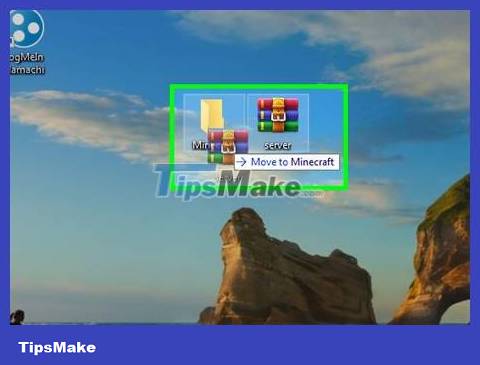
Place the Minecraft server file into the folder. Click and drag the downloaded Minecraft server file to the new folder's icon, then drop it there.
You can also copy it by clicking the hosts file, pressing Ctrl+ C(on Windows) or ⌘ Command+ C(on Mac), opening a new folder, then pressing Ctrl+ Vor ⌘ Command+ V.
Create a server on Windows
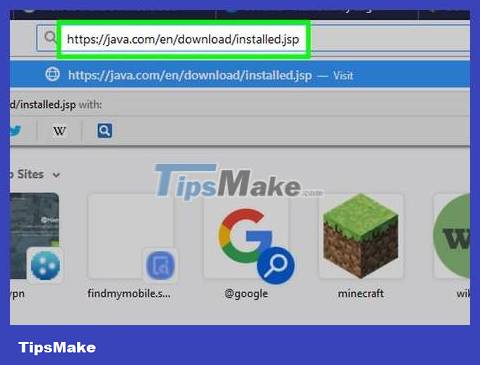
Make sure you have the latest versions of Minecraft and Java. The easiest way to do this for Minecraft is to double-click the Minecraft Launcher and wait for it to update if necessary. For Java, open Internet Explorer, go to https://java.com/en/download/installed.jsp, click Agree and Continue , and follow the onscreen instructions.
If you don't see anything, Java has been updated to the latest version.
Since most new browsers do not support Java, using Internet Explorer is the best way to ensure that there are no errors at runtime.
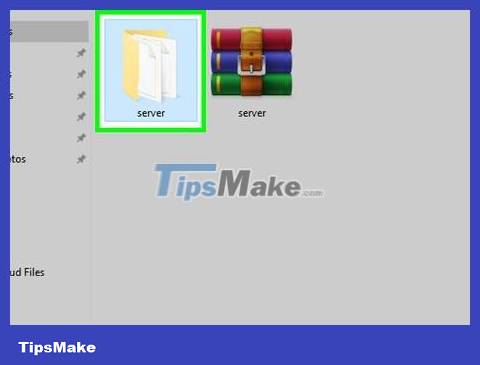
Open the Minecraft server folder. Double-click the folder to do this.

Double click the hosts file. When performing this step, the server files will start to be extracted inside the folder.
Make sure you double-click the server executable file that looks like a gear on a white background and not text.
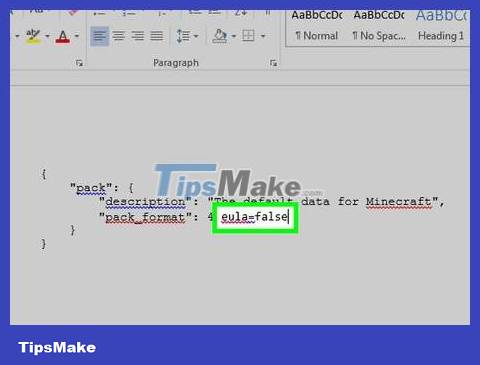
Accept Minecraft server terms of use. Once the "eula" file appears, double-click it to open it in Notepad, then delete the false"eula=false" line and type true. You can then press Ctrl+ Sto save the changes and close Notepad.
The edited "eula" file will now display the line "eula=true" instead of "eula=false".

Double click the hosts file again. This is the step where the server continues to be decompressed.

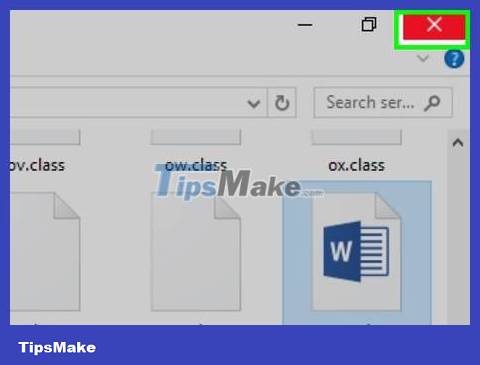
Close the "Minecraft server" window when the download is complete. When you see "Done" in the line at the bottom of the window, click the X in the upper-right corner of the window. At this point, you can freely configure Hamachi.
Create a server on Mac
Make sure you have the latest versions of Minecraft and Java. The easiest way to do this for Minecraft is to double-click the Minecraft Launcher and wait for it to update if necessary.
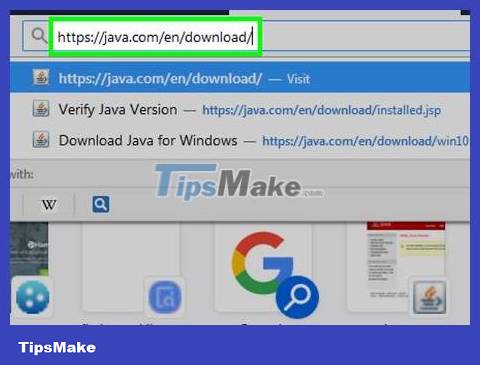
As of April 2020, the latest Java version is Version 8 Update 251. You can download it from the Java website by visiting https://java.com/en/download/ and clicking the Java Download button free of charge.

Double click on the Minecraft server file. When performing this step, the server file will begin to be extracted inside the new folder.

Accept Minecraft server terms of use. Once the "eula" file appears, double-click it to open it in TextEdit, then delete the false"eula=false" line and type true. You can then press ⌘ Command+ Sto save your changes and close TextEdit.
The edited "eula" file will now display the line "eula=true" instead of "eula=false".
Double-click the Minecraft server file again. The files will continue to be extracted inside the folder.
Close the "Minecraft server" window when the download is complete. When you see "Done" in the line at the bottom of the window, you can click the red circle in the upper left corner of the window to close it. At this point, you can freely configure Hamachi.
Hamachi configuration
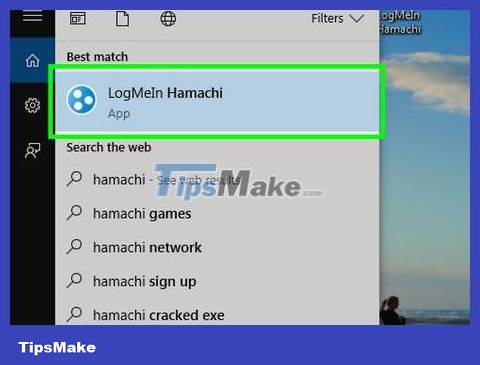
Open Hamachi. Open Start (on Windows) or Spotlight (on Mac), type hamachi, click, or double-click LogMeIn Hamachi in the search results.
When using a Mac, Network is a menu item at the top of the screen.
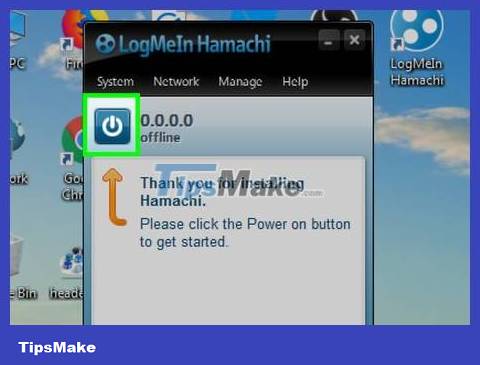
Click the "Power button" icon. This button is at the top of the Hamachi window. This is the step to turn on Hamachi and display the login window.
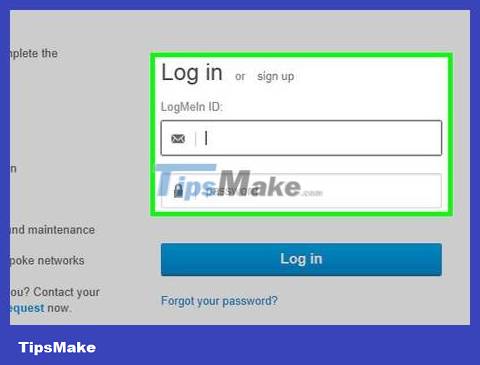
Sign up for a Hamachi account. Click the Sign up link in the upper right corner of the window, then enter your email in the "email" text box, type your password in the "password" text box, retype your password in the "retype password" box, and click Create account .
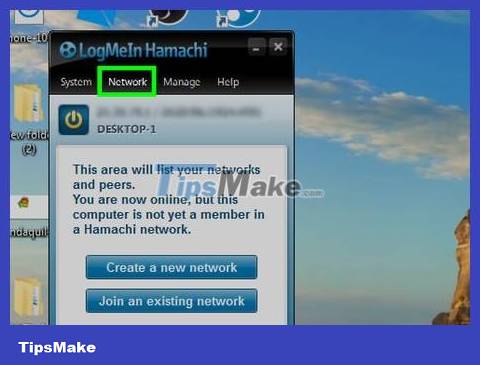
Click the Network tab . This tab is at the top of the Hamachi window. A drop-down menu will appear.

Click Create a new network… . It's in the drop-down menu. This is the step that displays the pop-up window.
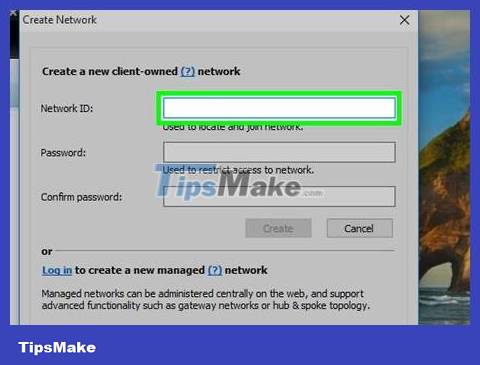
Enter the server name. In the "Network ID" text box, you can type whatever name you want for your server.
If you set a server name that is already in use by someone else, Hamachi will notify you that the name has been taken.
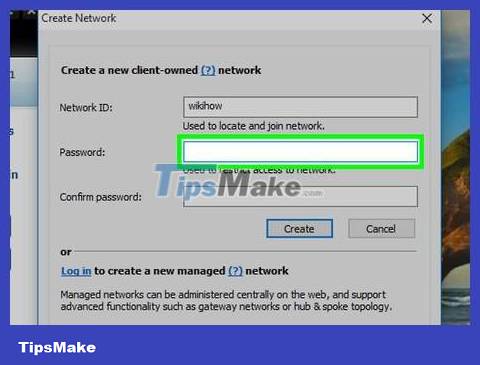
Enter the password for the server. Type the server password you want to set in the "Password" text box, then retype the password in the "Confirm password" text box.
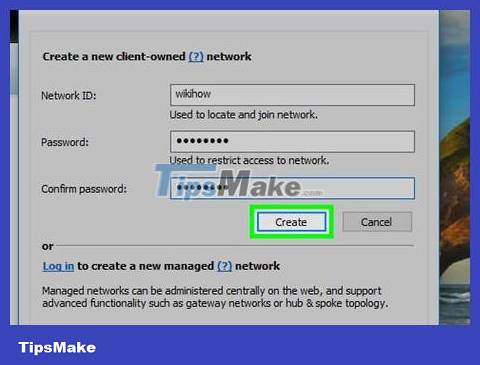
Click Create . This button is at the bottom of the window. This is the step to create the server.
Paste the Hamachi IP address into the server folder. Here's how to get the server to use Hamachi:
Right-click (or hold Control-click) the IP address at the top of the Hamachi window.
Click Copy IPv4 address
Rename the text file "server.properties" in the Minecraft server folder to "serverproperties".
Double-click the "serverproperties" file, then confirm or click the text editing application on your computer.
Click to the right of the "server-ip=" line.
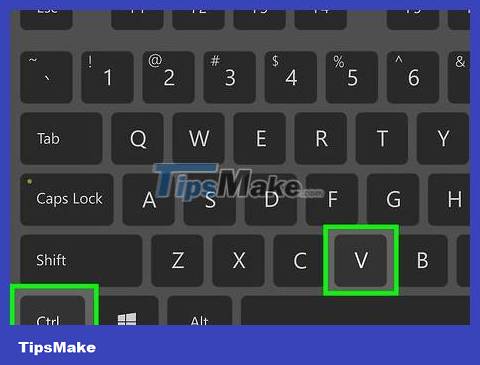
Press Ctrl+ V(on Windows) or ⌘ Command+ V(on Mac).
Save the file by pressing Ctrl+ Sor ⌘ Command+ S, then close the text editing program.
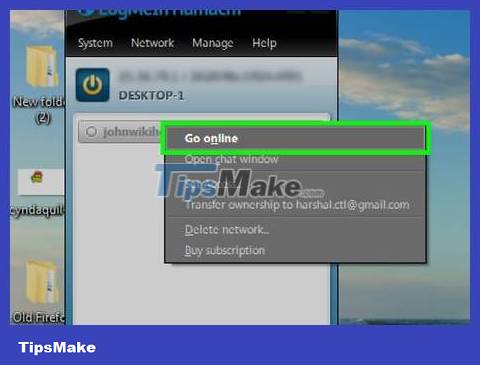
Switch to online status. Right-click (or hold Control-click) the server name, then click Go online in the drop-down menu.
If you see Go offline in the drop-down menu, the server is online.
Invite friends to the server. If you want to invite some friends to the server, they will need to download and install Hamachi before performing the following steps:
Open Hamachi.
Click Network
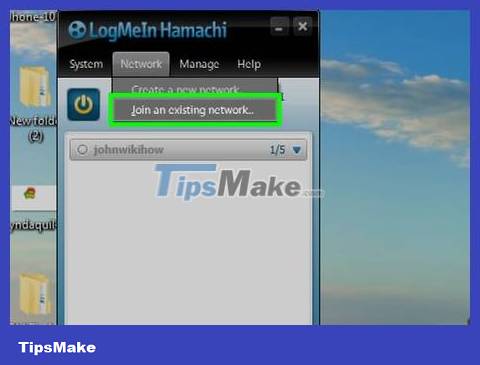
Click Join existing network.
Enter the server name and password in the "Network ID" and "Password" text fields respectively.
Click Join
Connect to the server

Run the server file. Double-click the Java server file in the Minecraft Server file. This is the step to open the command line window of the server file.
You also need to make sure that the Hamachi server is running before continuing.
To grant yourself admin rights, type /op username(where "username" is your Minecraft username) into the text field at the bottom of the server run window and press ↵ Enter.
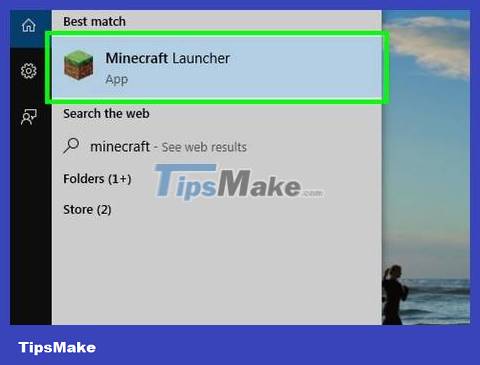
Open Minecraft. Open Minecraft Launcher by double-clicking or clicking the grass-shaped Minecraft icon, then clicking PLAY at the bottom of the window.

Click Multiplayer . This option is in the middle of the main menu.
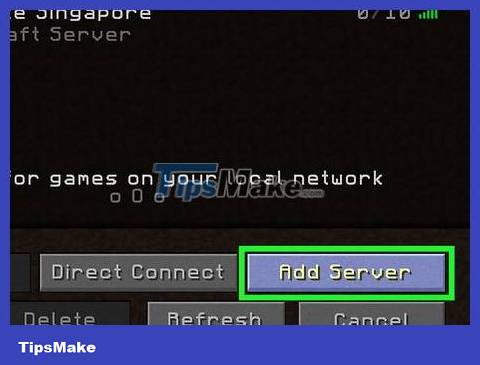
Click Add Server . You'll see this option at the bottom of the window.
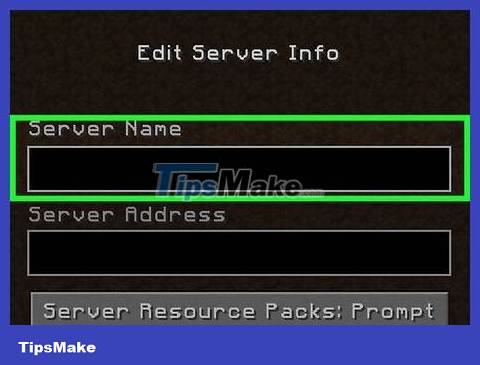
Enter your server name. In the "Server Name" text box, type the name of the server that appears in Hamachi.

Paste the server's address. Click the "Server Address" text box, then press Ctrl+ V(on Windows) or ⌘ Command+ V(on Mac). You will see the IPv4 address you copied earlier here.
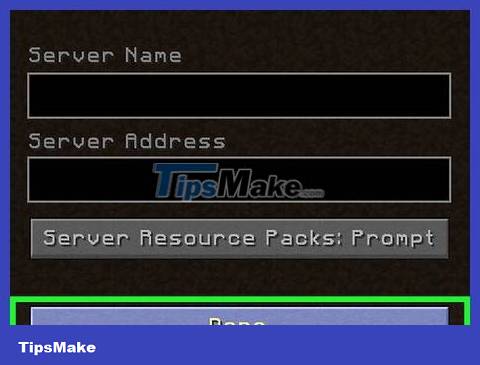
Click Done . This button is at the bottom of the window. This is the step that tells Minecraft to start searching for servers.
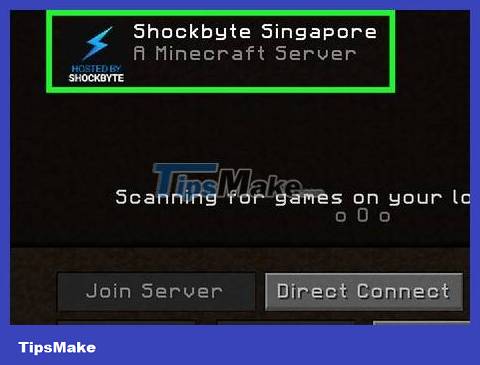
Server selection. When the server appears in the search results, click the server name once to select it.
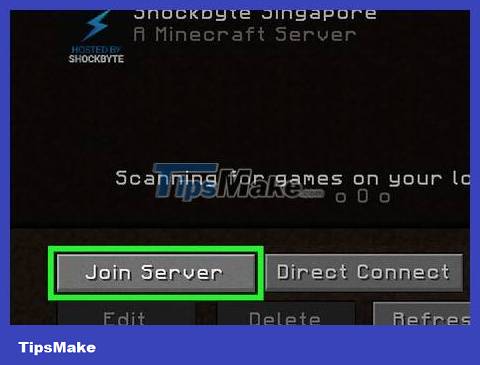
Click Join Server . This option is at the bottom of the window.

Wait for the server to load. Once the server is loaded, you will appear as a player in the world, from here you can start playing as normal.
You may be asked to enter your password before the world is finished loading. If asked, type the password you used to create the server when configuring Hamachi.