How to split columns in Word - Instructions on dividing columns in Word 2007, 2010, 2013, 2016
In order for your text to be scientifically presented and visually pleasing, splitting columns in the text is also a preferred text layout. The following article helps you divide columns in Word 2007, 2010, 2013, 2016.

Divide columns in the text ie you will divide the text content into multiple columns, the text will automatically write column 1 and then the next column. For example, divide the following text into 2 columns:
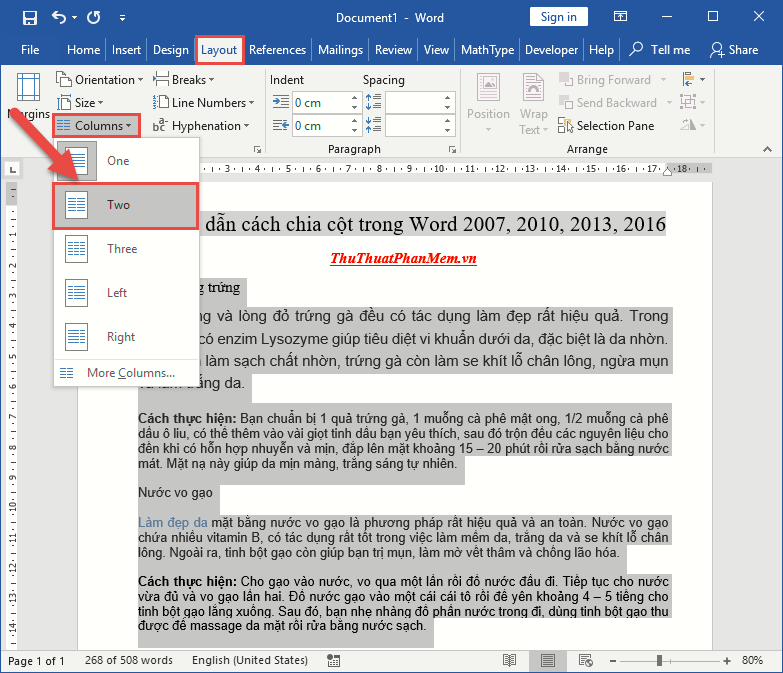
Select the text to divide the column -> on the Layout tab -> Columns -> select the value to split the column, for example, here should divide the column, select Two:
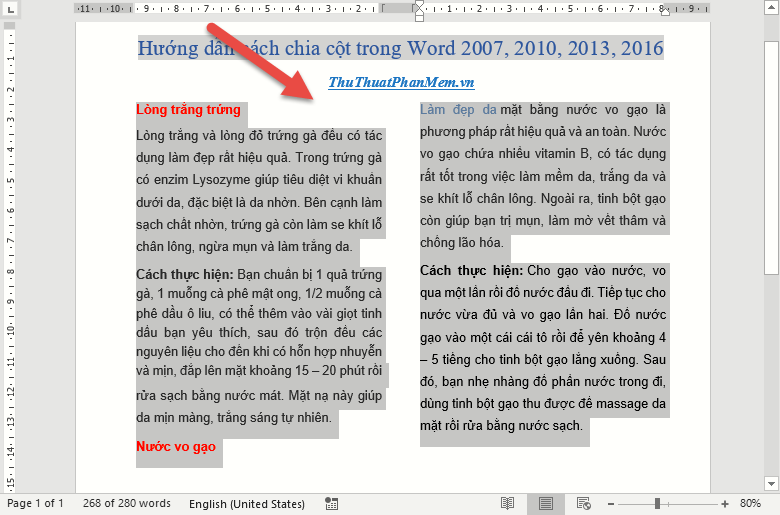
After selecting the number of columns, the text content is divided into 2 columns of equal width:
But Word shows the default dividing 3 columns (to the value of Three) if you want to split into more columns and split columns of different widths, with lines below you as follows:
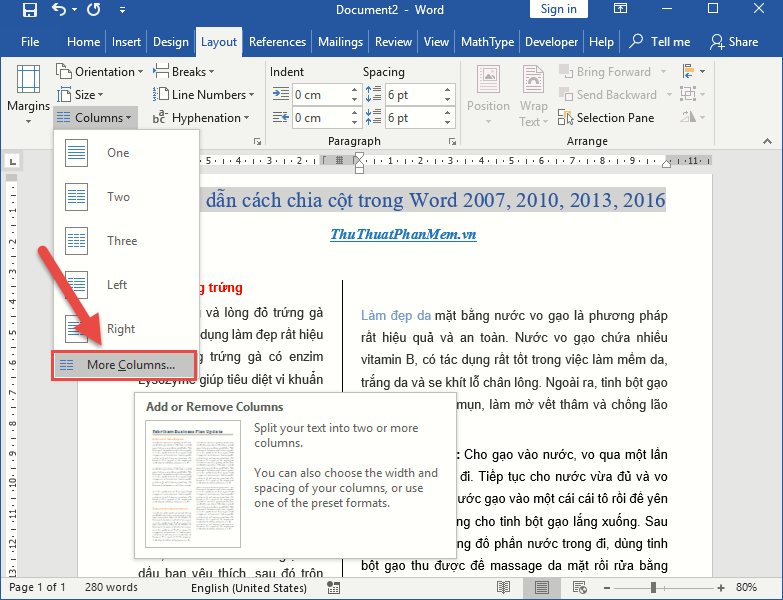
Step 1: Select the text to divide the column -> on the Layout tab -> Columns -> More Columns .
Step 2: A dialog box appears to select the number of columns to divide, change the value in the Number of Columns section:
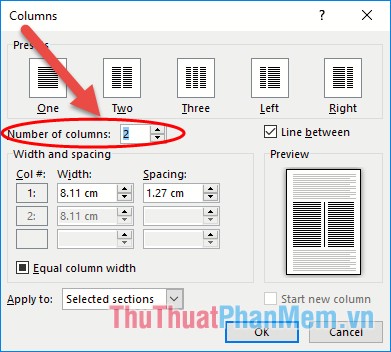
Step 3: To create a line between divided columns, select Line between:
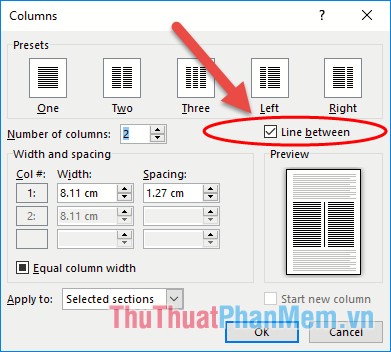
Step 4: To adjust the width of columns you deselect in Equal column width -> change the width of columns in Width , the distance between columns in Spacing -> click OK:

The results you have format the column display type and the width of the columns:
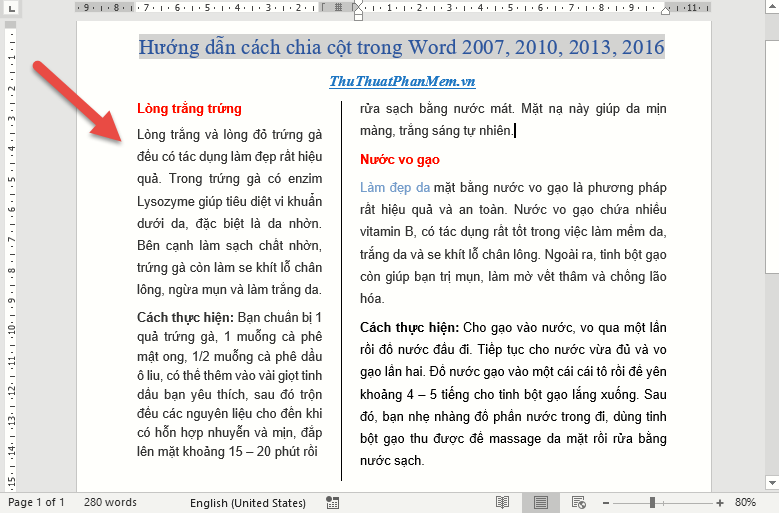
In case you want to convert the first 2 rows of column 2 to column 1 to divide 2 contents into 2 corresponding columns as shown:

You just need to put the mouse cursor at the last position of the line 2 to move -> click the Layout tab -> Breaks -> Columns:

As a result, you have moved the content to break into column 1, you just need to delete the blank line on the same column 2 to complete the transfer process:

In case you want to create large letters at the beginning of paragraphs to increase the aesthetics of the text, simply highlight the letters to be created on the Insert tab -> click the Drop Cap icon -> select the type of Drop Cap to create -> As a result, you created the first capital letter:

Also, if you want to leave multi-column mode, want to return to the original state with only 1 column, you just need to go to Layout -> Columns -> choose One:

So with some manipulations you can divide columns in versions of Word 2007, 2010, 2013 as well as word 2016. Wish you success!
You should read it
- ★ Word 2013 Complete Guide (Part 13): Divide the text column
- ★ How to split columns in Word and tips or handle columns in Word
- ★ How to align in Word - Instructions on how to align in Word 2007, 2010, 2013, 2016
- ★ Word 2016 Complete Guide (Part 13): Divide the text column
- ★ Repeat titles in Word - Instructions on how to repeat titles in Word 2007, 2010, 2013, 2016