How to create a folder in Outlook 2016 using the rule
Do you often receive emails in Outlook from a specific colleague or customer and want to automatically transfer those emails to a different Inbox folder for easy search? Read this article to learn how to create an email transfer folder in Outlook 2016 using the rule.
Table of Contents
Do you often receive emails in Outlook from a specific colleague or customer and want to automatically transfer those emails to a different Inbox folder for easy search? Read this article to learn how to create an email transfer folder in Outlook 2016 using the rule.
How to create a folder in Outlook 2016 using the rule
Step 1: First, select an email to receive the rule, then on the Home tab, click Rules

Step 2: Next, in the Rules drop-down menu, select Create Rule .

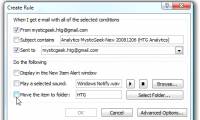
Step 3: A Create Rule window appears.

Step 4: Select the box ' From the sender's name ' and select the ' Move the item to folder ' box, then click 'Select Folder .' to specify the destination.
Note, if you check the "Sent to: only me" box , the email has multiple recipients, (ie emails sent to many people including you) will not enter the created directory.
Step 5: After clicking " Select Folder" , another window will appear. From here, select ' New .' to create a new folder.
Note: Be sure to save the folder in the inbox by selecting Inbox (it will be blue if selected).

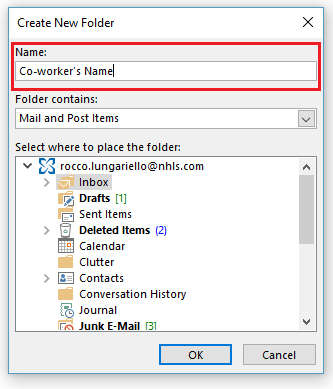
Step 6: Name the new folder, you should name the email sender or whatever name you want, then click OK .
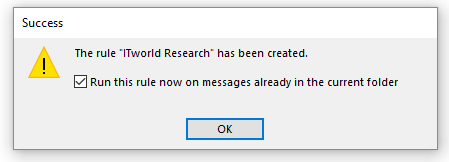
Step 7: Finally, a Success window displays a message that created the rule successfully. Check the box and then click OK .
Now, you can create as many rules as you like, to organize your mailbox more neatly.
I wish you all success!
See more:
- Create a Rule to move and store email to another folder in Outlook
- How to create a folder in Outlook 2013 by creating a rule
- List of Outlook 2016 shortcuts when working with Mail
Was this article helpful?
Your feedback helps us improve.
Related Articles
 How to create a folder in Outlook 2013 by creating a rule3 minutes read
 Create a Rule to move and store email to another folder in Outlook7 minutes read
 Steps to create a new folder in Microsoft Outlook3 minutes read
 Move daily email to a folder in Outlook2 minutes read
 How to change the startup directory on Outlook 20163 minutes read
 Instructions for basic steps to backup Outlook data9 minutes read
Reader Comments 0
Sign in with email or Google to join the discussion.