How to create a signature in Outlook
You often use Outlook to send and receive mail, so you want to create a signature in Outlook but you do not know how to create a signature in Outlook like? Then, please refer to the tutorial article below.

The article details how to create a signature in Outlook, please follow along.
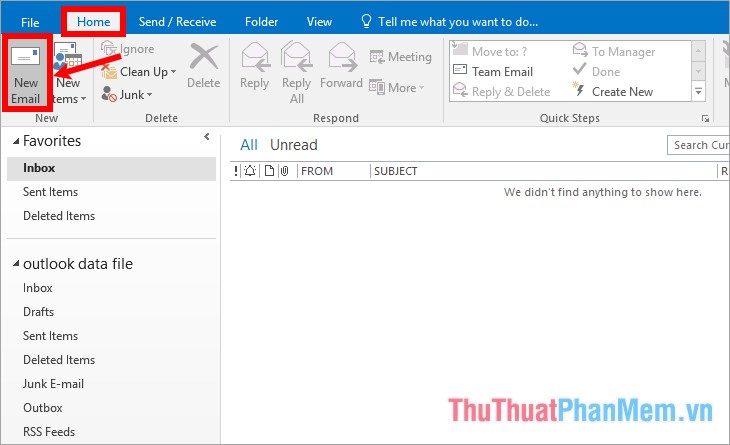
Step 1: First you need to open Outlook to create a signature, on the Outlook interface you select Home -> New Email.
Step 2: A new message window appears, select the Message tab -> Signature -> Signature.

Step 3: On the Signatures and Stationery window , select New in the E-mail Signature card .

Step 4: The New Signature dialog box appears, enter the signature name in the white box below Type a name for this signature and click OK .

Step 5 : Select the signature name to edit in Select signature to edit if you create many different signature names. In the Edit signature section, enter the content of the signature in the white box below. You can use the toolbar to change the font, font color, font size and text alignment for your signature.

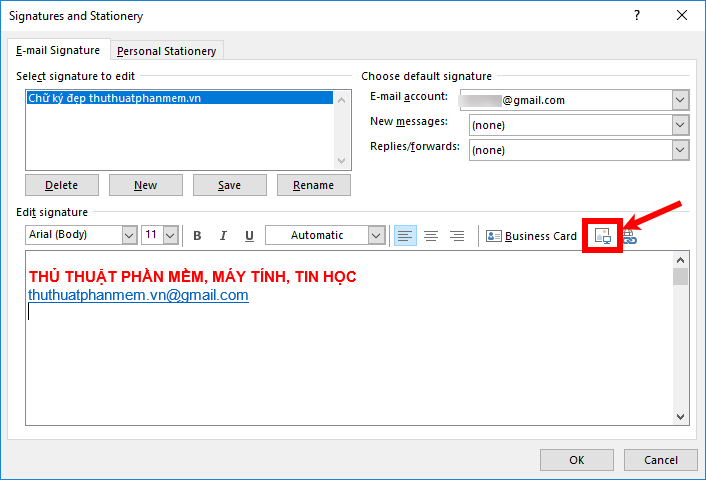
Step 6 : To insert images and logos into your signature, select the Insert Picture icon .
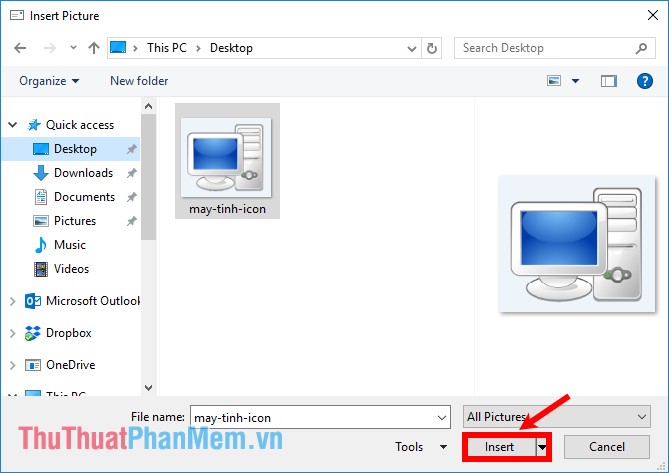
The Insert Picture dialog box appears, select the images and logos you want to add and click Insert to add images and logos to the signature.
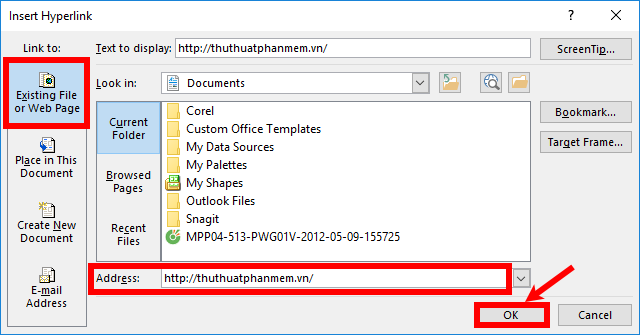
Step 7: If you want to insert hyperlinks in your signature, you can select the text you want to insert the link or if you want to insert the link into the image, then select the image, if you want to display the website address directly, then all you need to do is to place the mouse where you want to insert hyperlink. Next on the toolbar of the Edit signature, select the Insert Hyperlink icon .

The Insert Hyperlink dialog box appears, enter the website address in the Address box and click OK .
So you have inserted the link in the signature.
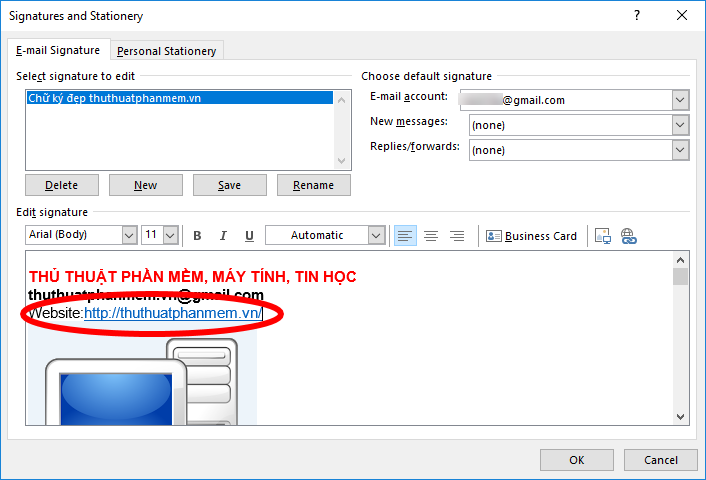
Step 8 : Set some other customizations.
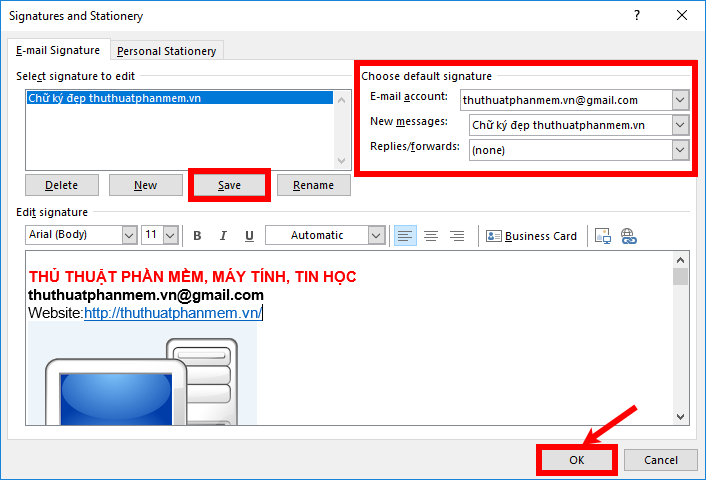
On the right in the Choose default signature section, you set some custom:
(1) E-mail account : here you select the email account you want to create a signature.
(2) New messages: this is the new mailbox, if you want to apply the signature to all messages when you compose a new message, then you choose the signature name. If not then you select (none).
(3) Replies / forwards : reply or forward, if you want to apply the signature to all messages when you press reply or forward then you choose the signature name. If not then you select (none).
After setting up, click Save and click OK to save the signature and save the settings.
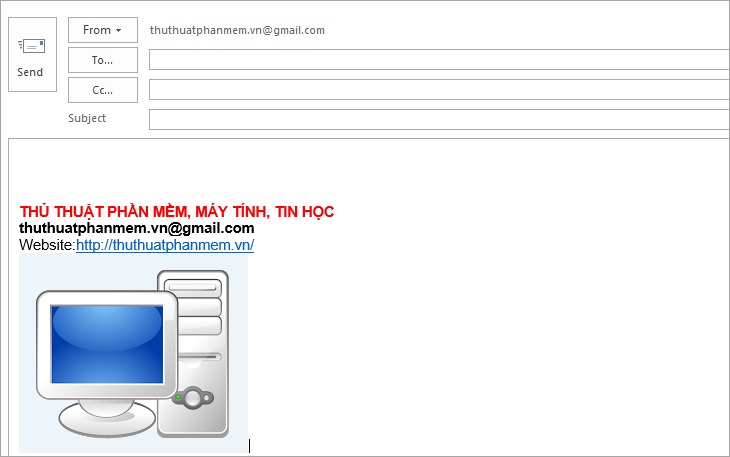
So if you set only New messages as the signature name, when opening a new message, the signature will be automatically inserted below the message.
If you select (none) in Replies / forwards as above, when you press reply or forward the message, the signature will not appear. You can set up more signatures by selecting Message -> Signature -> signature name.
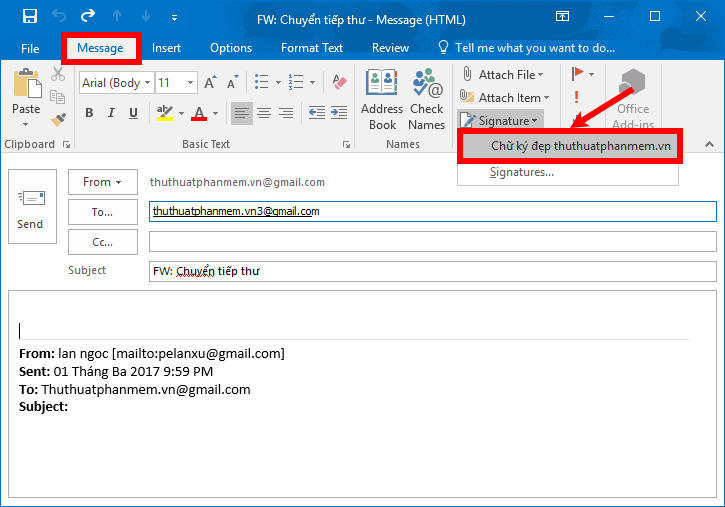
Such signatures will also be added to replies or forwards.
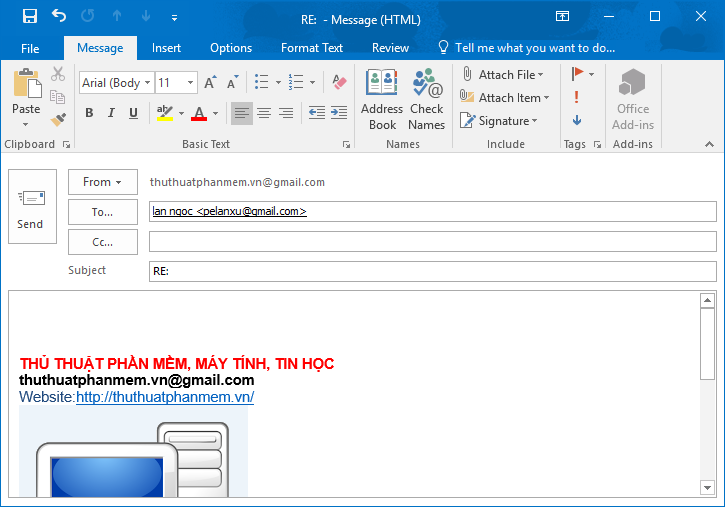
Thus, only with the basic steps you have created a signature in Outlook. Good luck!