Table of Contents
This article examines Outlook 20016 and explains the main developments, practical implications, and context readers should understand.
How to Create and Add New Email Signatures?
Step 1: Click Home on the toolbar.
Step 2: Click New Email in the top left corner of the screen.

Step 3: A new mailbox appears, select the Signature box on the Include tab.
Step 4: Select Signatures in the drop down bar.
Step 5: At Email signature, click New.

Step 6: In Type a name for this signature, enter the name of the signature.

Step 7: Click OK
Step 8: On the next screen, highlight the signature name in Select Signature to Edit.
Step 9: Large empty box under Edit Signaute, enter your name, title, company name, email address, social networking information or other personal information you want to appear in the new signature.
- Below Edit signature, there are different font options and custom formatting. You can create rich styles and rich borders to create a unique.
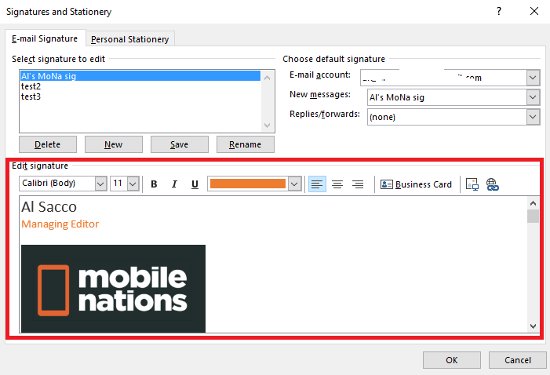
Step 10: Add a custom image like the company logo, determine where you want to insert the image and click the Insert picture icon.
Step 11: Select the image in your computer's file browser and select Insert.
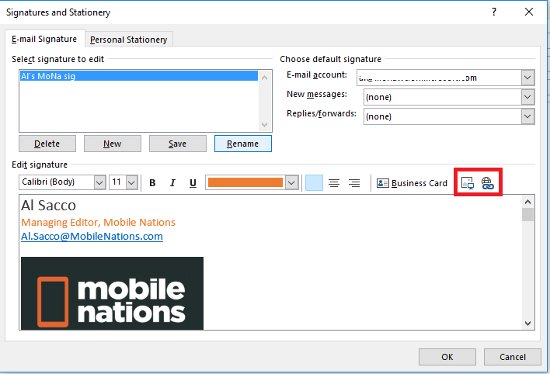 Step 12: To insert a website link into a photo or logo, or any word in your signature. First, highlight the image or text you want to insert.
Step 13: With the image selected, click the Insert Hyperlink icon.
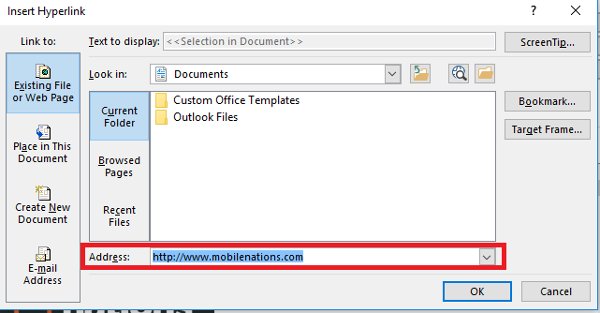
Step 14: New window appears, enter the full URL of the website in the last box. Then press OK.
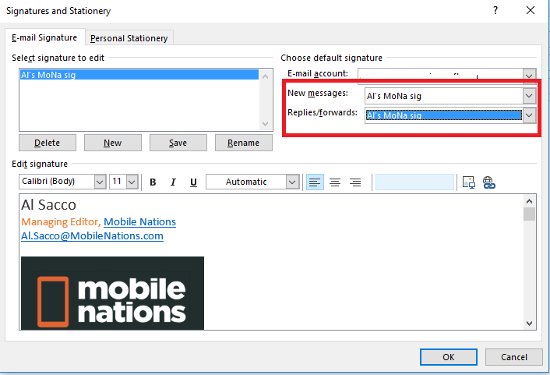
Step 15: Set customizations for New messages and Replies / Forward.
- If you want to apply a signature to all new messages, select the signature name from the drop-down menu of New messages.
- If you want to use for reply or forwarding messages, in the drop down menu select the signature name of Replies / Forward.
- Furthermore, if you do not want to apply a signature to a new message, reply message or forwarding, select (none) for the appropriate menu.
Step 16: After setup is complete, press the Save button below.
Step 17: Finally, select OK at Signatures and Stationary to save the changes.
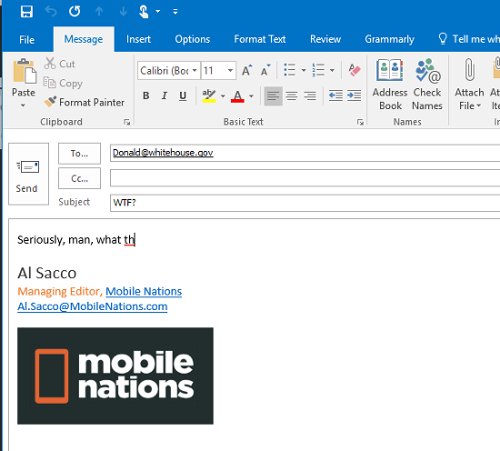
When opening a new mailbox, reply or forwarding, the signature automatically appears at the bottom of the page.
FAQ
How does Outlook 20016 work?
This article examines Outlook 20016 and explains the main developments, practical implications, and context readers should understand.
What should you prepare before using this method?
How to Create and Add New Email Signatures?.
What should you do if the process does not work as expected?
Step 1: Click Home on the toolbar.
Related Articles
 How to Add a Signature in Microsoft Outlook: Step-by-Step Guide3 minutes read
 How to Create a Signature in Outlook: Step-by-Step Guide5 minutes read
 How to Create a Signature in Outlook to Make Your Emails Look11 minutes read
 How to Create an Email Signature Generator Using ChatGPT8 minutes read
 How to Change a Signature in Outlook: Step-by-Step Guide3 minutes read
 How to Insert an Icon into a Link in an Outlook Signature2 minutes read
Reader Comments 0
Sign in with email or Google to join the discussion.