How to Create a Flowchart
Flowcharts are a great tool for breaking down difficult to understand processes into accessible concepts. Creating a successful flowchart requires you to simplify the information and present it in a clear, concise format. To create a...
Table of Contents
Method 1 of 3:
Design the Concept
-
 Write out your core concepts. The key to a successful flowchart is its readability. Make sure that your core concepts are simply stated, and that the progression from concept to concept is explained in simple steps.
- Make sure that you have a distinct end point for your chart planned. This will help make it easier to read.
-
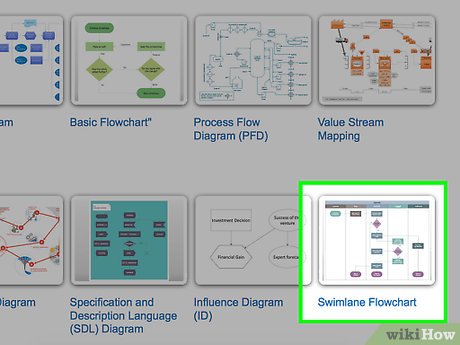 Decide between a standard or swimlane format. A standard flowchart breaks a process down by its key concepts and required actions. If you have multiple groups involved in the process outlined by the flowchart, a swimlane format can help show who needs to do what. Each flowchart step is placed in the 'Lane' for the group responsible for completing the task (Marketing, Sales, HR, etc.).
- Swimlanes are typically formatted horizontally or vertically. The starting point is the top-left corner of the chart.
- Swimlanes can be difficult to design if you have multiple concepts that have to travel back and forth between departments. This will lead to muddled charts.
-
 Layout your flowchart. Before you start designing your flowchart through software, draw it out on a scratch piece of paper. Place your starting concept at the top, and expand the chart out below it.
- Most flowcharts operate on a basic binary principle. At points in the process where variations occur, the reader is presented with a Yes or No question. The answer will guide the reader to the appropriate concept.
- Use different shapes to represent different types of concepts or decisions. Adding visual cues will help with readability and comprehension.
-
 Separate complex processes. If areas of your flowchart are becoming too dense, separate the subprocess into a new flowchart. Add a box as a reference to the subprocess in the original flowchart, and have the reader return to it when they get through the expanded section.
Method 2 of 3:
Create a Flowchart in Excel
-
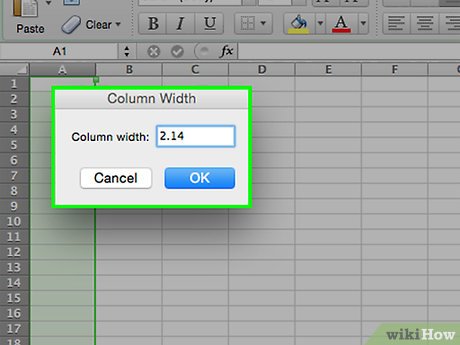 Create a grid. Excel spreadsheets are formatted by default to have cells that are wider than they are tall. To create a uniform flowchart, you will want to set the cell sizes to be square. To do this, click the Select All Cells button located in the top-left corner of the spreadsheet.
- Right-click on any column heading and select Column Width from the menu. Enter 2.14 into the field and press Enter. This will change all of the cells into perfect squares.
- Turn on Snap to Grid from the Align menu in the Layout or Page Layout tab. This will make any created objects adjust their size to match the grid, helping you to create uniform shapes.
-
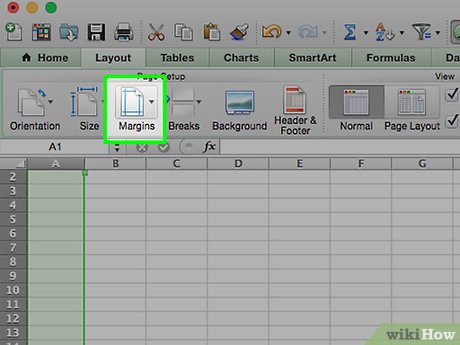 Set your margins. If you plan on exporting the spreadsheet to Word or another program, you will want to make sure that the margins line up. Use the Margins menu in the Page Layout or Layout tab to adjust the margins to match the software you are exporting to.
- You can adjust the orientation of the document (portrait or landscape) using the Orientation menu in the Layout tab. Flowcharts that go from left to right should be formatted for landscape.
-
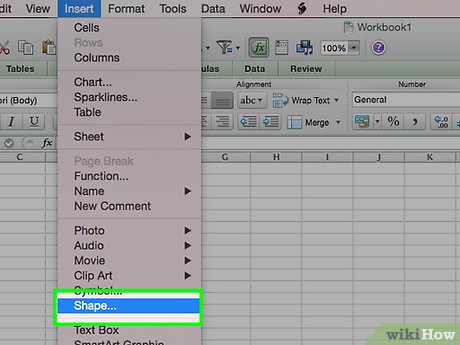 Create shapes. Click the Insert tab and select the Shapes menu. Select the shape that you want to create and then draw the size of the box using your mouse. Once you create a shape, you can change the color and outline style using the tools in the Format tab that opens.
 -
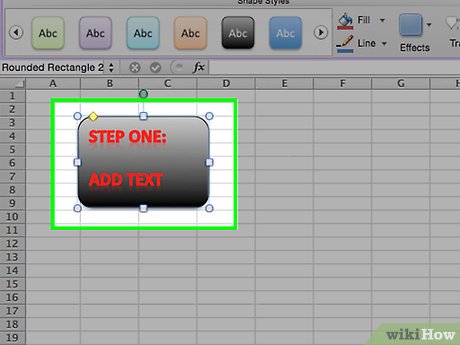 Add text. To add text to shapes, click on the center of the shape and start typing. You can adjust the font and style in the Home tab. Keep your text short and to the point, and ensure that it is easily readable.
 -
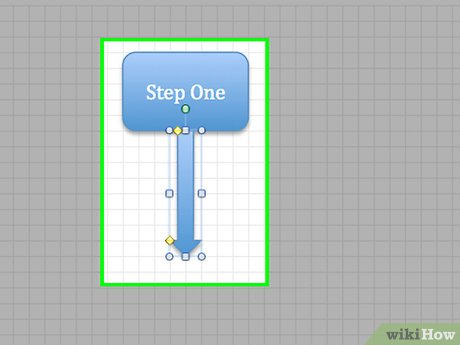
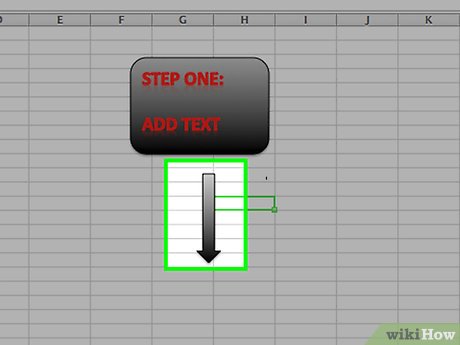 Connect the shapes. Open the Shapes menu from the Insert tab. Select the line style that most suits your needs. Hover your mouse over the first shape. You will see small red boxes appear on its edges that show where lines can be connected.
- Start the line in the red box, and drag it to the second shape.
- Red boxes will appear on the second shape. Place the endpoint of the line on one of these boxes.
- The shapes are now connected. If you move one, the line will stay connected, and adjust its angle appropriately.
- Add comments to connecting lines by inserting a Text Box, available from the Insert tab.
-
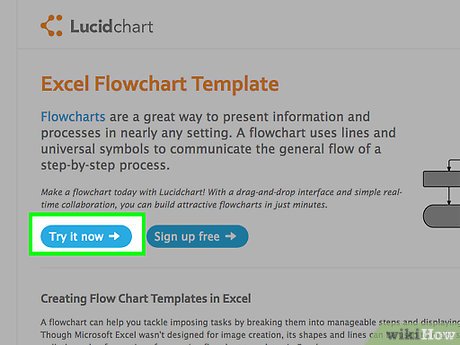 Download a template. Instead of creating a flowchart from scratch, there are a variety of Excel templates and wizards available both for free or for purchase online. Many of these take most of the work out of creating a flowchart.
Method 3 of 3:
Create a Flowchart in Word
-
 Insert a canvas. The easiest way to create a flowchart in Word is to first create a canvas. A canvas allows more freedom to work with shapes, and enables some features that aren't normally available, such as connecting lines.
- Click the Insert tab. Select the Shapes menu, and then click New Drawing Canvas at the bottom of the menu. A dotted outline of the canvas will appear in your document. You can adjust the size of the canvas by manipulating the corners.
-
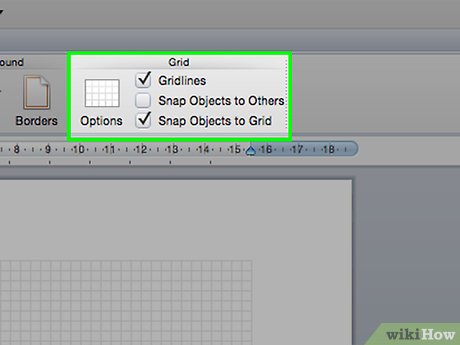 Enable the grid. Using a grid will allow you to create uniform shapes. To enable it, click on the canvas to make it active. In the Format tab, click Align and then select Grid Settings. Check the boxes for displaying gridlines and snapping objects.
 -
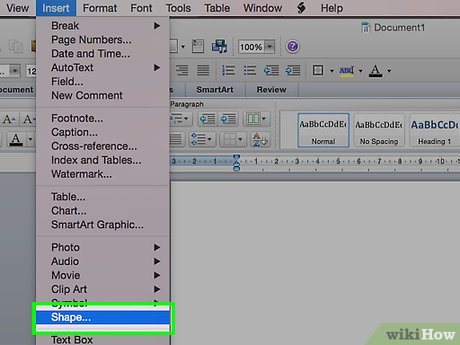
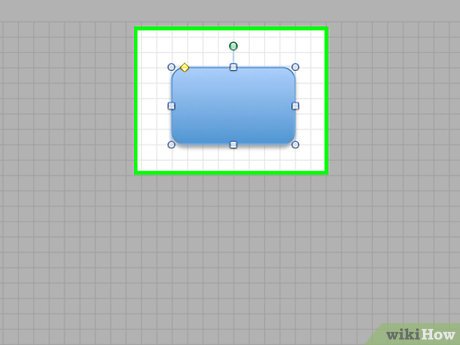 Create shapes. With the canvas active, select the Insert tab and click the Shapes menu. Select the shape you would like to add. Use your mouse to draw the shape to the size you would like. Once you create a shape, you can change the color and outline style using the tools in the Format tab that opens.
 -
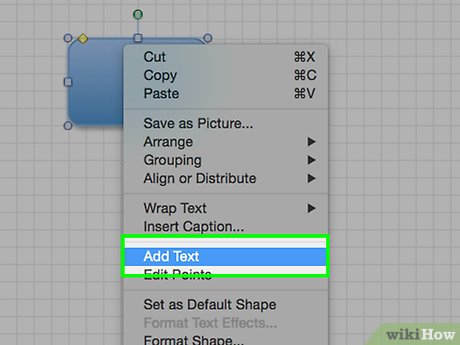 Add text. To add text to a shape in Word 2007, right-click on it and select Add Text from the menu. For Word 2010/2013, simply click the shape and start typing. You can adjust the font and style from the Home tab.
 -
 Connect the shapes. Open the Shapes menu from the Insert tab. Select the line style that most suits your needs. Hover your mouse over the first shape. You will see small boxes appear on its edges that show where lines can be connected.
- Start the line in the box, and drag it to the second shape.
- Small boxes will appear on the edges of the second shape. Place the endpoint of the line on one of these boxes.
- The shapes are now connected. If you move one, the line will stay connected, and adjust its angle appropriately.
- Add comments to connecting lines by inserting a Text Box, available from the Insert tab.
Flow Chart Help
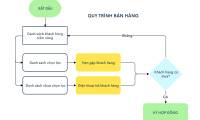
 Sample Flow Chart Plan
 Sample Flow Chart
 Flow Chart Tips and Tricks
Was this article helpful?
Your feedback helps us improve.
Related Articles
 The best flowchart patterns (flowcharts) for Microsoft Office8 minutes read
 10 best free diagramming tools for Windows8 minutes read
 How to draw flow charts in PowerPoint5 minutes read
 How to draw flow charts in Excel12 minutes read
 Instructions on how to draw diagrams in Word13 minutes read
 Startup drawing chart 'Made in Vietnam' attracts users from 165 countries5 minutes read
Reader Comments 0
Sign in with email or Google to join the discussion.