How to Convert Excel to PowerPoint
If you want to take data from an Excel spreadsheet and put it into a PowerPoint presentation, you can do so with built-in controls available in both programs. This wikiHow shows you how to put Excel data into PowerPoint slides using these...
Table of Contents
Method 1 of 2:
Copying and Pasting Excel Data into PowerPoint
-
 Open an Excel file you want to use. Open your file explorer and navigate to the folder where your file is stored.
 -
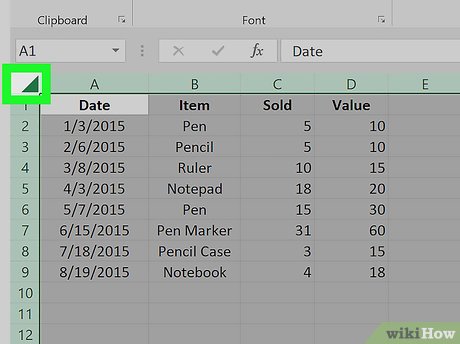 Click on the box in the top left to select data. You can select all of the data or only the data you want.
 -
 Click Edit and select Copy to copy the data.
 -
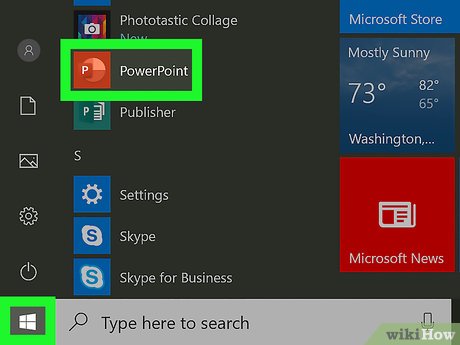 Open Microsoft PowerPoint. You can minimize the Excel file's window or exit Excel and navigate to PowerPoint.
 -
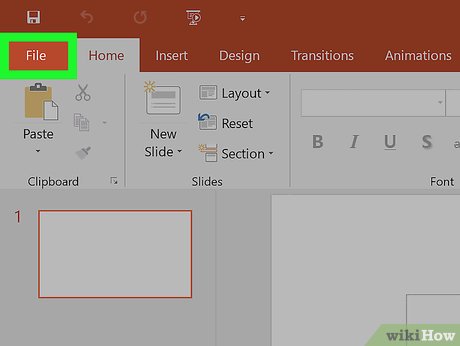 Click File in the top left. This pulls up a drop-down list of more options for that PowerPoint file.
 -
 Click New. You can also open an existing presentation.
 -
 Click on the slide that you want to use. You can also format the slide for displaying data by picking the slide template.
 -
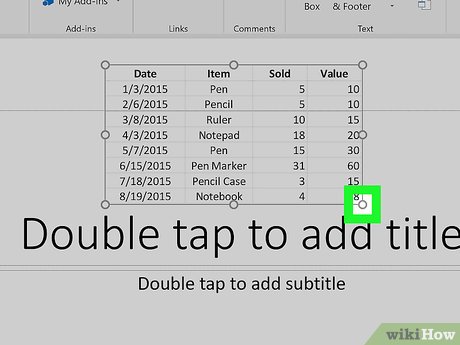
 Right click and select Paste. This pastes the Excel data into your chosen slide.
 -
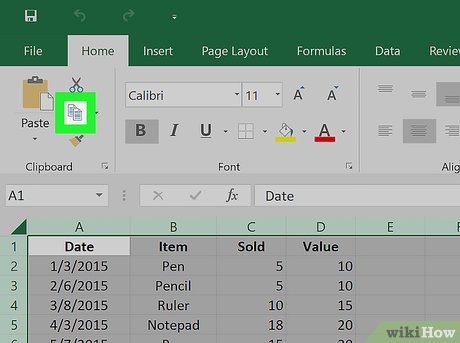
 Click on the clipboard icon in the bottom right. This changes presentation options for your slide.
 -
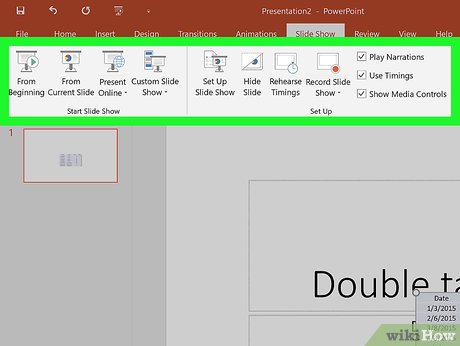 Select a mode for presentation from the drop-down menu. Save your work after you're satisfied with the changes you've made.
Method 2 of 2:
Inserting an Excel Object into PowerPoint
-
 Open your PowerPoint file. Navigate to the folder where it's saved from your file explorer.
 -
 Click Insert in the menu bar.
 -
 Select Object.
 -
 Select Create from file.
 -
 Locate your Excel file. Once you've opened the dialog window, navigate to the Excel file you want to insert into your PowerPoint slide.
 -
 Select your file and click Insert. This will insert the file into the slide you've selected.
 -
 Resize and rearrange the spreadsheet snapshot as desired. You can grab the edges to make it bigger or smaller, or click and drag to move it. When you double-click on the actual spreadsheet, it'll open the file in Excel.
Was this article helpful?
Your feedback helps us improve.
Related Articles
 Simple way to convert Excel files to PDF7 minutes read
 How to convert PDF files to PowerPoint7 minutes read
 How to convert PowerPoint to PDF on iPhone3 minutes read
 How to create an effect for an Excel chart in PowerPoint9 minutes read
 How to convert Google Slides to PowerPoint2 minutes read
 How to convert a Keynote presentation to PowerPoint5 minutes read
Reader Comments 0
Sign in with email or Google to join the discussion.