Table of Contents
Understanding PowerPoint 2016 requires more than a headline. The overview below breaks down the key facts, changes, and user impact.
How to Insert a Shape into a Slide
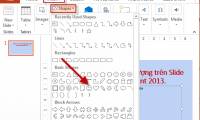
1. Select the Insert tab, and then click the Shapes command in the Illustrations group. A drop-down menu containing shapes will appear.
2. Select the desired shape.
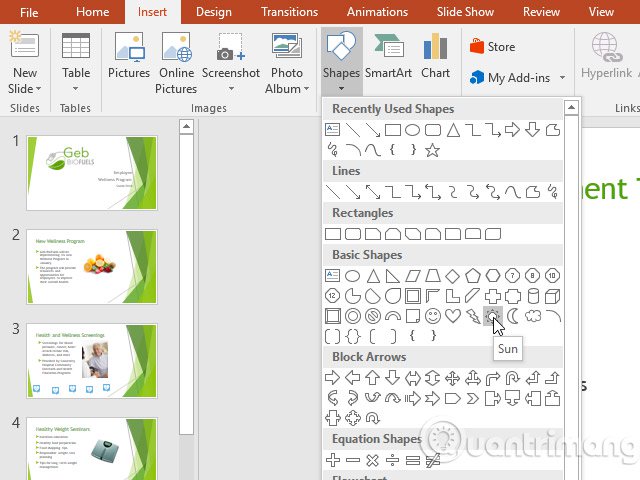
3. Click and drag to the desired position to add the shape to the slide.

Modify the Shape or Text Box
When clicking on a shape or text box, the handles will appear allowing you to manipulate the shape. There are several types of handles.
- Size adjustment handle: Click and drag the handle to adjust the size until the shape or text box has the desired size. You can use the size handle at the corners to change the height and width at the same time.

- Handle rotate: Click and drag handle rotate to rotate the shape.

- Handle Yellow: Some shapes with one or more Yellow handles can be used to customize the shape. For example, with the sun image, you can change its ratio.

In addition to resizing, customizing and rotating shapes, you can align, arrange and group them together.
Formats and Text Boxes
PowerPoint allows you to modify shapes and text boxes in a variety of ways so that you can adjust them to suit your project. You can change the shape and text box into different shapes, style and color formats, as well as add effects to them.
How to Change the Shape Shape
Choose a style for the shape that allows you to apply preset colors and effects to quickly change the appearance of the shape or text box. These options will depend on the color, which is now part of the theme in use.
1. Select the shape or text box you want to change.
2. On the Format tab, click the More drop-down arrow in the Shape Styles group.

3. A drop-down menu containing styles will appear. Please choose the type you want to use.
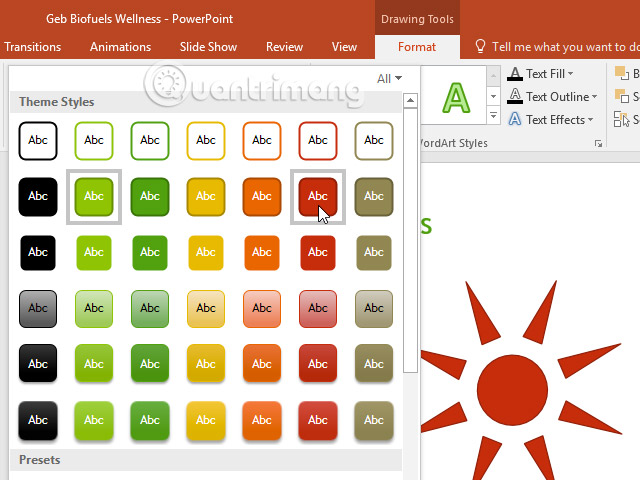
4. The shape or text box will appear in the selected style.
How to Change the Shape Fill Color
1. Select the shape or text box you want to change.
2. On the Format tab, click the Shape Fill drop-down arrow. The Shape Fill menu will appear.
3. Move the mouse over different colors to select the color you want to use. To see more color options, select More Fill Colors.

4. The shape or text box will appear with the selected color.
If you want to use another Fill type, select Gradient or Texture from the drop-down menu. You can also select No Fill to make it transparent.
How to Change Outline Shapes
1. Select the shape or text box you want to change.
2. On the Format tab, click the Shape Outline drop-down arrow. Menu Shape Outline will appear.
3. Select the color you want to use. If you want to make the outline transparent, select No Outline.

4. The shape or text box will appear with the selected outline color.
From the drop-down menu, you can change the color, thickness of the outline and choose the type of dashed LINE or not.

How to Add Effects to Shapes
1. Select the shape or text box you want to change.
2. On the Format tab, click the drop-down Shape Effects arrow. In the menu that appears, hover over the type of effect you want to add, then select the desired preset effects.
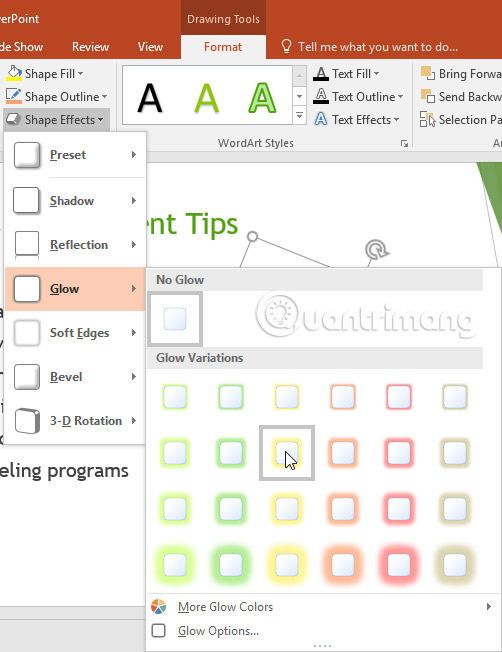
3. The shape will appear with the selected effect.
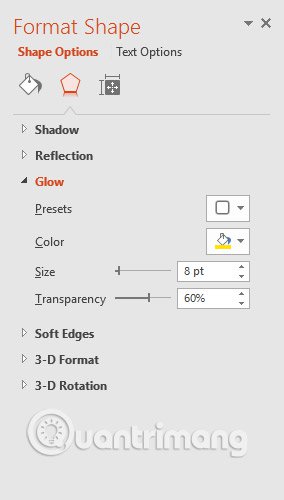
To continue adjusting the effect for the shape, select Options at the bottom of each menu. The Format Shape window will appear, allowing you to customize the effects.
How to Change to Another Shape
1. Select the shape or text box you want to change. The Format tab will appear.
2. On the Format tab, click the Edit Shape command. In the menu that appears, hover over Change Shape and select the desired shape.
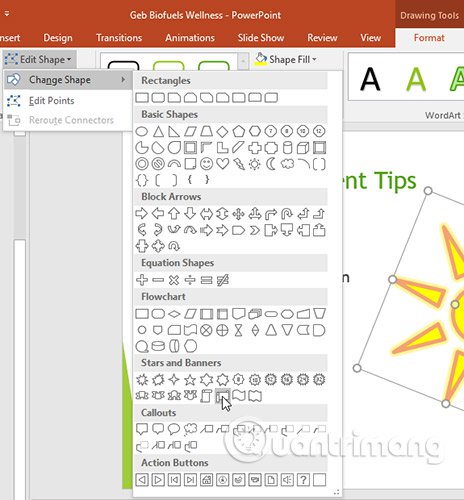
3. The new shape will appear.

If desired, you can enter text into the shape. When the shape appears in the document, you just need to start typing the text. Then, you can use formatting options on the Home tab to change the font, font size or color of the text.

Good luck!
- PowerPoint file recovery has not been saved yet
- How to convert PDF to Word without font errors
- Slide presentation effects
FAQ
What is the main topic of Manipulate Shapes in PowerPoint 2016?
Understanding PowerPoint 2016 requires more than a headline.
Why is PowerPoint 2016 important?
The overview below breaks down the key facts, changes, and user impact.
What should readers remember about PowerPoint 2016?
How to Insert a Shape into a Slide 1.
Related Articles
 Shapes Powerpoint: How to Include Shapes in Powerpoint3 minutes read
 PowerPoint 2019 (Part 16): Shapes: Explained7 minutes read
 PowerPoint 2016: Working with Shapes8 minutes read
 How to Cut Photos Using Microsoft PowerPoint4 minutes read
 Summary of Useful Shortcuts in PowerPoint7 minutes read
 Insert and Draw Shapes on Slide in PowerPoint4 minutes read
Reader Comments 0
Sign in with email or Google to join the discussion.