Table of Contents
This guide explains how to convert Excel Files to CSV, with clear steps, practical tips, and important checks before you begin.
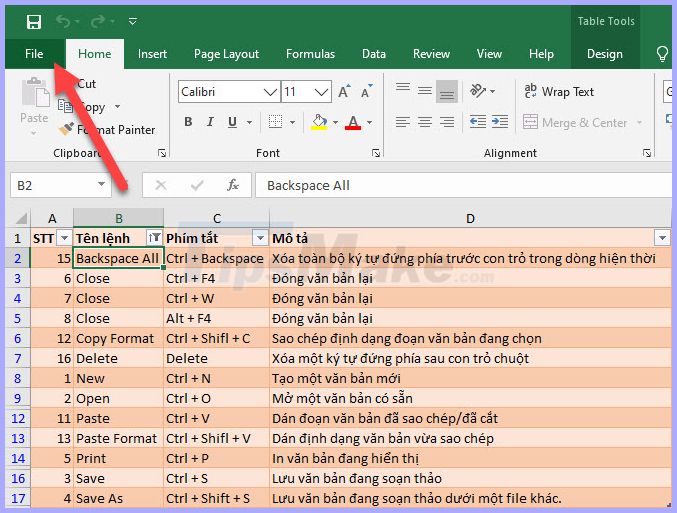
Next, click open the File ribbon on the toolbar.
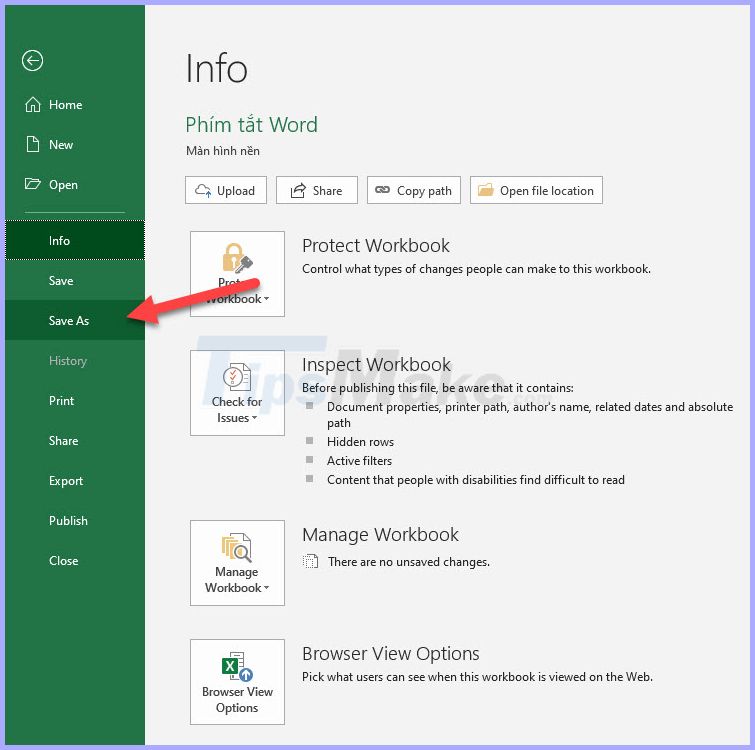
Continue to click on the Save As line in the File list displayed.
Or you can use the F12 key to be able to use the same function through the above steps.
When saving a new file, click Save as type and select the file with different CSV extensions. Inside:
- Comma delimited : Save Excel file as comma-separated text for use on Windows.
- Macintosh : Save Excel files as comma-separated text for use on Mac.
- MS-DOS : Save Excel files as comma-separated text for use on MS-DOS.

After you confirm saving the file as a CSV file, Excel will remind you of some of the CSV file (can not be opened in workbooks), click OK to confirm saving the file.

Continue to click OK to confirm saving the file.

So you've completed the conversion process to the desired CSV file.
Thank you for reading our article Tipsmake. com on how to convert Excel files to CSV. Hopefully, through this article, you can convert your Excel file to CSV. Good luck!
FAQ
What should I know about Convert Excel Files to CSV?
Focus on the key features, requirements, limitations, and practical use cases explained in this guide.
How do I get the best results with Convert Excel Files to CSV?
Follow the recommended steps, use current software or information, confirm compatibility, and review settings before major changes.
Are there any risks or limitations?
Potential limitations depend on compatibility, data quality, cost, privacy, support, and how the product or method is used.
Related Articles
 Simple Way to Convert Excel Files to PDF: Exel to PDF8 minutes read
 Simple Way to Convert Excel Files to PDF - Convert Directly or9 minutes read
 Convert Csv to Xls: How to Convert Csv Files to Excel in Bulk6 minutes read
 How to Convert Excel Files to PDF Online Using Google Drive2 minutes read
 How to Convert Excel Files to PDF for Free, Extremely Simple5 minutes read
 How to Convert PDF Files to Excel Keeps Formatting: PDF to Excel2 minutes read
Reader Comments 0
Sign in with email or Google to join the discussion.