How to check and monitor RAM status on Windows 10
If you see that your computer shows signs of reduced performance, frequently encounters blue screen errors, then most likely the problem comes from RAM. Therefore, you need to check and monitor the status of RAM like.

Use Windows Memory Diagnostic tool to check RAM
The RAM modules fitted to the computer will directly affect the overall performance of the system. All applications, programs and services that do not run on the hard drive will be executed in RAM. Therefore, it is an important component of the PC.
Over time, RAM can also malfunction, especially when you use your computer in the wrong way, or do not ensure the best conditions such as suitable temperature and humidity.
That's why you need to use the Memory Diagnostic tool to check RAM regularly, so that you can promptly detect errors that occur on RAM. This utility comes pre-installed in Windows 10, so you don't need to download or install anything else.
Step 1: Type 'memory diagnostic' in the Windows search box, when the application appears in the results, open it.

Step 2: Select Restart now and check for problems if you're ready to restart your computer. Otherwise, select Check for problems the next time I start my computer when you have unfinished business and need to save them.
Now, restart the machine.

Step 3: When the computer restarts, the diagnostic process will start automatically, which will take a few minutes to complete. After that, will get results about problems with RAM. For more extensive results, press F1 and switch the diagnostic mode from Standard to Extended.
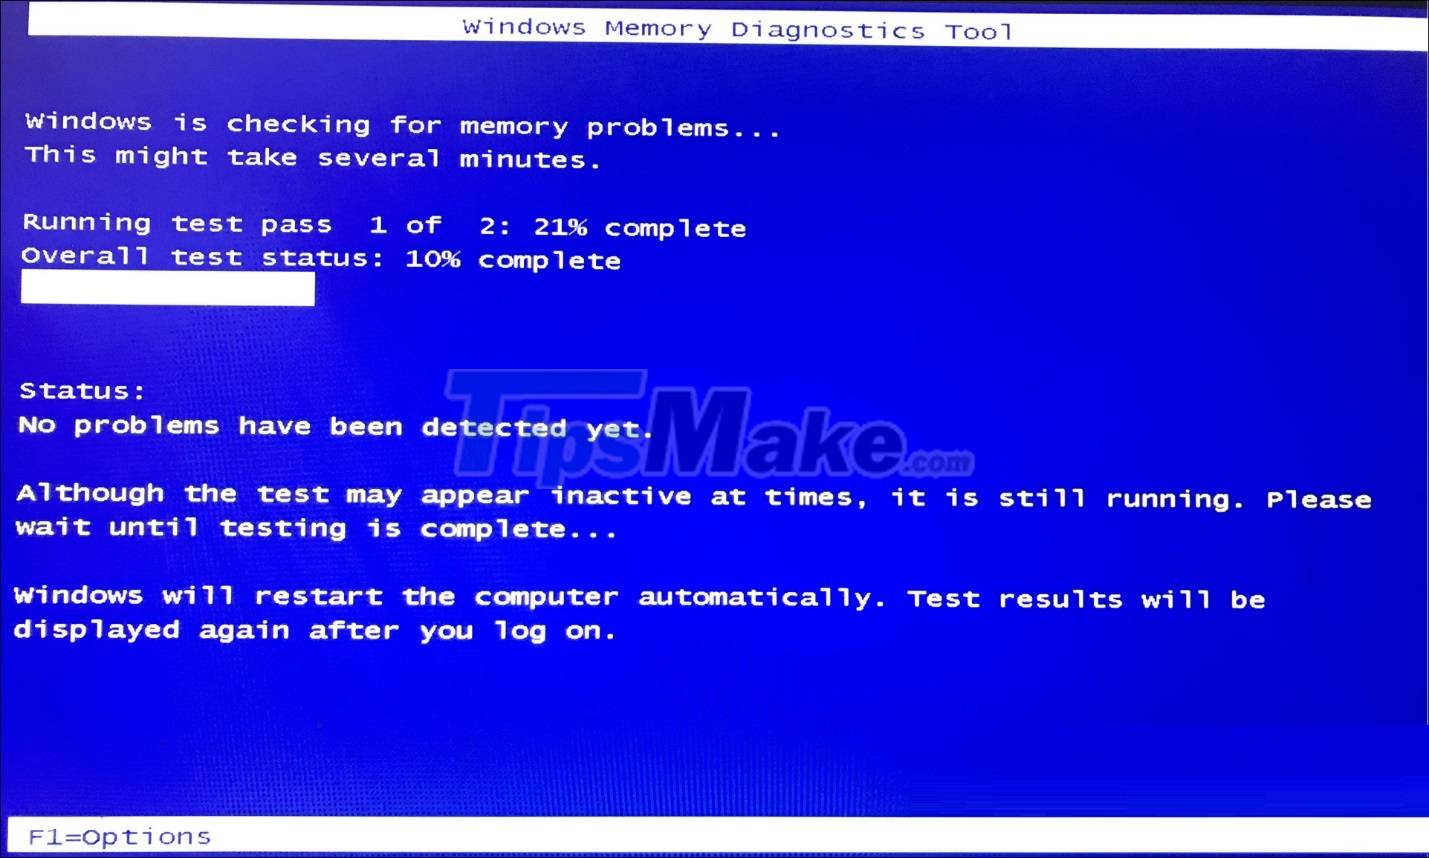
Step 4: After the test is complete, the machine will boot into Windows and you can see the diagnostic results. However, the results will only be displayed when the RAM is indeed at fault. Otherwise you will just get the message 'There were no problems found'.
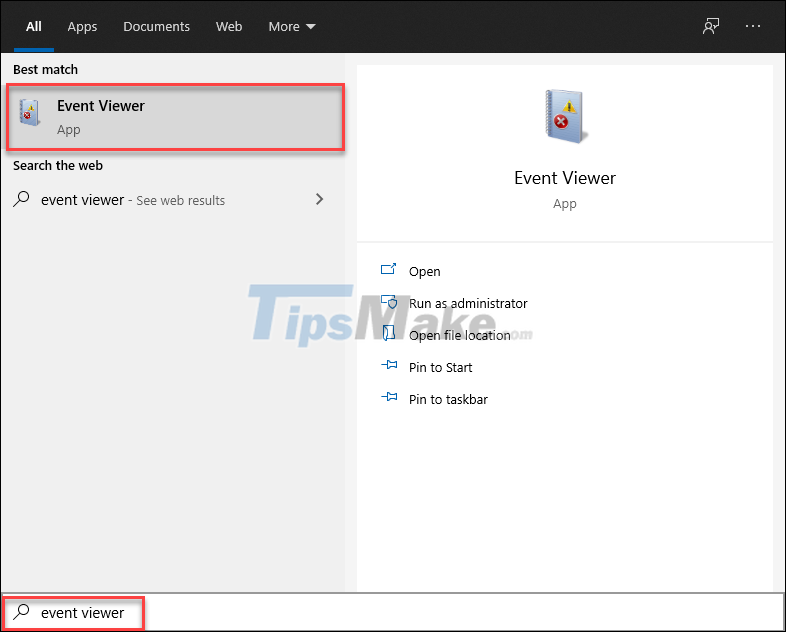
If you still want to see the results manually, use the Event Viewer, just search for 'event viewer' in the Windows search and open this application.
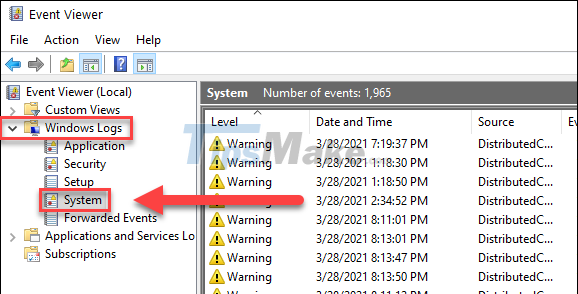
Step 5: In the left pane, navigate to Windows Logs >> System.
Step 6: In the middle pane, look for activities whose source is MemoryDiagnostics-Results.
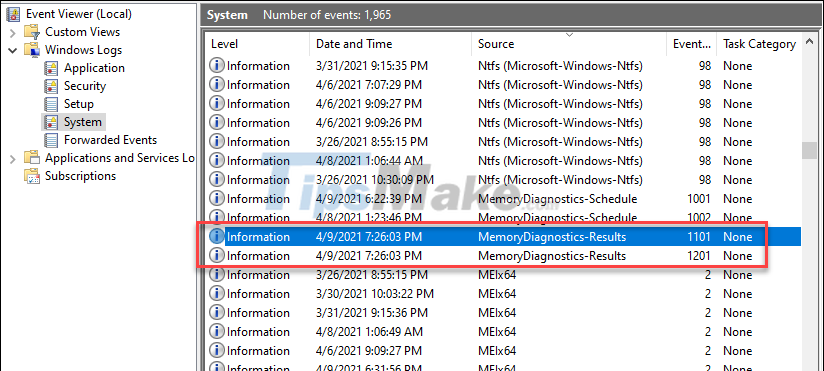
Step 7: In the information section, you can find more detailed results of the diagnostic scan.
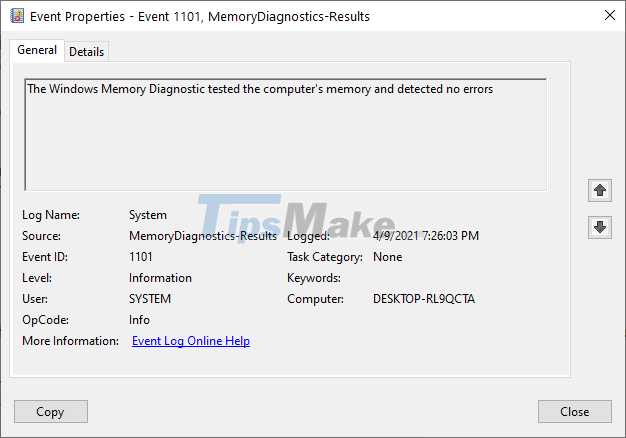
You can also switch from the General tab to the Details tab to view more information about the test results.
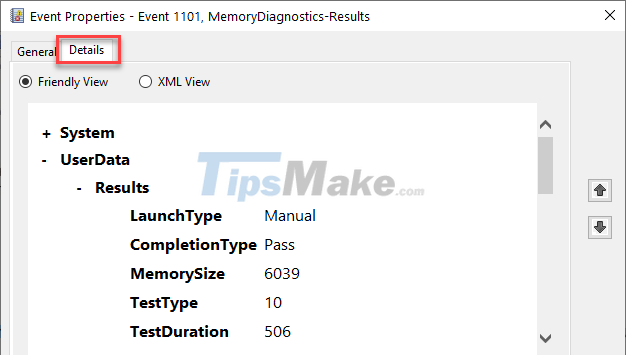
Since my RAM has no faulty parts and is working properly, the result does not show any errors. If you find an error, contact the service center for the best support.
Conclude
Sometimes, simply removing the RAM and cleaning the RAM pins and ports again is enough to fix the PC problem. However, you should still monitor the condition of your RAM regularly so you can take the optimal remedy.
You should read it
- ★ Steps to check computer configuration on Windows 11
- ★ Steps to use Windows PC Health Check, check whether the computer can install Windows 11 or not
- ★ How to check the copyright of Windows 11
- ★ 2 ways to check RAM and check RAM errors on the computer with the highest accuracy rate
- ★ 4 ways to check Windows 10 system configuration details