Steps to Enable Auto Backup on Windows 10
Usually to back up the operating system, computer users often use the solution to create a Ghost version to 'package' the current Windows status and use it for recovery when there is a problem.
However, the Ghost solution is quite time-consuming and if you carelessly you can damage a hard drive partition if you choose the wrong partition to extract the ghost file.
For more convenience, Microsoft has built-in Windows backup and restore (Backup and Restore) feature to quickly back up data, as well as system status at a certain point in time, after that restores when needed.

In general, this feature works somewhat better than System Restore Point because you can be proactive in choosing storage partitions, as well as control the ability to automatically backup. If you are interested, here are some suggestions on how to use it.
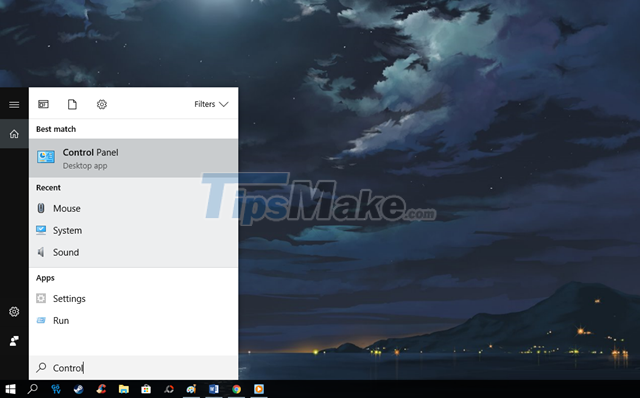
Step 1: Enter the keyword 'Control' into Cortana and click on the Control Panel result.
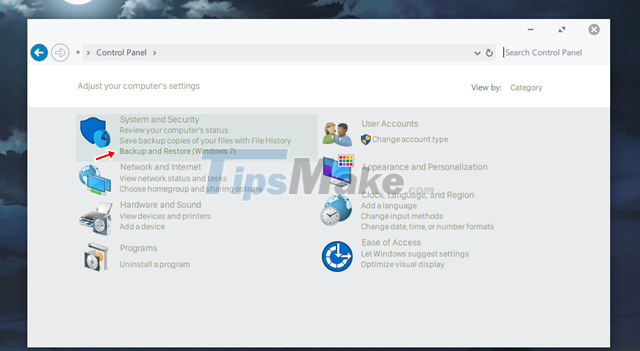
Step 2: Find and click the 'Backup and Restore (Windows 7)' option in the System and Security group.

Step 3: Click the 'Set up backup' option.

Step 4: Wait a few seconds for this feature to start. When done, the window to select the partition to store the backups will appear. Click on the partition you want to 'select the gold deposit', then click Next to go to the next step.

Step 5: Check the 'Let me choose' option box to be more proactive in choosing what will be backed up yourself.
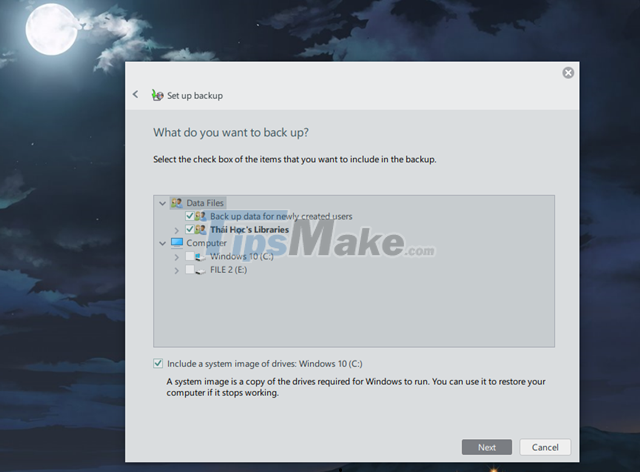
Step 6: Go to the next step, check the data types, as well as select the partition to be backed up.

Step 7: Next step, click on the 'Change schedule' option.

And proceed to set the time Wndows automatically activates data backup from your settings.
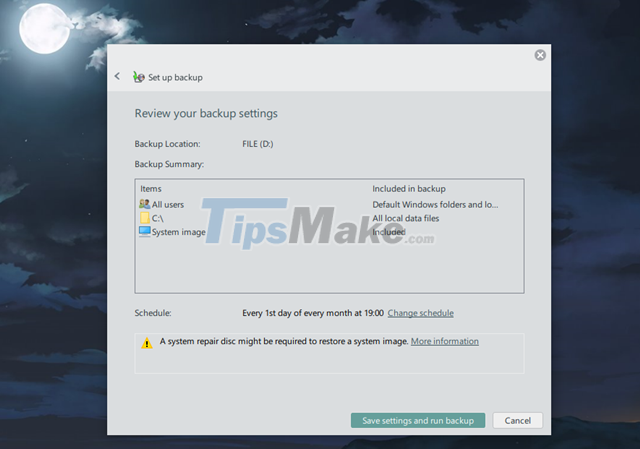
Step 8: Once everything is in place according to your settings, simply click on 'Save settings and run backup' to save and allow the backup feature to launch.
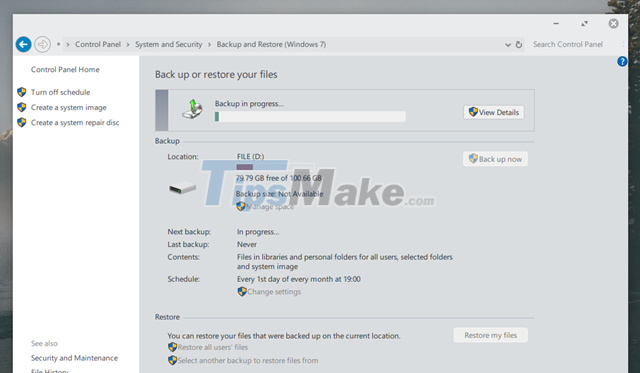
Backup is in progress.
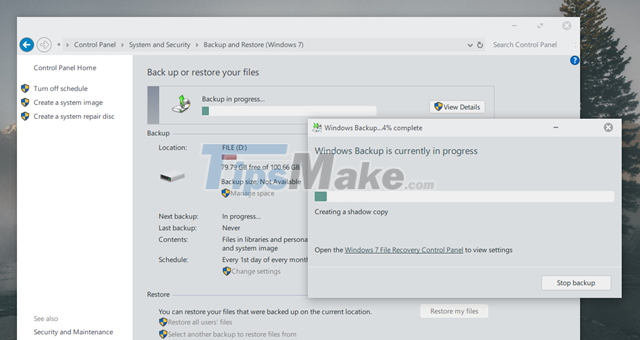
You can click 'View Details' to review the process in detail.

When you need to restore, just go to 'Backup and Restore (Windows 7)', click the 'Restore my files' option and choose when to restore backed up.
Very simple and useful, right?
Was this article helpful?
Your feedback helps us improve.
Related Articles
 Instructions on how to set up Microsoft Word to create backups yourself4 minutes read
 How to enable Auto Color Management for applications in Windows 112 minutes read
 How to enable automatic backup of Registry on Windows 105 minutes read
 4 ways to manage the process of Backup Windows Server 2008 on multiple servers7 minutes read
 How to set YouTube to auto-rotate on Samsung phones2 minutes read
 Steps to enable TPM 2.0 to install WINdows 115 minutes read
Reader Comments 0
Sign in with email or Google to join the discussion.