How to adjust light and dark in photoshop
Color correction, light and dark in Photoshop are advanced skills and you must have a good color perception to create a picture that you like.
In the article below, TipsMake introduces readers to the most simple and effective ways to adjust the light and dark in Photoshop. Invite readers to follow along.
1. Lighten and darken with Blending Mode
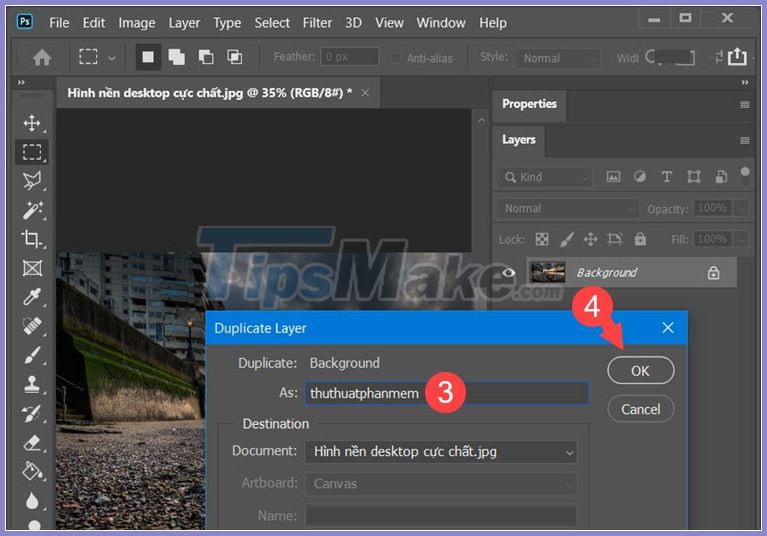
Step 1: You right click on the Background layer (1) => Duplicate Layer . (2) .

Next, you name the new layer (3) => OK (4) .
Step 2: Click on the Blend mode (1) and choose a suitable color blending style (2) . Depending on the color of the image, you can choose a suitable color blend. Like the example below, the Screen color blends will be brighter and the Soft Light and Hard Light blends darken the image.

After the color blending is complete, you can Save the image again.

2. Lighten and darken with Brightness / Contrast
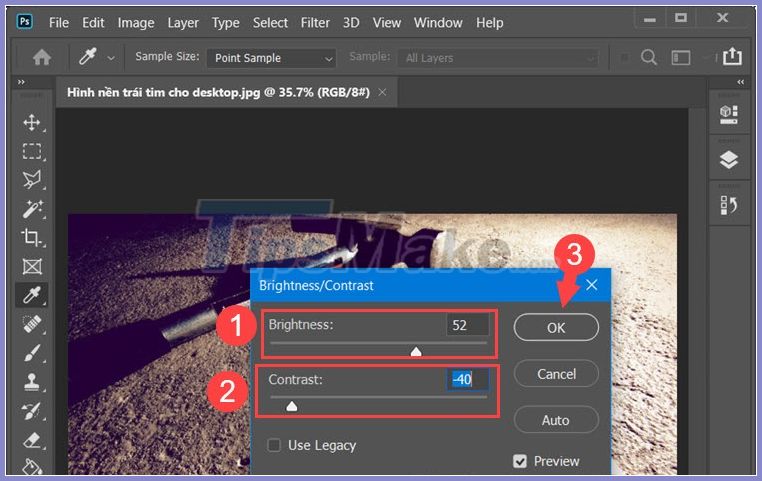
Step 1: Click on the menu Image (1) => Adjustments (2) => Brightness / Contrast . (3) .

Step 2: You adjust the Brightness (1) to adjust the brightness and Contrast (2) to adjust the contrast. The Brightness + index will increase the brightness and vice versa, the index - will decrease the brightness. With Contrast (contrast) is the opposite: index + will darken the image and index - brighten. After editing is complete, click OK (3) and save the image.
3. Lighten and darken with Levels
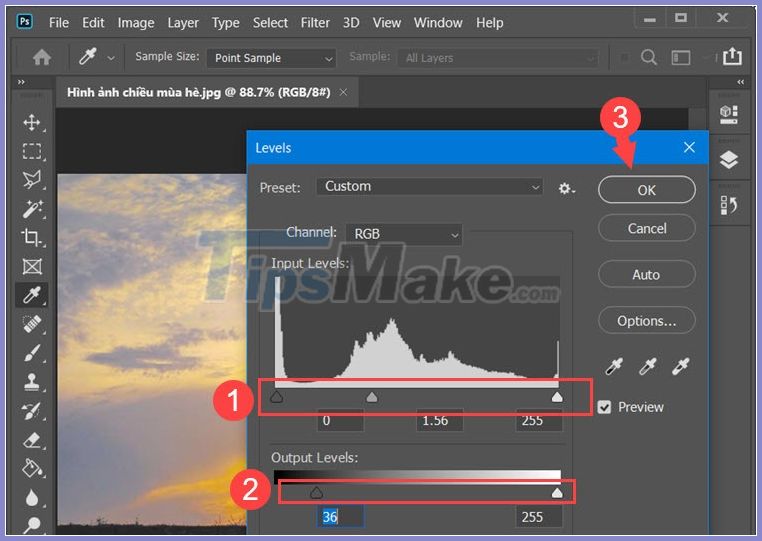
Step 1: Click on the menu Image (1) => Adjustments (2) => Levels (3) .

Step 2: You can set the Input Levels (1) and Output Levels (2) accordingly and you can see the sample image inside the Photoshop editor while editing on the dialog box. After editing is complete, click OK .
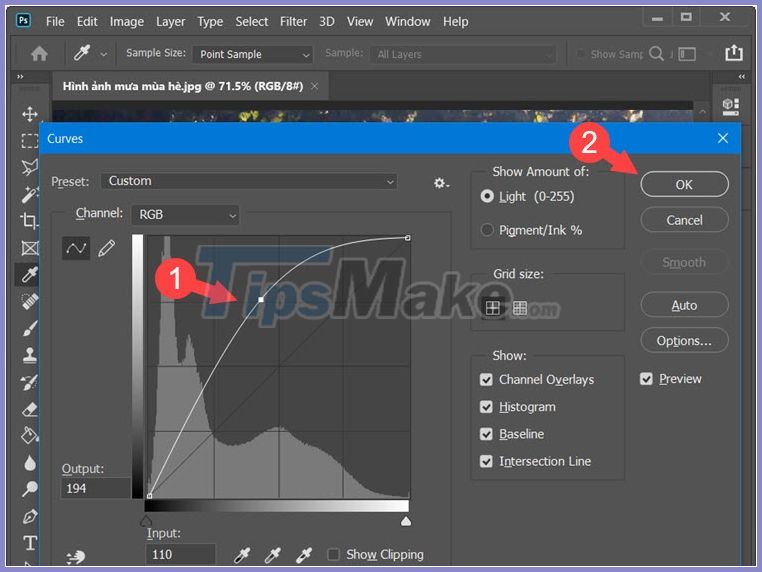
4. Lighten the shadows with Curves
Step 1: Click on the menu Image (1) => Adjustments (2) => Curves . (3) .
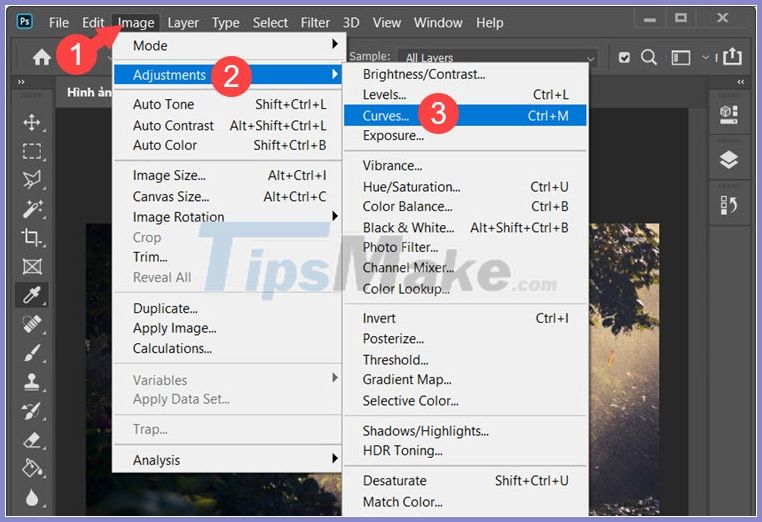
Step 2: You adjust the graph border (1) curled upwards to lighten the image or curved downwards to darken the image. After editing the picture, click OK (2) to finish.
5. Lighten and darken with Exposure
Step 1: Click on the menu Image (1) => Adjustments (2) => Exposure (3) .
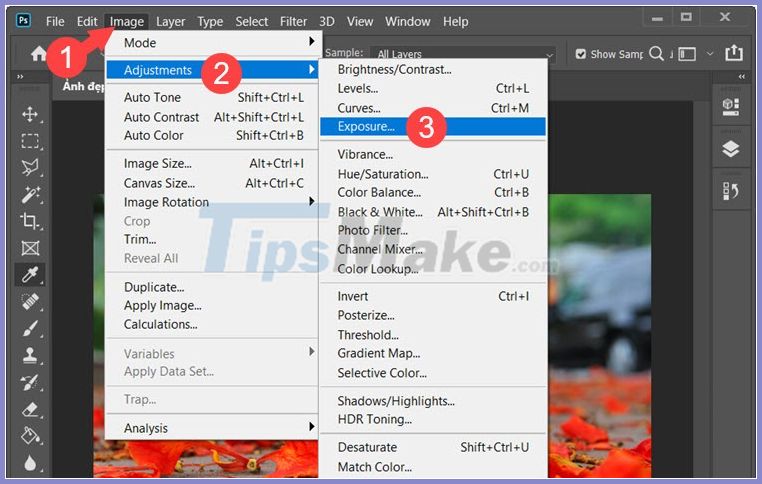
Step 2: You adjust the Exposure lever (1) to the left to darken the photo or to the right to brighten the photo. Once done, click OK (2) to save.

With the instructions in the article, you can easily adjust the brightness for photos in Photoshop. Good luck!
- How to switch between light and dark background themes in Photoshop
- How to adjust the Canon 2900 printer in dark and light ink
- 5 easy ways to handle low-light photos in Photoshop
- How to quickly edit backlighting in Photoshop
- What is opacity? How to use Opacity in Photoshop
- Automatic color adjustment feature in Photoshop
- Google Duo adds a new feature that allows video calling in the dark without turning on the light
- How to adjust color in Photoshop
- Instructions for adjusting light for photos using AI
- Instructions for turning on Dark Mode on Office 2019
- Free software that can replace Photoshop
- Adjust brightness, tone, contrast, image compression in Word
- How to split photos with Photoshop
- Photoshop shortcuts help you work faster (part 2)
- Photoshop shortcuts help you work faster (part 1)
- 49 smart Photoshop tips you need to know (Part 2)
- Tutorial to create a photo-crumbling image in Photoshop
- Create text effects like Star Wars movie Poster in Photoshop
- 4 tips to help identify photos that have been edited
- How to use Photoshop CS5 - Part 5: Photo editing
-
 Guide to creating wallpapers using AI on iPhone
-
Experience Lexica.art with its vast library of image creation prompts.
-
Guide to creating better AI images: 4 steps to writing effective prompts for beginners.
-
Instructions on how to use AI models to create images in Civitai
-
Guide to inserting images under text in PowerPoint - Changing image position
-
Transform any text and image into a coloring page.
 Guide to creating wallpapers using AI on iPhone
 Experience Lexica.art with its vast library of image creation prompts.
 Guide to creating better AI images: 4 steps to writing effective prompts for beginners.
 Instructions on how to use AI models to create images in Civitai
 Guide to inserting images under text in PowerPoint - Changing image position
 Transform any text and image into a coloring page.
-
Application
-
Web Email
-
Website - Blog
-
Web browser
-
Support Download - Upload
-
Software conversion
-
Social Network
-
Simulator software
-
Online payment
-
Office information
-
Music Software
-
Map and Positioning
-
Installation - Uninstall
-
Graphic design
-
Free - Discount
-
Email reader
-
Edit video
-
Edit photo
-
Compress and Decompress
-
Chat, Text, Call
-
Archive - Share
-
-
System
-
Mac OS X
-
Hardware
-
Game
-
Tech info
-
Technology
-
Science
-
Life
-
Electric
-
Program
-
Mobile