Table of Contents
This guide explains how to restore Old Photos in Photoshop, with clear steps, practical tips, and important checks before you begin.

I will proceed to restore an old black and white photo with many wrinkles, discoloration..
Step 1: For crumpled images, we will proceed to process the crumpled marks first to bring them back to the original. To treat these crumples, you should choose the Spot Healing Brush Tool .
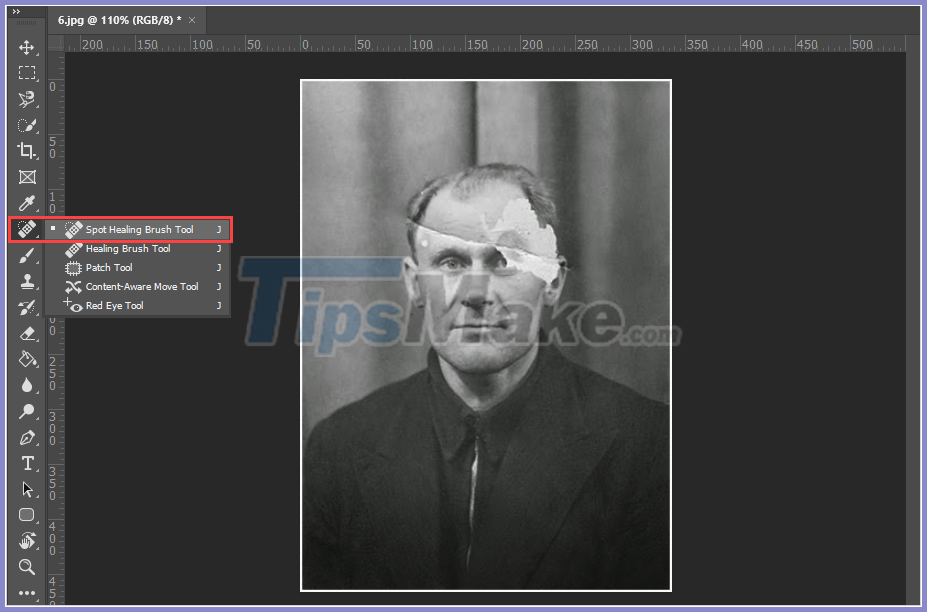
Step 2: After selecting the Spot Healing Brush Tool , right click to open the parameters panel , here you can set the brush size to match (Item Size).
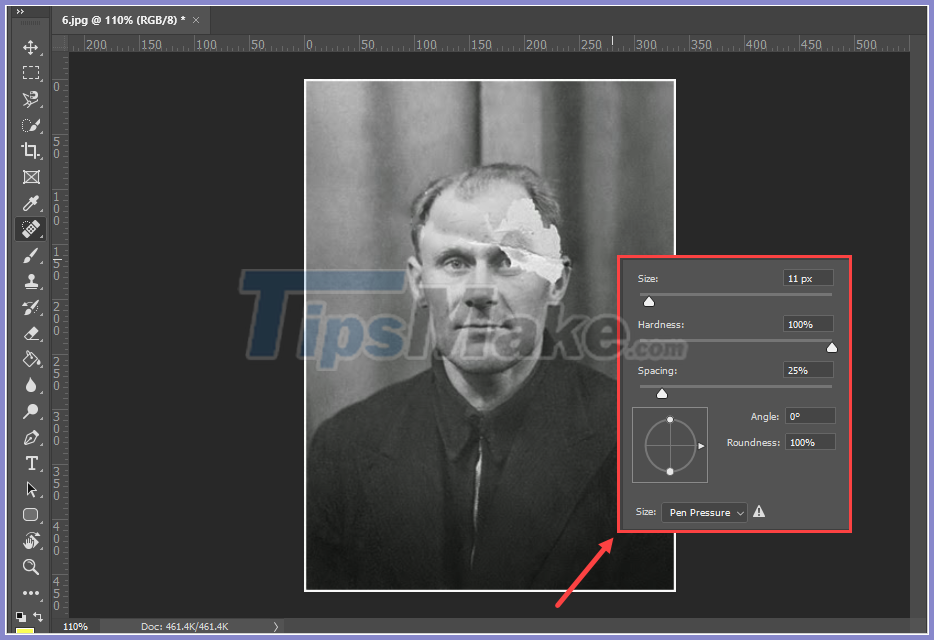
Step 3: Next, you click on the creased image area, lose detail so that the software automatically recovers the image from the image arrays around that area.
Note : For a beautiful and detailed image, you should choose the brush size (Size) equal to the crumpled line, the loss of content. Avoid large brush sizes as they will be very messy.

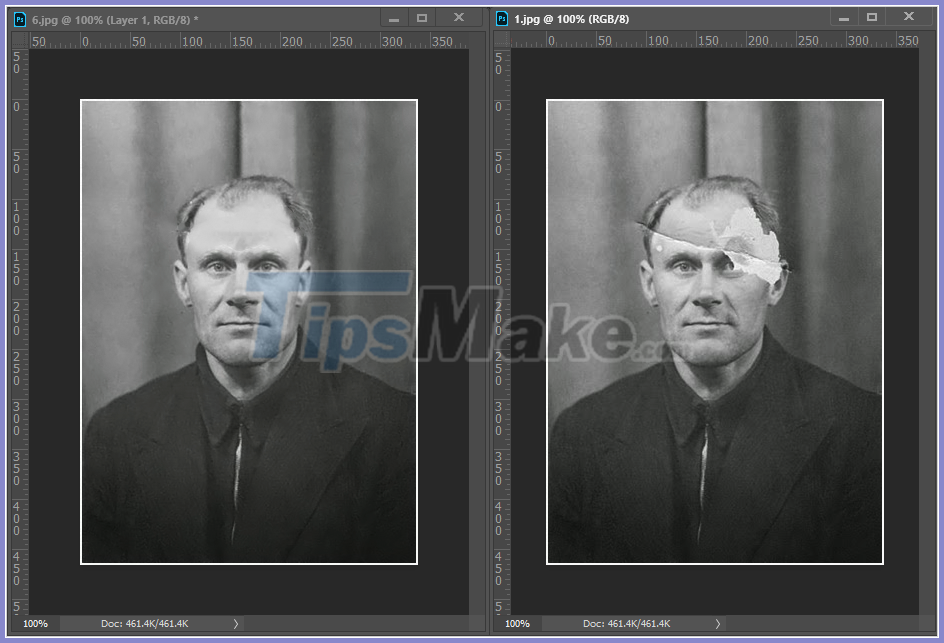
Step 4: After dealing with the creases, we get to the hardest part of the photo. The hardest part here is the right half of the face, the part of the image that has lost a lot of detail and cannot be recovered with the Spot Healing Brush Tool .
However, the left half of the image is still very good and full of details, we will copy the right half to paste to the left half.
Take the Slection Tool (M) and select an area around the left face area.
Note: The selection should not be too large, as long as they surround the necessary content is enough.

After creating the selection, you press Ctrl + J to duplicate the selection into a new Layer.
Next, you select the newly created Layer and press Ctrl + T to open FreeTransform . To reverse the image, you right-click on the image content and choose Flip Horizontal .
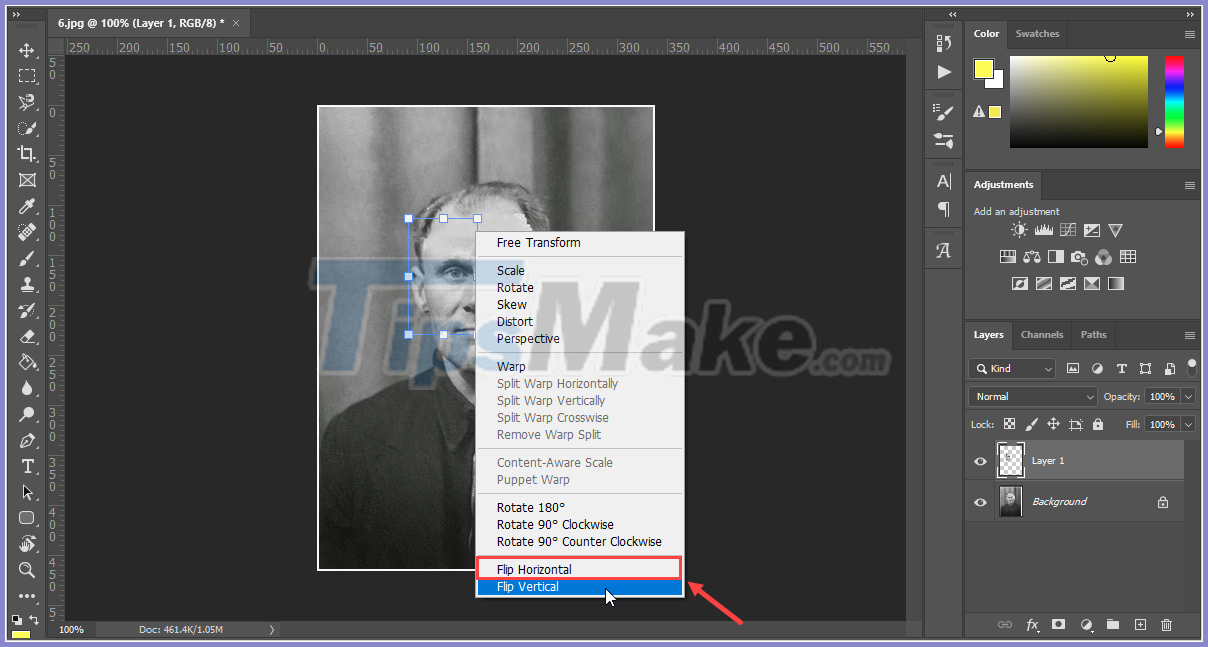
After a series of manipulations above, we have the right part of the face. Now move them to the replacement area.
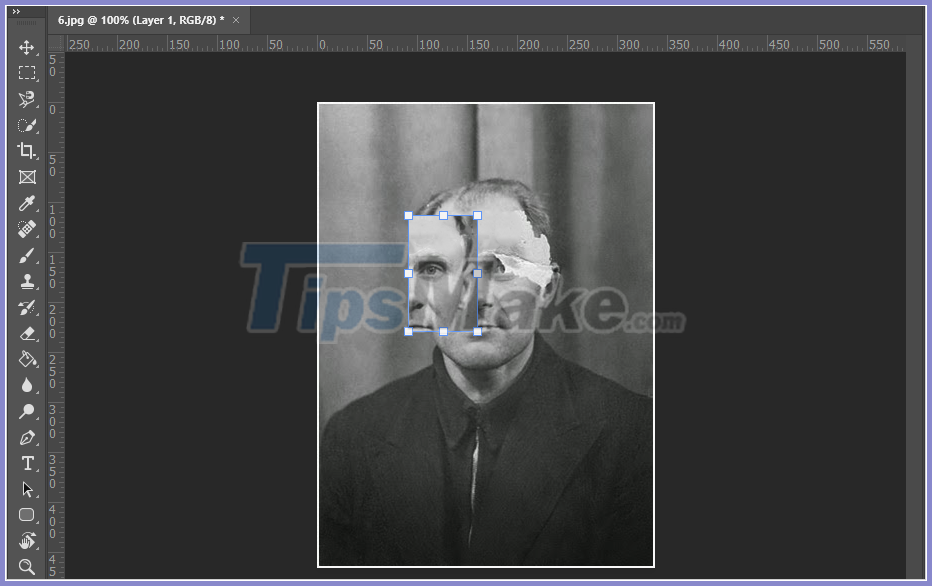
To move them to the correct position, you need to reduce the Opacity and move, lower the Opacity will help you align more easily with the original content. After the move is complete, you push the Opacity to 100% as before.
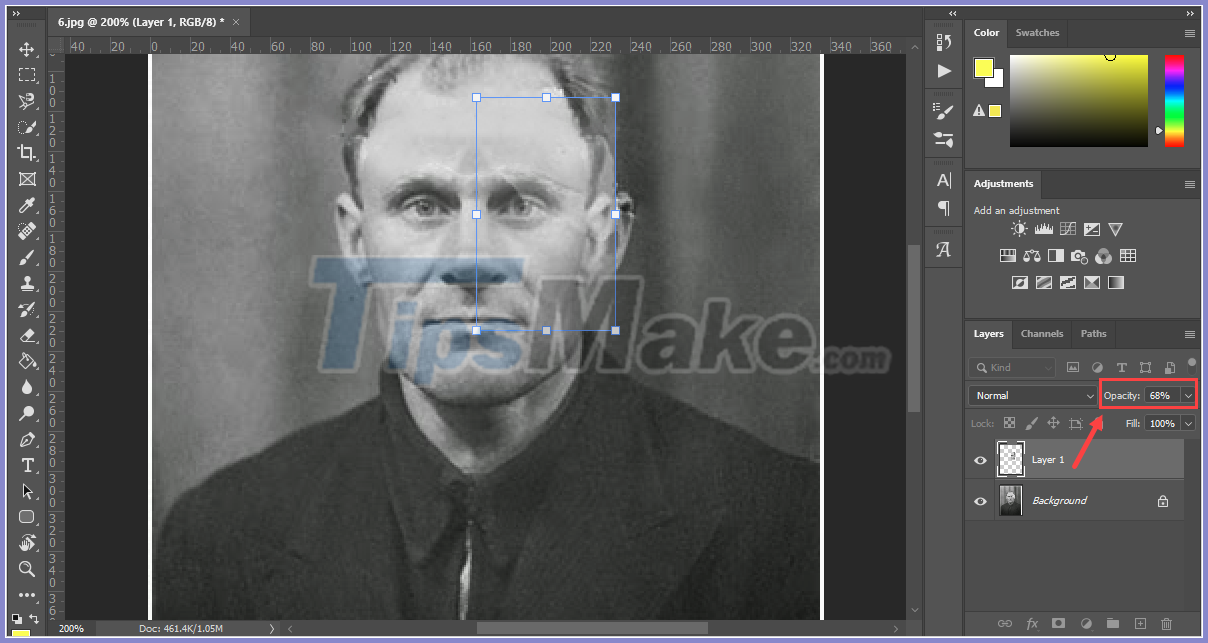
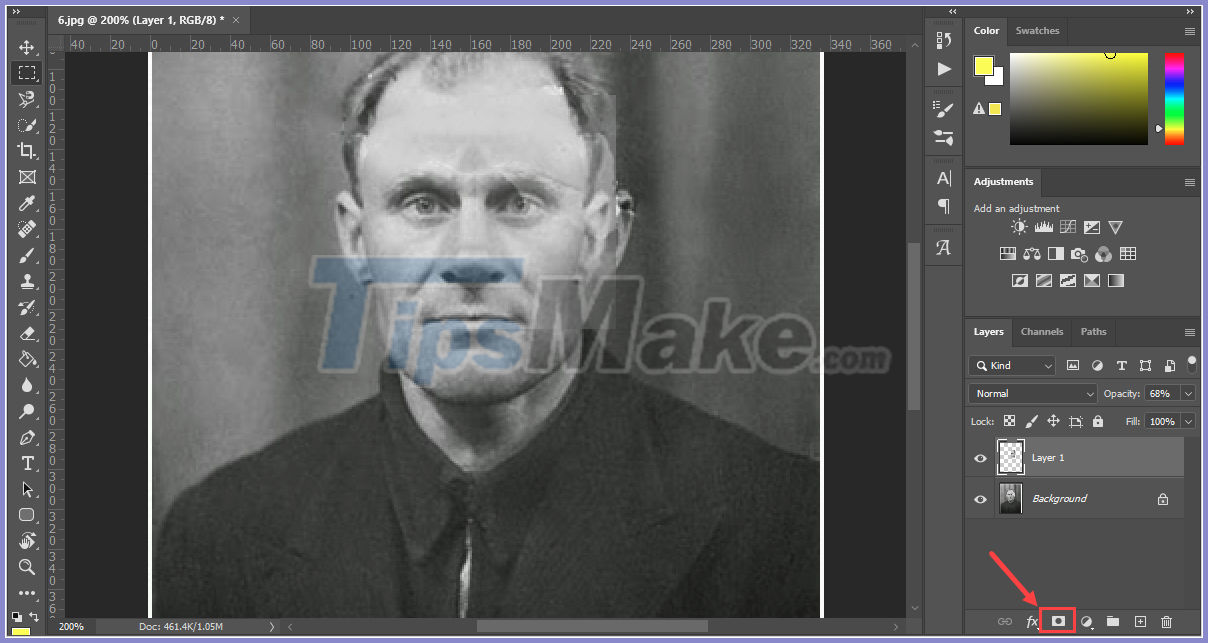
Step 5: Next, you create a Layer Mask for the newly restored right face so that we can edit it smoother and more reasonable.
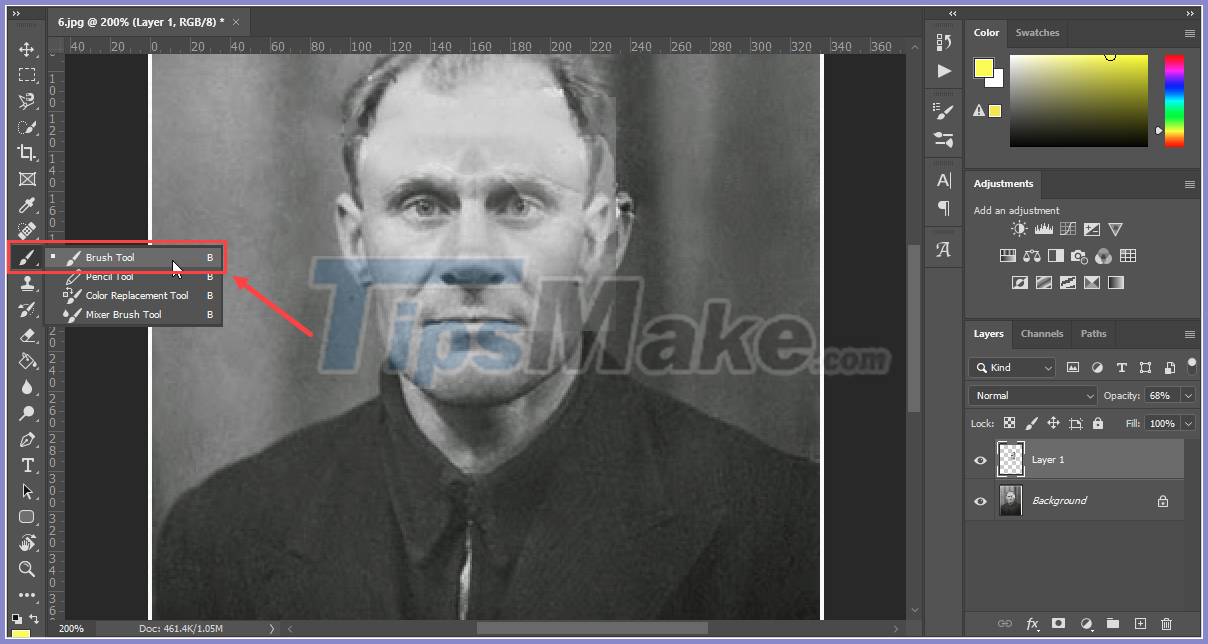
Step 6: After creating a Layer Mask, you choose the Brush Tool to proceed with erasing unnecessary areas on the right half of the restored face.
Step 7: You proceed to remove the frills, no need to restore the right half of the face to make them smoother and more authentic.

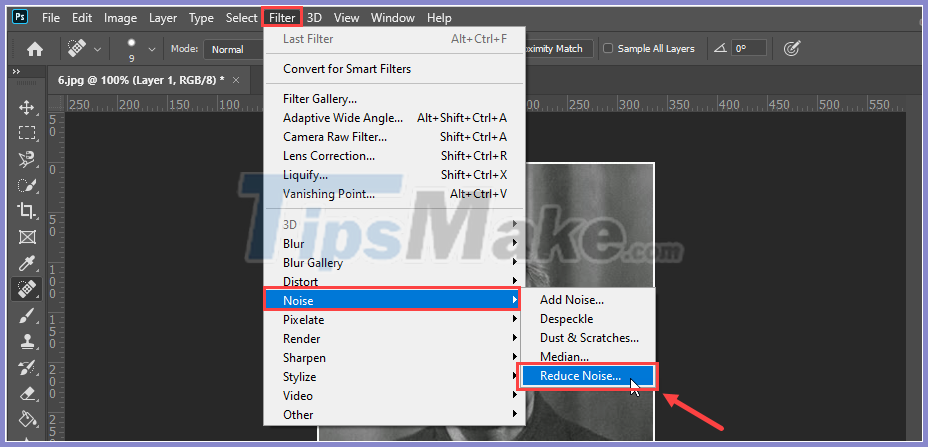
Step 8: So we are done with the image content, now we will reduce noise (much) for a sharper image. You choose Filter -> Noise -> Reduce Noise..
Step 9: Next, you choose Filter -> Sharpen -> Unsharp Mask. to proceed to increase the sharpness of the image.

Step 10: After performing a series of operations above, you have finished restoring an old photo in Photoshop. Our content after the recovery will be as follows:
Good luck!
FAQ
What should I know about Restore Old Photos in Photoshop?
Focus on the key features, requirements, limitations, and practical use cases explained in this guide.
How do I get the best results with Restore Old Photos in Photoshop?
Follow the recommended steps, use current software or information, confirm compatibility, and review settings before major changes.
Are there any risks or limitations?
Potential limitations depend on compatibility, data quality, cost, privacy, support, and how the product or method is used.
Related Articles
 How to Cut Circular Images in Photoshop: Cut Photos on Photoshop4 minutes read
 Photoshop CS: Decorate Photos6 minutes read
 Super Photos Will Make You Admire the Ability of Humans to Photoshop3 minutes read
 How to Resize Photos in Photoshop4 minutes read
 'laughing Does Not Shut Up' with 23 Photos Falling into the Hands4 minutes read
 How to Quickly Edit Backlighting in Photoshop3 minutes read
Reader Comments 0
Sign in with email or Google to join the discussion.