How to anti aliasing in Photoshop
With low quality photos, we often have to deal with jagged edges to make the image look smoother. If you do not know about anti-aliasing skills in Photoshop, please refer to the following article.
Table of Contents
1. Anti-aliasing for writing
With the Text tool used to insert text, look for the aa (1) icon located in the row below the File menu , Edit . Next, choose options such as Sharp (sharp), Crisp (do sharp), Strong (bold), smooth (smooth) (2) for anti-aliasing for text.
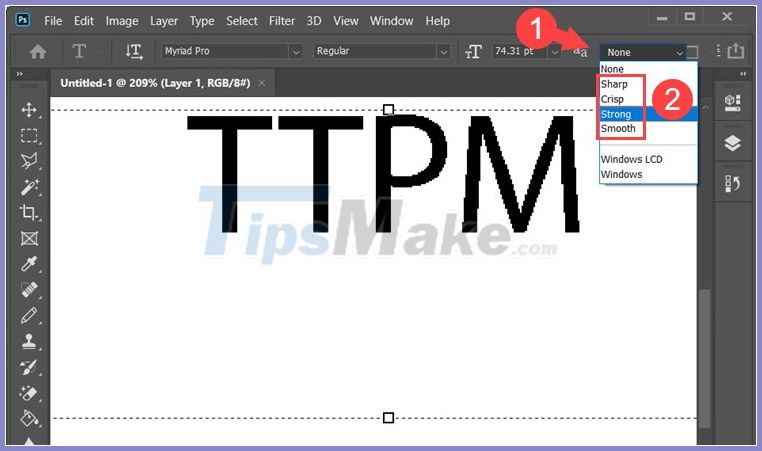
After switching to Smooth , you can see that the PM in the image below has sharpened and reduced the jaggies compared to the PM in the image above.

2. Use the Unsharp Mask filter
Step 1: Open the photo you need to edit with Photoshop. Next, you go to Filter menu (1) => Sharpen (2) => Unsharp Mask . (3) .

Step 2: You set the following parameters.
(1) Amount:Adjusts freely and depends on image details. If your image has a lot of good details, you should adjust it for a small Radius - large Amount and vice versa.
(2) Radius:This item should be set as small as 0.5 - 3 units. The purpose of the Radius is to set the width of the vertical halo of the image.
(3) Threshold: You should leave the value of this item high because a small value will cause noise in the image. This item sets the edge contrast.
After the setup is complete, click OK (4) to save.

3. Use the Blur filter
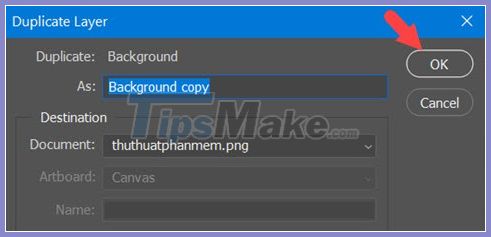
Step 1: You right click on the Background Layer (1) => Duplicate Layer . (2) .

Next, click OK to finish.
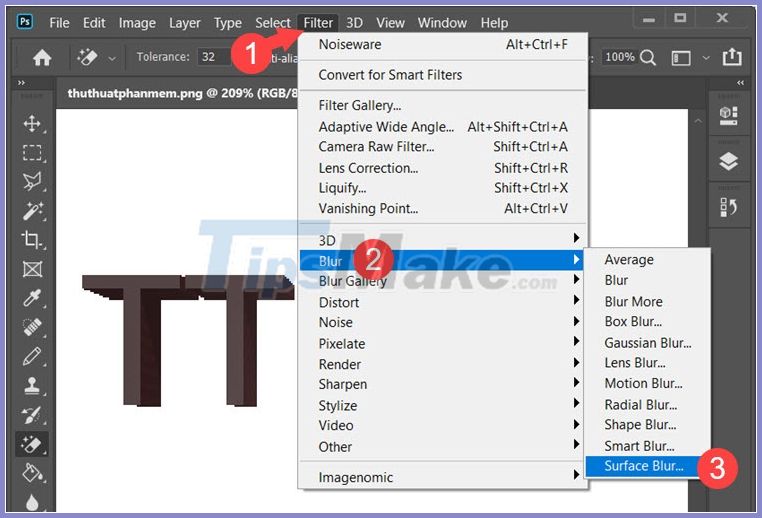
Step 2 : Go to the menu Filter (1) => Blur (2) => Surface Blur . (3) .
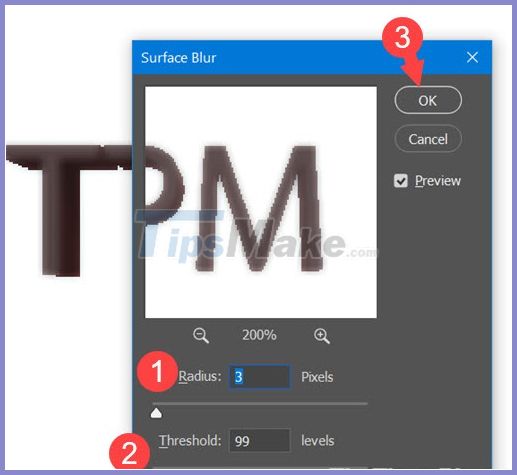
Step 3: You set the Radius (1) on a small scale from 0.5 to 3 so that the image color is not changed too much. For Threshold (2) , a high value will make the image blurry and you should set it to a moderate level. Then, click OK (3) to save.
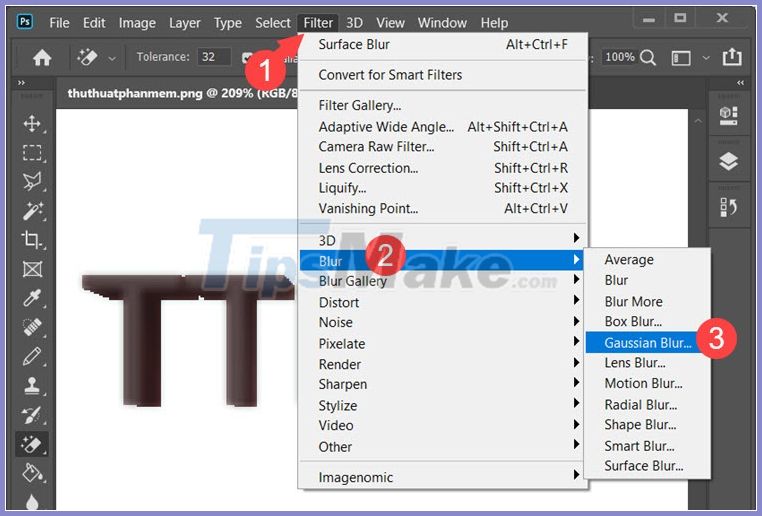
Step 4: Go to the menu Filter (1) => Blur (2) => Gaussian Blur . (3) .
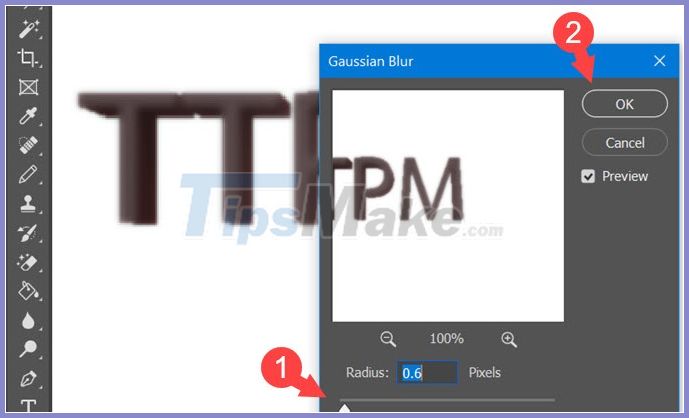
Step 5: You set the Radius (1) so that the image is not too blurry (set the value to small, just right). Then, click OK (2) to save your changes.
Step 6: Select the Eraser Tool (1) => Set Opacity (2) at 45% and Flow (3) at 35-37%.

Step 7: You right-click (1) on the working area => set Size (2) to a small level and Hardness (3) at 0%. Next, you click to select the brush type is Soft Round Pressure Size (4) .

Then, you click on the area of the image to delete to highlight details of the image. Erase the image position in the foreground or the shadows of the object to bring out the details of the photo.

Step 8: You click on the layer Copy (1) and choose the blending mode (2) is Screen or Soft Light to make 2 layers into a single regulation.

With the sharing about how to anti-aliasing in Photoshop, readers can process the photos more beautiful and attractive. Good luck!
Was this article helpful?
Your feedback helps us improve.
Related Articles
 49 smart Photoshop tips you need to know (Part 3)15 minutes read
 49 smart Photoshop tips you need to know (Part 1)12 minutes read
 Instructions for using Photoshop for newbies18 minutes read
 49 smart Photoshop tips you need to know (Part 2)9 minutes read
 10 Photoshop beginner skills need to know16 minutes read
 Photoshop is now available for mobile devices11 minutes read
Reader Comments 0
Sign in with email or Google to join the discussion.