Guide to correcting underexposed photos using Photoshop
Insufficient lighting causes photos to lose sharpness and reduces overall quality. However, with Photoshop, you can easily improve brightness without losing important details.
Table of Contents
This article will guide you on how to correct underexposed photos using Photoshop with tools such as Curves, Levels, and Shadows/Highlights.
The simplest way to fix underexposed photos.
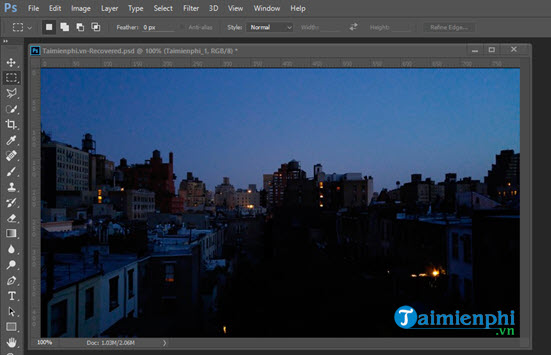
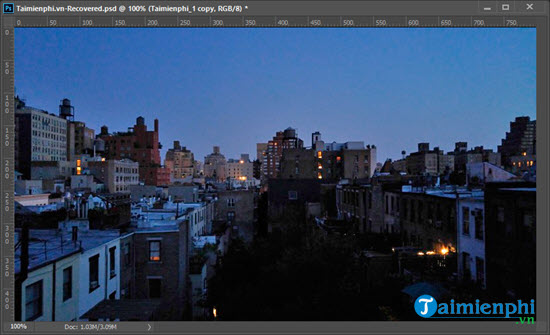
Let's say we have a dark image like the one below; now Free Download will use Photoshop to make the image look brighter.
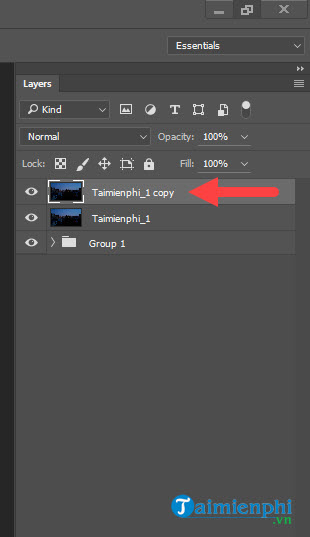
Step 1: First, duplicate the image layer. This is a habit you should develop before attempting any other techniques. To duplicate a layer, press the Ctrl + J key combination.
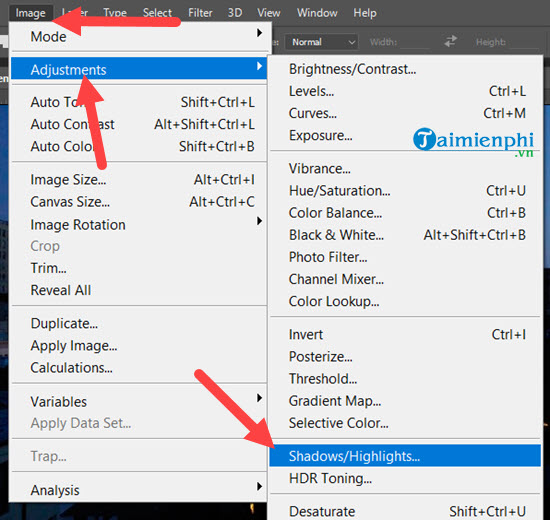
Step 2: The next step is simply to click on Image > select Adjustment > then select Shadows/Highlights to adjust the brightness of the dark areas.
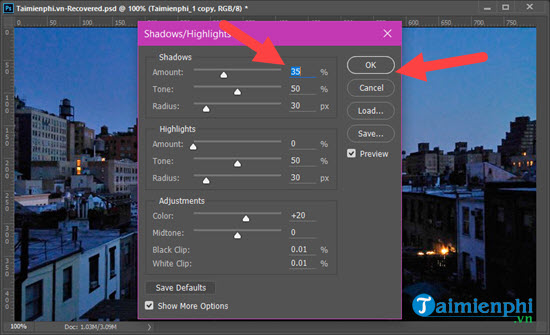
Step 3: Next, we can fine-tune the Shadows with an Amount value of 35% , but of course, you can adjust it to suit your image.
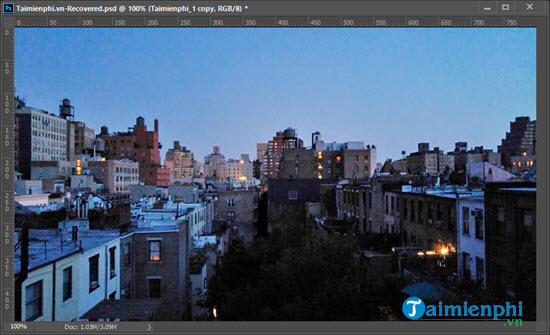
As a result, you'll see the picture is a little brighter than it was initially, right?
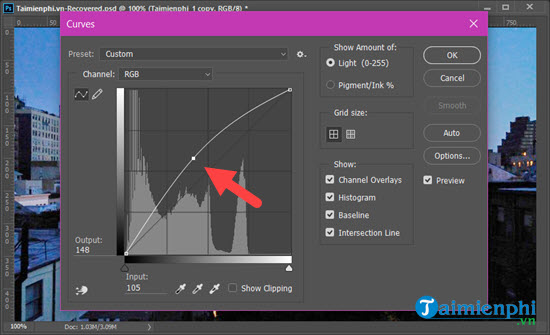
Step 4: Using Curves , press Ctrl + M and drag as shown in the image. It doesn't need to be perfectly curved, and you can adjust it to your liking at this step.
Result:
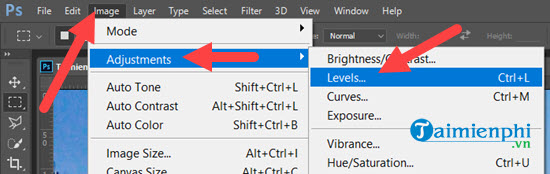
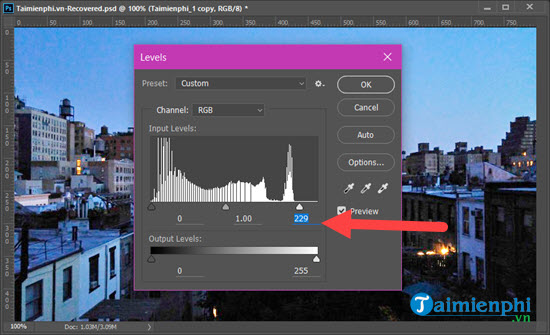
Step 5: Next, go back to Image > select Adjustments > select Levels , or use the shortcut Ctrl + L for quick access.
Step 6: Here, to adjust the brightness, select the section as shown below, then drag it from right to left to adjust.
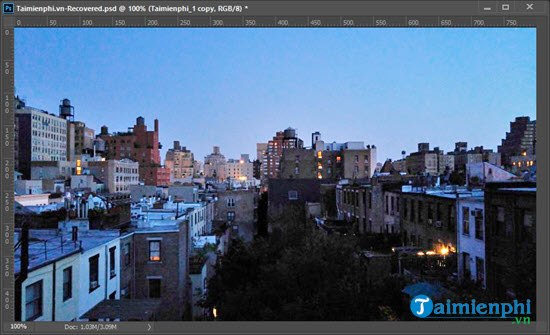
The final result is that your image is much brighter than it was initially.
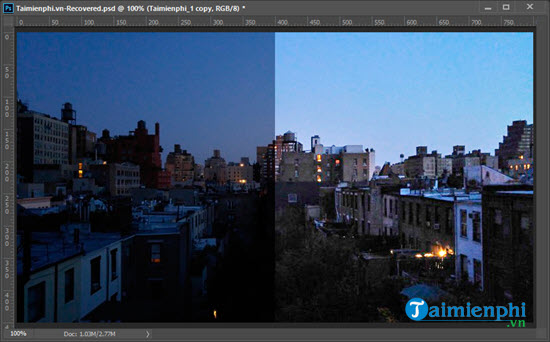
Let's compare the before and after edits:
If you're using RAW images, editing is easier thanks to the complete color data. However, even with JPEG images, you can still improve brightness by adjusting Shadows/Highlights, Levels, or Curves. To avoid noise after brightening, apply Noise Reduction to maintain the best quality. When editing, you need to be flexible depending on the lighting characteristics of each image to achieve optimal results. With these tips, you can confidently fix underexposed photos in Photoshop more professionally.
Was this article helpful?
Your feedback helps us improve.
Related Articles
 The Fastest Method To Remove Noise In Photoshop7 minutes read
 How to cut circular images in Photoshop4 minutes read
 How to use Photoshop CS6 (Part 1): Create digital photos10 minutes read
 Remove bad details from photos with Adobe Photoshop5 minutes read
 Photoshop CS: Decorate photos5 minutes read
 How to create a border for photos in Photoshop2 minutes read
Reader Comments 0
Sign in with email or Google to join the discussion.