Table of Contents
The following guide provides a clear overview of Adobe Photoshop CS6, with the most relevant background, details, and practical takeaways.
Adobe Photoshop CS6 Overview
- How to sharpen images in Photoshop in 2 ways
- 10 common problems in Photoshop and basic remedies
Start by creating a new file ( Ctrl + N ) in Adobe Photoshop CS6 with size 1000px x 1500px (RGB color mode) at a resolution of 72 pixels / inch. Use the Paint Bucket Tool (G) to color # 030221 for the new background layer.

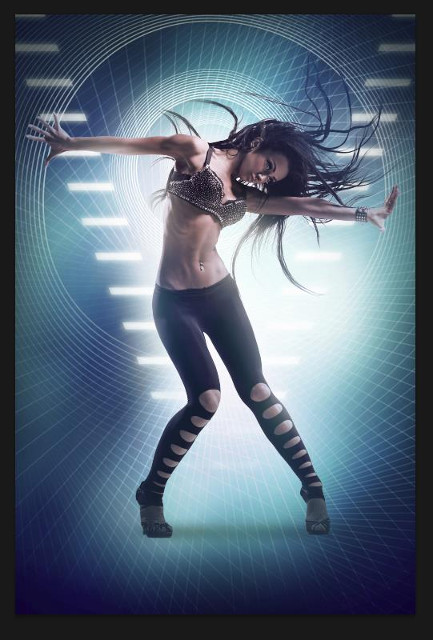
Find an original photo, here is a dancer posing in the studio.
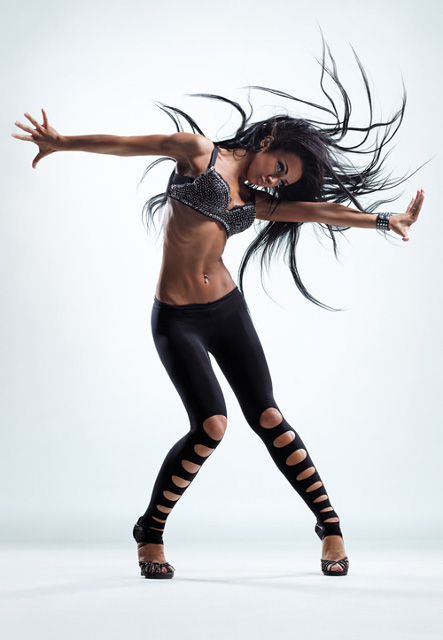
Delete the background using your favorite tools like Pen Tool (P), Magic Wand Tool (W), Magnetic Lasso (L) or even simple like Filter> Extract and insert into a main layer.

Now create a layer below the dancer image layer. Grab the Brush Tool (B) and select a smooth brush of color # 65b0c9, set the Opacity to 40% in the Options bar and draw the background as shown below. Set the Blending mode for this layer to Linear Dodge.

Next, create a new layer again and use the same brush as above to paint the background. Set the Blending mode for this layer to Color Dodge.

Open Adobe Illustrator and create a new file 1000px by 1500px. Then draw a blue rectangle using the Rectangle Tool (M).
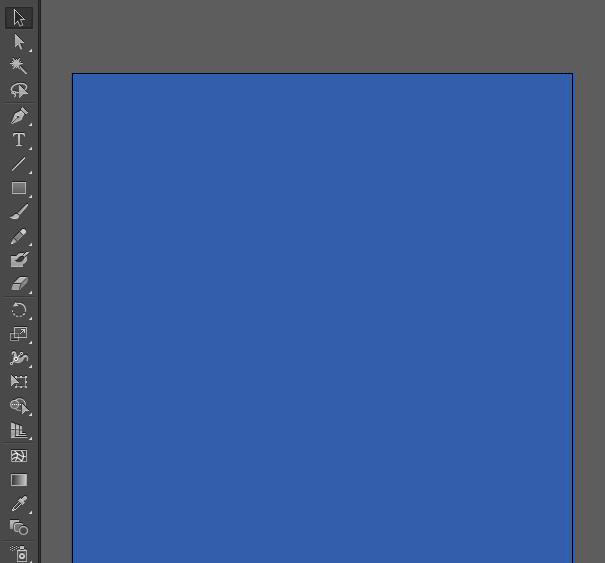
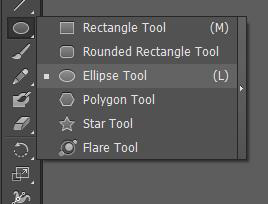
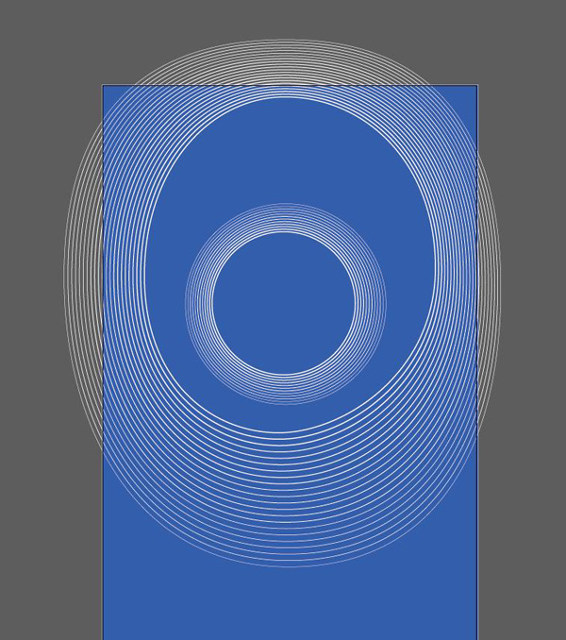
Use the Ellipse Tool to draw two ovals.
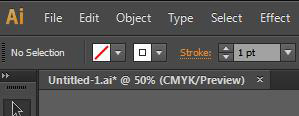
Large ovals should have a Stroke - 1pt and a thumbnail of 3pt.
A large oval can be adjusted using the Convert Anchor Point Tool (Shift + C) as shown below.
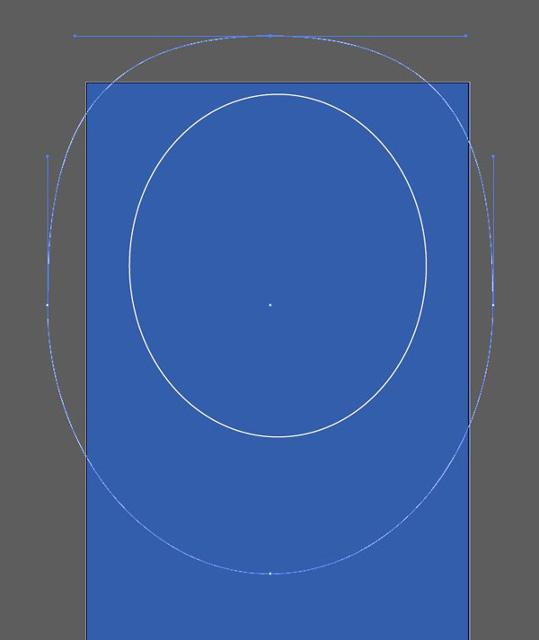
Select both ovals with the Selection Tool (V). Press the Shift key.
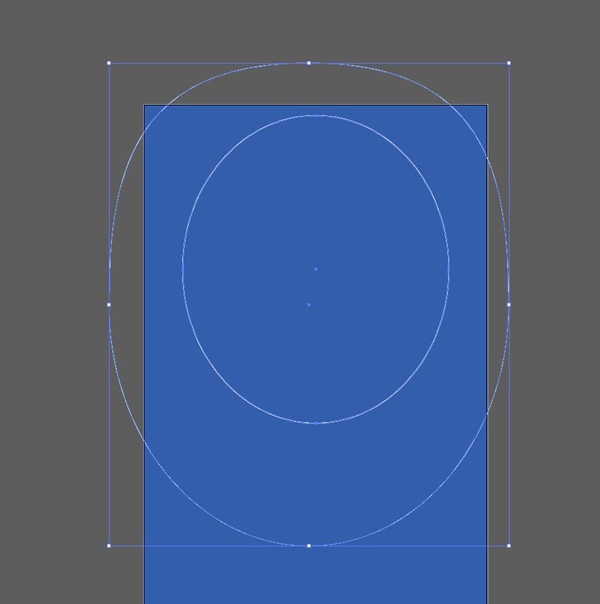
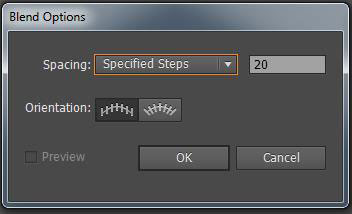
Apply this option to the selected oval: Object > Blend > Blend Options. Set Specified steps to 20.
Press Ctrl + Alt + B and you will have 20 intermediate elements as shown below:
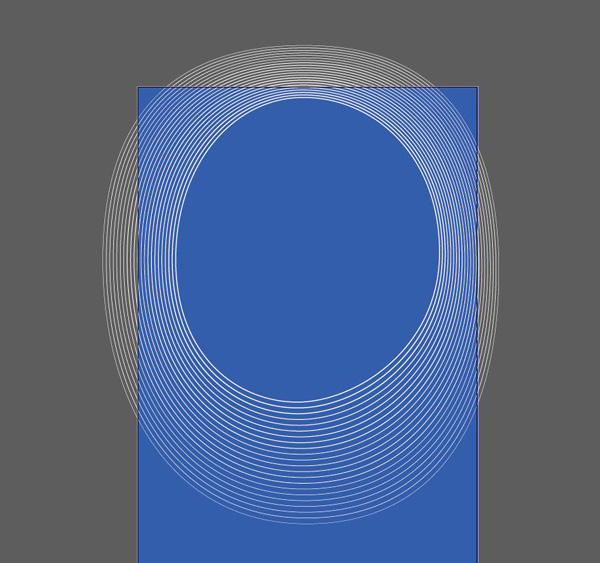
Using the same method as the circle, it has fewer internal intermediate copies, only 10 Specified steps.
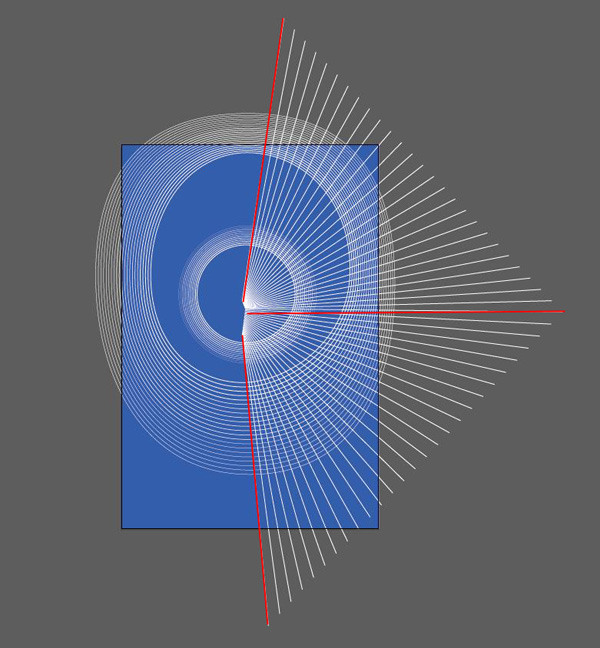
Using the LINE Segment Tool, create three lines marked in red, with Stroke of 3pt and Specified steps of 25.
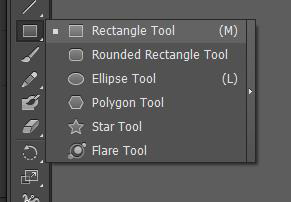
Select the Rectangle Tool (M).
Now create two parallel rectangles using Specified steps - 12.
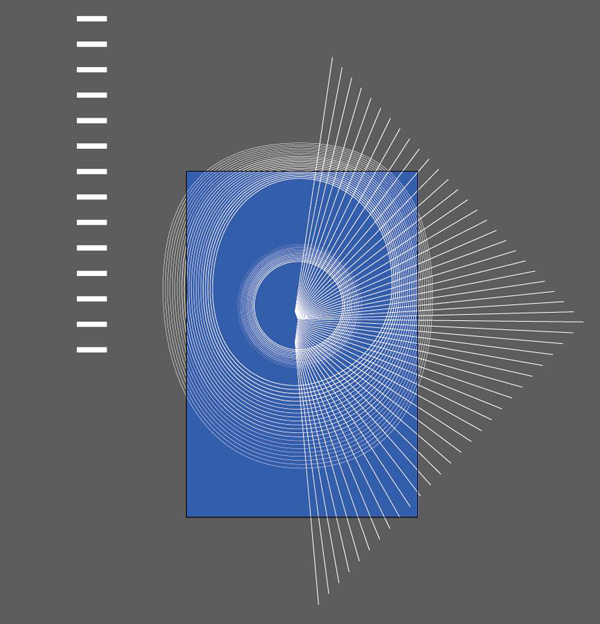
Now, select the drawing from the triangular lines, use the Selection Tool (V) and press Ctrl + C to copy. Open Adobe Photoshop and press Ctrl + V to paste the lines with the Paste as Smart Object option in the main layer. Set the blending mode for this layer to Soft Light.
Copy this layer with Ctrl + J and rotate the copy horizontally using the Free Transform (Ctrl + T) (Flip Horizontal) command. Put this layer under the dancer image layer.
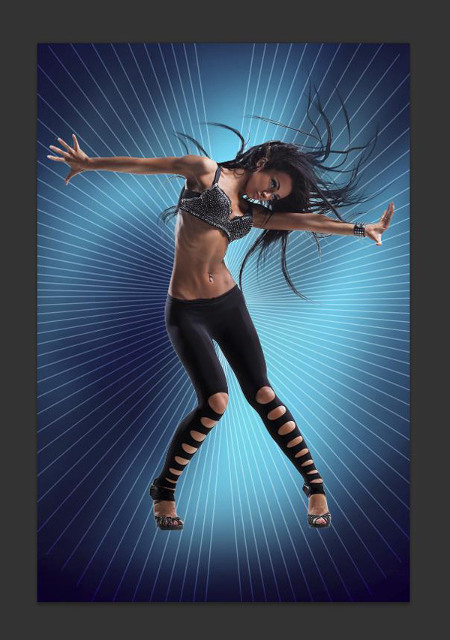
Make a copy of these layers and select the Free Transform (Ctrl + T) command to get the same result as on the image shown.
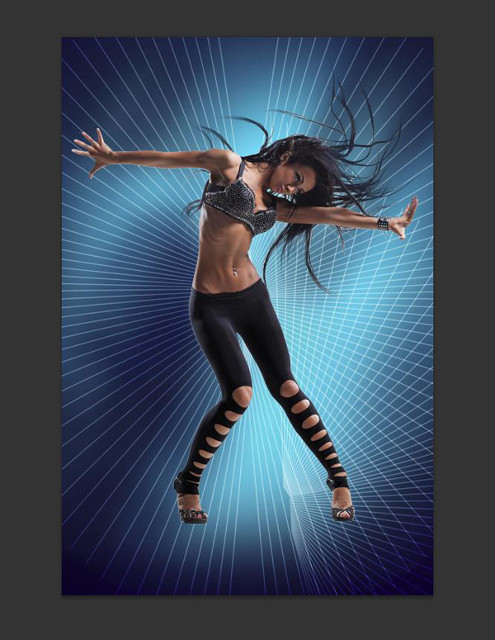
Select the Eraser Tool (E) and erase the edges of the final layer.
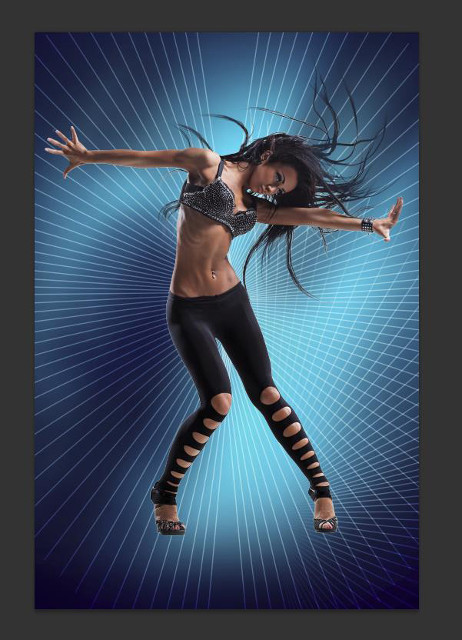
Do the same as above for the other party.
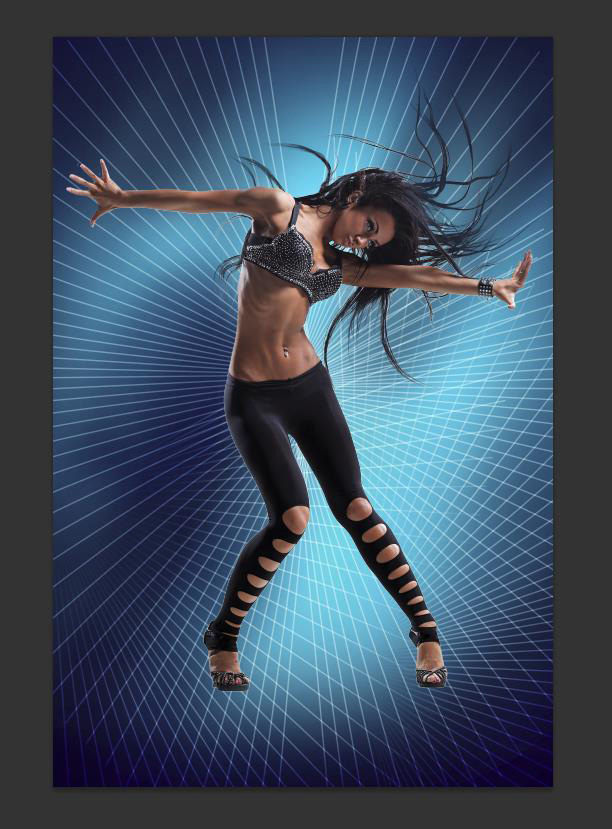
Combine all the layers containing the lines in a group (press the CTRL button to select the required layers and hold the left mouse button while dragging the selected layers into the Create a new group icon at the bottom of the Layers panel ).
Apply Vector Mask to the new group and select the Brush Tool (B) to hide the contours on the mask in the same way as the illustration below.
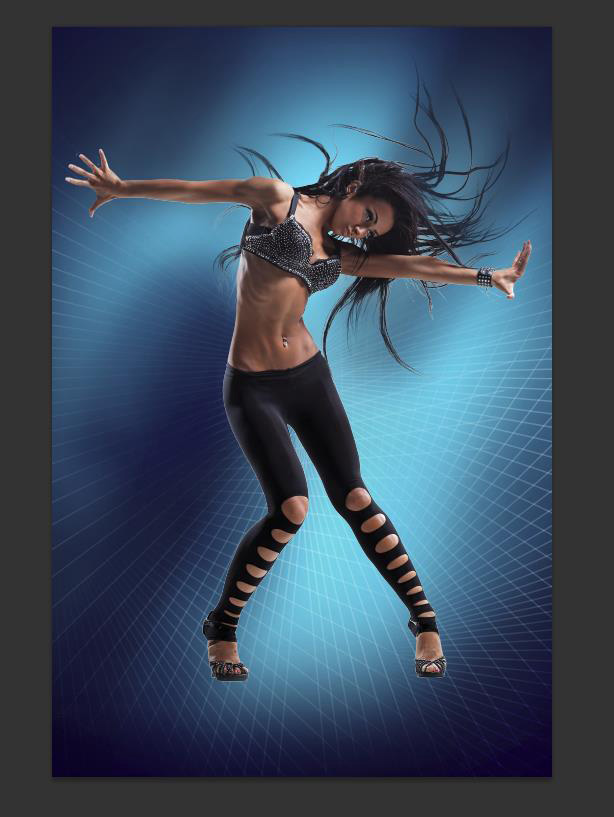
Insert some lines at the top as shown below.
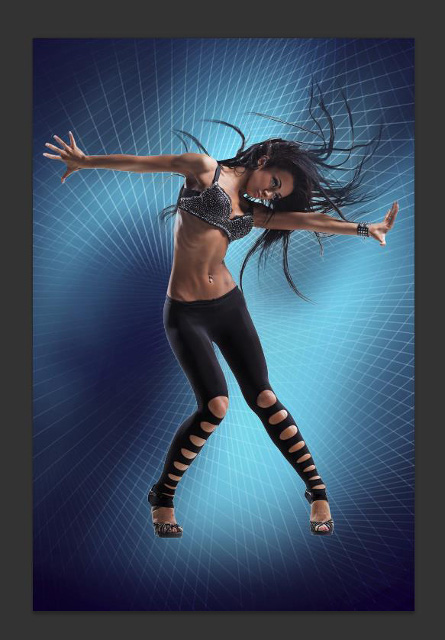
Create a new layer and select the Soft Round white brush, set Flow to 20% in the Options bar to create a glowing effect as shown below. Set the Blending mode for this layer to Overlay.
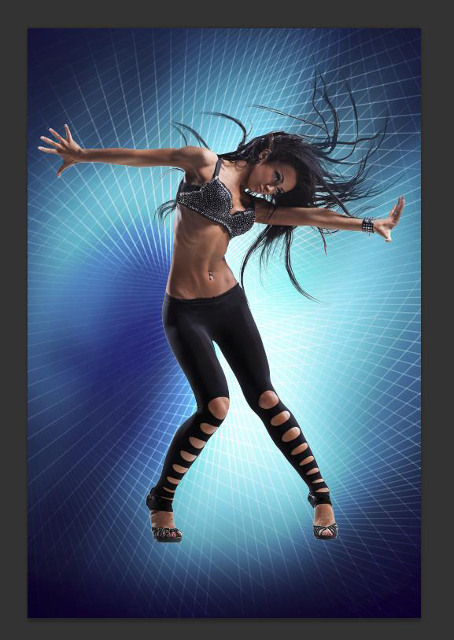
Create a new layer and insert some brushstroke as shown using the same brush. Set the Blending mode for this layer to Normal.
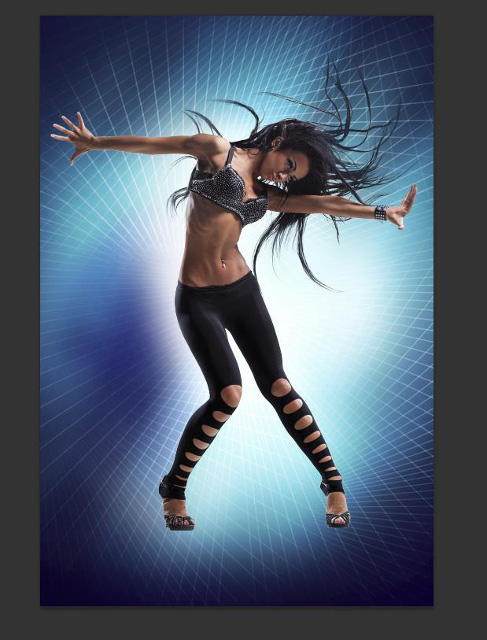
Select the brush on a new layer and insert the purple light effect, the color is # 9265C9.
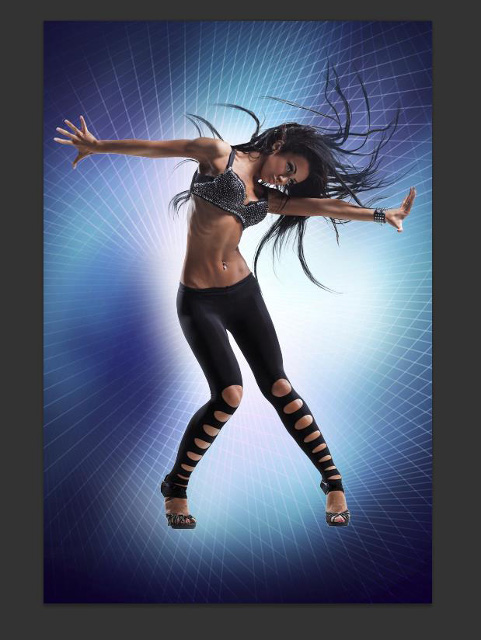
Create a new layer and apply the same brush with the same color as above but this time use a stronger glow effect along the edges, the same way as the next image. Set the blending mode for this layer to Soft Light.
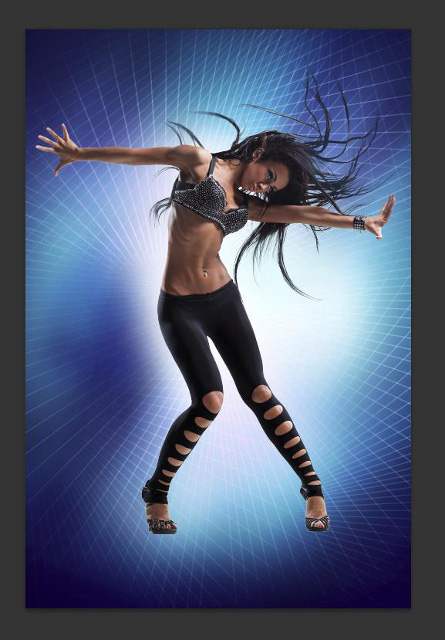
Back to Illustrator, select the circles and press CTRL + C to copy. Go back to Adobe Photoshop and press CTRL + V to paste Paste as Smart Object. Set the Blending mode for this layer to Hard Light.

Then make a copy of the big circle:
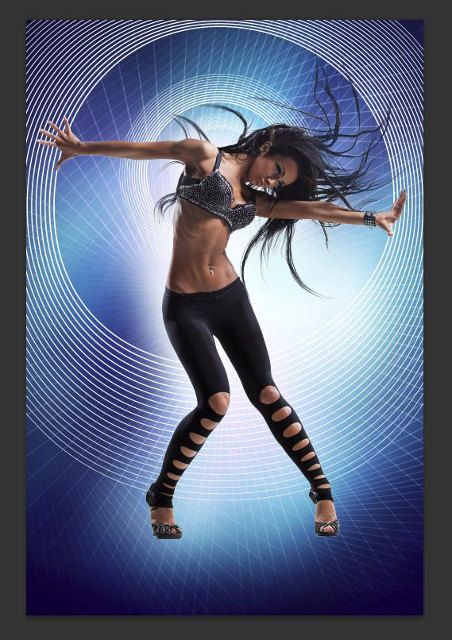
Hide the circle like the image below, use the Eraser Tool.
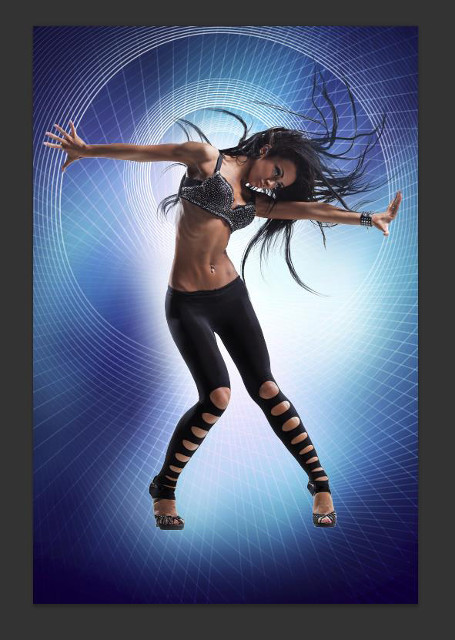
Insert the rectangles made from Illustrator, deform it in the same way as below, apply the Free Transform command (Ctrl + T).
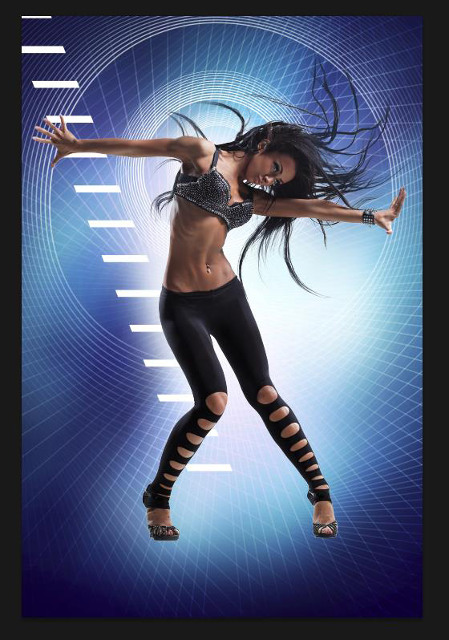
Hide it using the Eraser Tool.
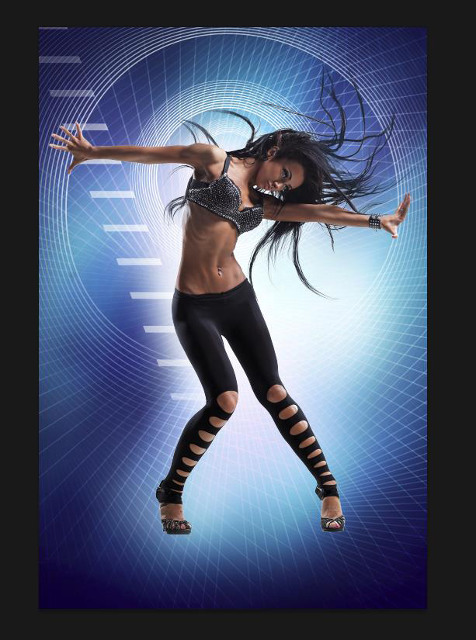
Click the Add a layer style icon from the bottom part of the Layers panel and select Outer Glow.
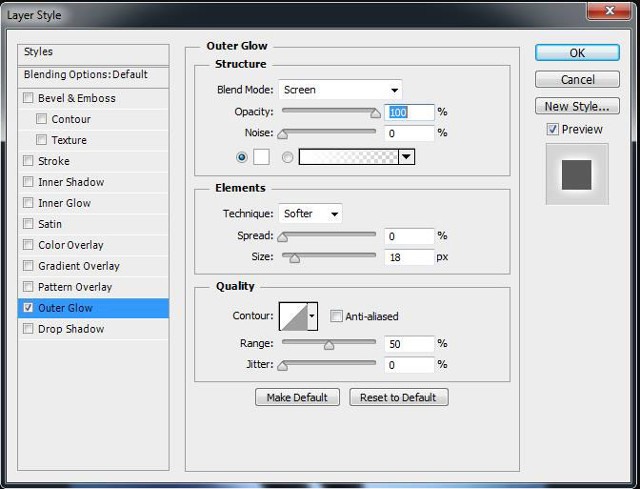
The rectangle layer will shine:
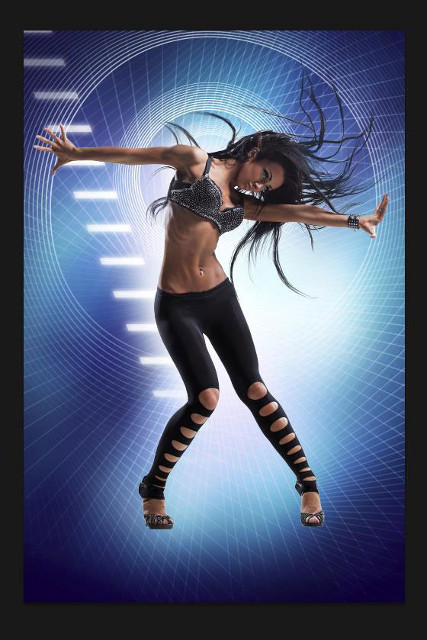
Make a copy of this layer and rotate it horizontally.
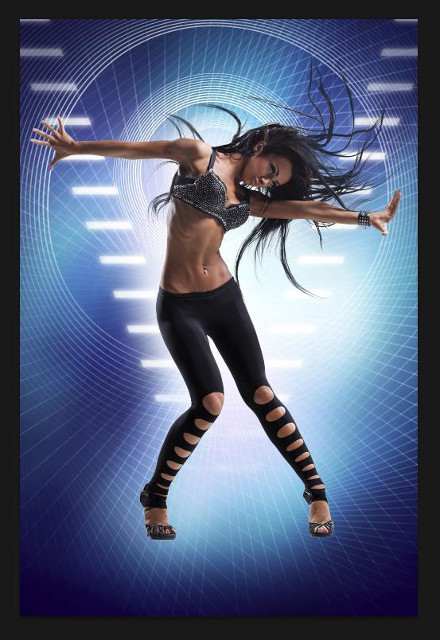
Now create shadow for the new layer, use Soft Round brush with Flow - 10% and insert a luminescent effect on the dancer's shoulder area.
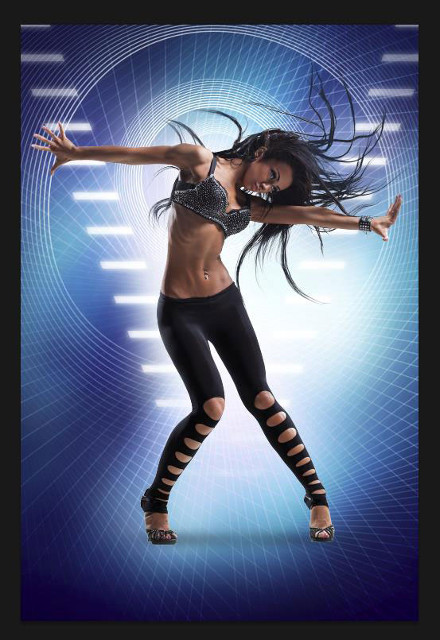
Create a new layer, use the Paint Bucket Tool (G) to color this layer with the color # 5F2D50. Set Fill to 60% and change the Blend mode to Color.
Hold the Alt key (on Windows) or Option (on Mac OS) and click between the new layer and the color on it and the layer containing the dancer in the Layers panel to create a Clipping mas k. The color will only be applied on the layer of the dancer.
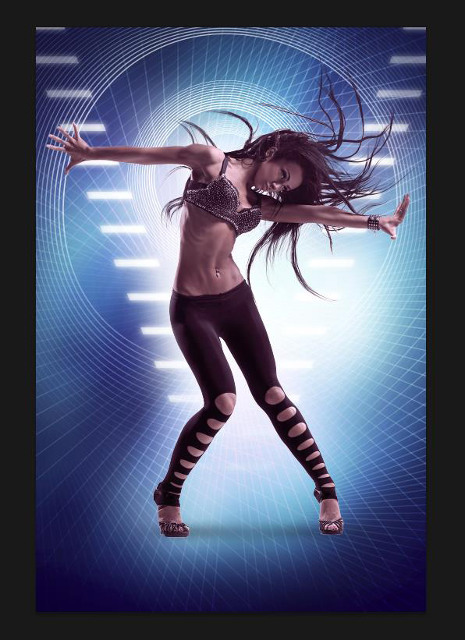
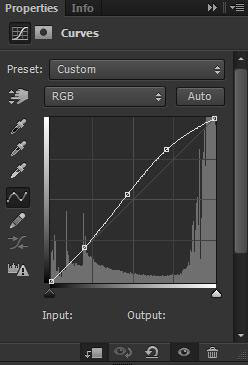
Click Create new fill or adjustment layer from the bottom part of the Layers panel and click Curves to adjust the curve as shown to make some color modifications.
The dancer class became more contrasting as shown in the picture.
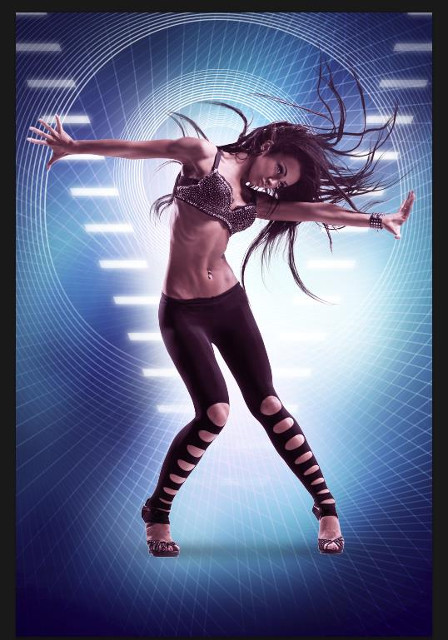
Now we have to darken the bottom part of the model's foot by creating a new layer and combining it with the model layer. Apply Soft Round brush with Flow - 10% and black. Cover the foot color to the knee area of the model.
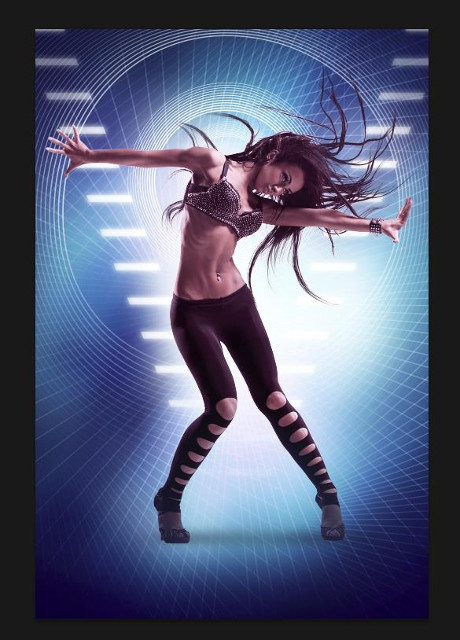
Repeat the operation, this time choose blue # 4164AA. You do the same for her hair, hand and hip tones.
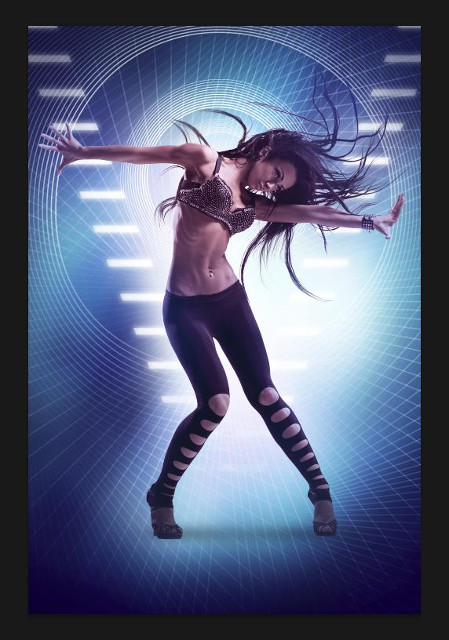
Now add a light effect by creating a new layer and combining it with the model layer. Choose a white brush and make the lines lighter in the same way as shown below.
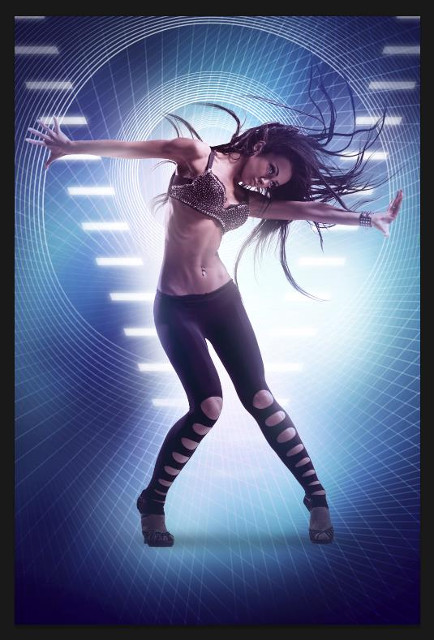
Create a new layer again and fill it with # 61BFBB. Set the Fill to 80% for this layer and change the Blend mode to Soft Light.
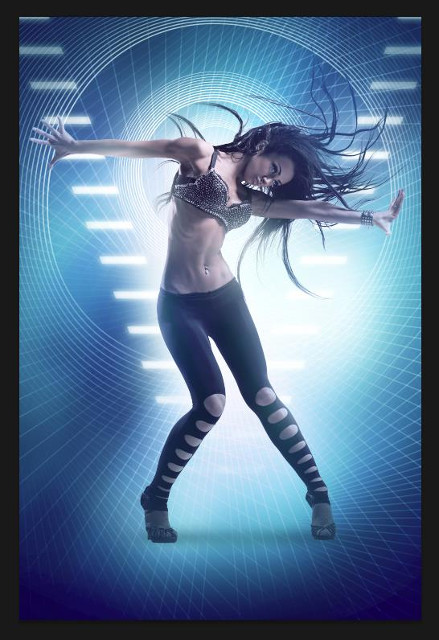
. And create a new layer other than # ff6b00. Set the Fill to 14% for this layer and change the Blending mode to Color.
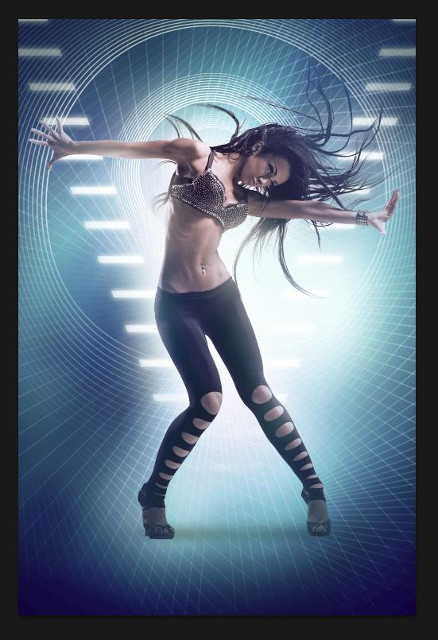
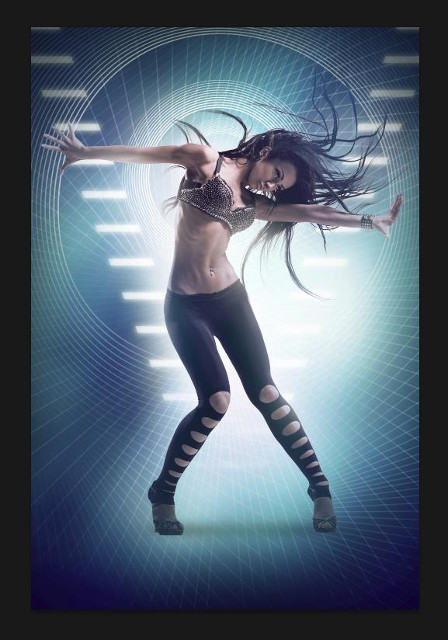
After that, create a new layer, use the Soft Round brush to draw the empty edges around the image (canvas) with black, Flow - 10%.
Click Create new fill or adjustment layer from the bottom part of the Layers panel and click Curves to adjust the curve as shown. Add a mask to this layer and press Ctrl + I to reverse the mask's color.
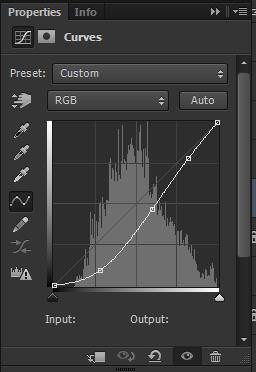
Now select the white brush and paint the mask of the adjustment layer. This time we will paint the top area, the lower left edge and the lowest right edge.
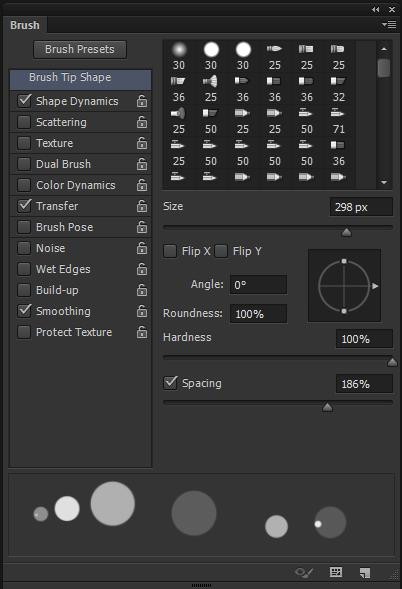
Next we need a custom brush, select the Hard Round brush, go to the Brushes panel (F5) and Select Brush Tip Shape. Click and drag any slider to change the brush Size and Spacing. The Preview window displays the brushstroke changes.
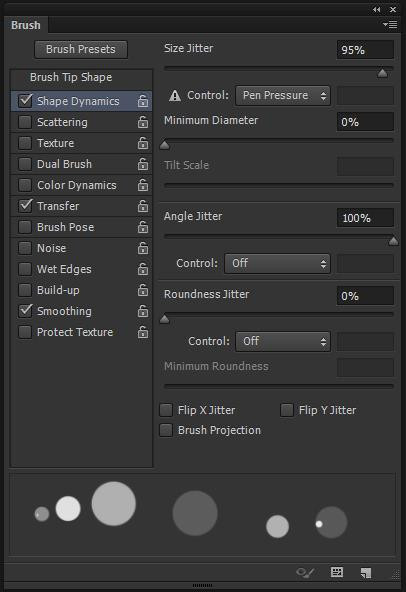
Go to Shape Dynamics:
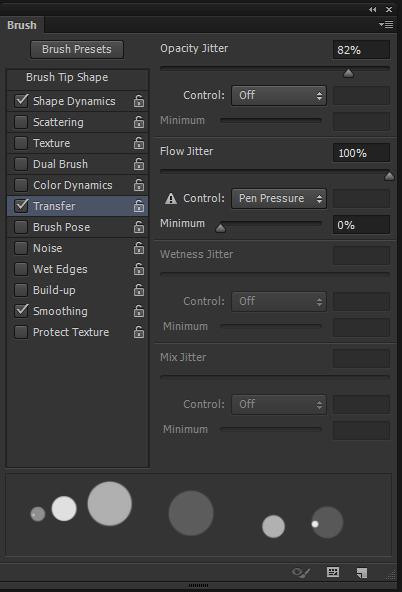
Apply Transfer.
Use this customized brush to create circles ( Flow - 80% ) on the new layer. Set the Blending mode for this layer to Overlay.
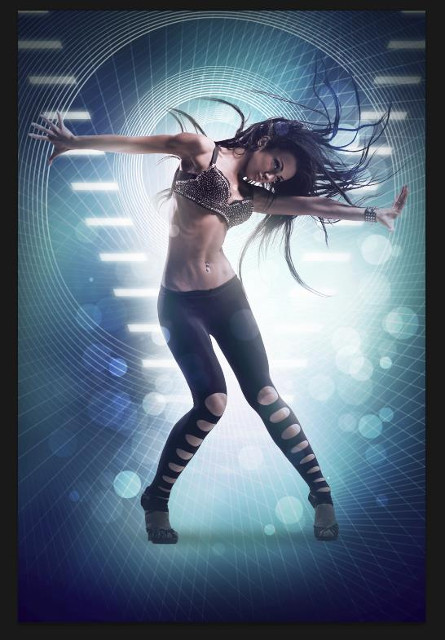
Create a new layer and select Soft Round brush with Flow - 30%, paint the designated areas brighter as shown below. Set the Blending mode for this layer to Overlay.
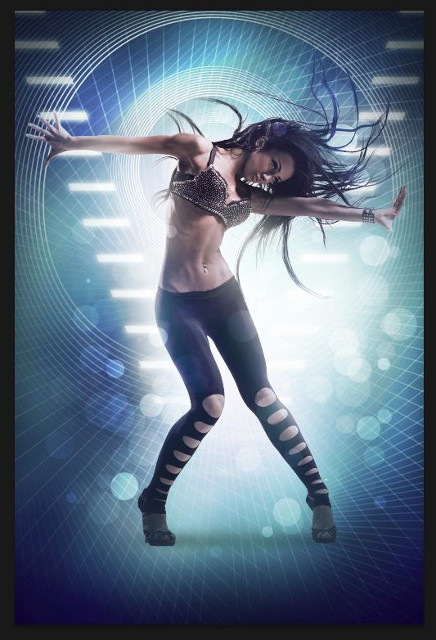
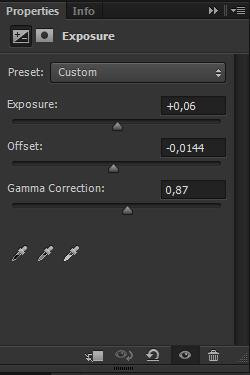
Click Create new fill or adjustment layer from the bottom part of the Layers panel and click Exposure to adjust the tone. Set the value of Exposure to Offset and Gamma.
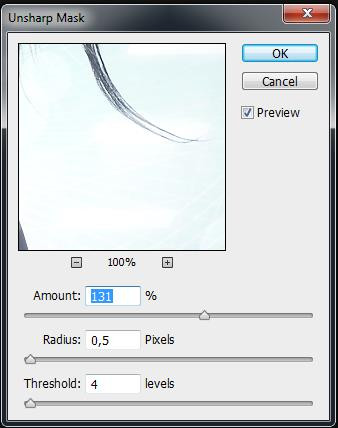
Press Ctrl + Shift + E to group all layers into one. Apply on this filter layer: Filter> Sharpen> Unsharp Mask.
So you've completed the steps of creating digital photos on Photoshop CS6, wish you success!
FAQ
How does Adobe Photoshop CS6 work?
The following guide provides a clear overview of Adobe Photoshop CS6, with the most relevant background, details, and practical takeaways.
What should you prepare before using this method?
Adobe Photoshop CS6 Overview How to sharpen images in Photoshop in 2 ways 10 common problems in Photoshop and basic remedies Start by creating a new file ( Ctrl + N ) in Adobe Photoshop CS6 with size 1000px x 1500px (RGB color mode) at a resolution of 72.
What should you do if the process does not work as expected?
Use the Paint Bucket Tool (G) to color # 030221 for the new background layer.
Related Articles
 How to Use Photoshop CS5 - Part 6: Digital Art10 minutes read
 How to Use Photoshop CS6 (Part 2): Create Fashion Collage Images17 minutes read
 minutes read
 How to Cut Circular Images in Photoshop: Cut Photos on Photoshop4 minutes read
 Simulate the Quality of Film Images in Digital Photos with Photoshop9 minutes read
 How to Create a Border for Photos in Photoshop2 minutes read
Reader Comments 0
Sign in with email or Google to join the discussion.