Table of Contents
Photoshop sharpening increases contrast along existing edges; it cannot recreate focus or detail that was never captured. For a clean result, sharpen at 100% view, work non-destructively, and judge the effect at the final output size.

Prepare the image
- Complete major exposure, color and noise corrections first.
- Duplicate the image layer, or convert it to a Smart Object so the filter remains adjustable.
- View the document at 100% and identify areas that should stay smooth, such as skin, sky or defocused background.
Method 1: Unsharp Mask
- Select the layer or Smart Object and choose Filter > Sharpen > Unsharp Mask.
- Increase Amount to strengthen edge contrast.
- Adjust Radius to control how many pixels around an edge are affected. Fine detail generally needs a smaller radius than large, soft detail.
- Raise Threshold to protect small tonal variations such as grain or smooth skin from being sharpened.
- Toggle Preview and inspect both detailed and smooth areas before clicking OK.
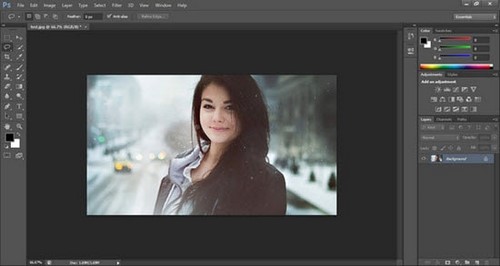
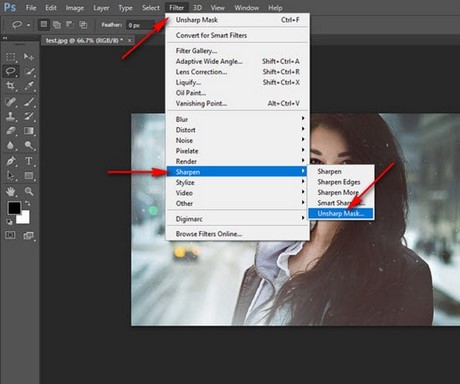
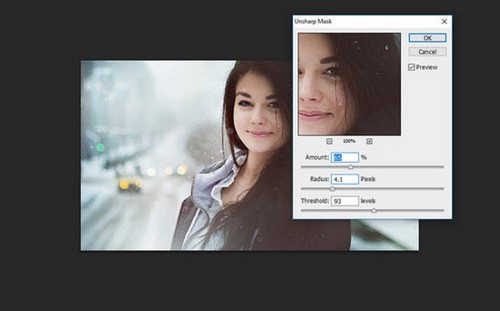
There is no single correct set of values. Image resolution, subject, noise and destination all affect the right settings. Stop if you see bright or dark halos, crunchy texture, emphasized noise or unnatural edges.
Method 2: High Pass sharpening
High Pass isolates edge detail on a separate layer, making the effect easy to mask and blend.
- Duplicate the image layer with Ctrl+J on Windows or Command+J on macOS.
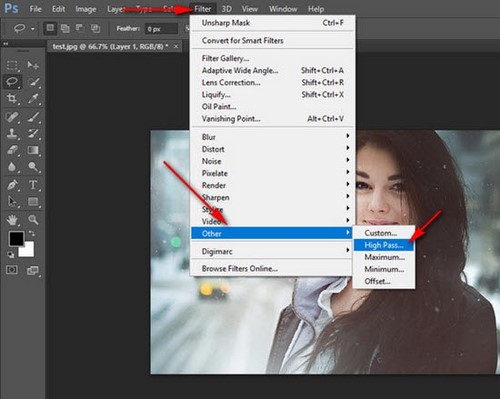
- Choose Filter > Other > High Pass.
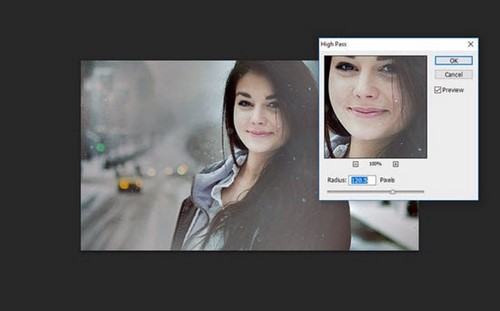
- Set a small Radius so edges are visible but the full image does not reappear. Adobe's current edge-mask workflow suggests 1–3 pixels as a starting range.
- Click OK, then change the duplicate layer's blend mode to Overlay. Soft Light produces a gentler effect; Hard Light is stronger.
- Add a layer mask and paint black over skin, sky, noise or any area that should not be sharpened.
- Reduce layer Opacity if the result is too strong.
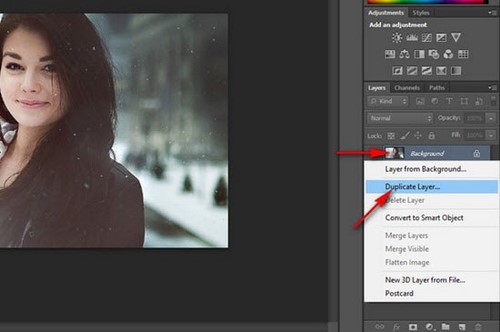
Sharpen for the destination
- Web and screen: resize first, then apply final sharpening and inspect at actual display dimensions.
- Print: the ideal amount depends on print size, paper and output process; a slightly stronger on-screen effect may be appropriate, but test when possible.
- Noisy photos: reduce noise before sharpening and mask smooth areas.
- Motion blur or missed focus: sharpening may improve edge contrast, but severe blur usually cannot be repaired convincingly.
Unsharp Mask or High Pass?
| Method | Best use | Main advantage |
|---|---|---|
| Unsharp Mask | Direct, familiar control over edge contrast | Amount, Radius and Threshold in one dialog |
| High Pass | Selective sharpening on a separate layer | Easy masking, blend-mode and opacity control |
Adobe provides current instructions for Unsharp Mask and High Pass edge-mask sharpening. For other options, compare AI photo enhancers, explore free photo-editing software, and review Photoshop export settings.
Related Articles
 How to Sharpen Images in Photoshop3 minutes read
 How to Sharpen Images in Photoshop in 2 Ways5 minutes read
 How to Sharpen an Image in Photoshop7 minutes read
 How to Resize Images Properly in Photoshop9 minutes read
 5 Easy Ways to Handle Low-Light Photos in Photoshop10 minutes read
 Steps to Save Photoshop Files as PDF3 minutes read
Reader Comments 0
Sign in with email or Google to join the discussion.