How to create professional shadow effects in Photoshop
Shadow effects in Photoshop help highlight text and images, adding depth to your design. With Layer Styles, Opacity, and the Gradient Tool, you can easily create natural, professional-looking shadows without needing advanced skills.
Table of Contents
Shadows help make designs in Photoshop more realistic and vibrant. This tutorial will help you quickly create shadow effects using tools like Drop Shadow and Blending Modes.
How to create a text shadow effect
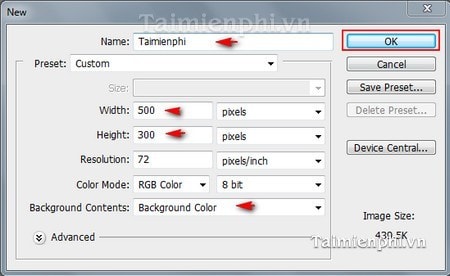
Step 1 : Open Photoshop and create a new image file with your desired size and background color by selecting File --> New from the toolbar, or by pressing Ctrl+N.
For example, the new file has the following parameters:
- Width : 500 pixels
- Height : 300 pixels
- Background Contents : Select Background Color if you want to choose your own background color.
Here, taimienphi chooses black as the background color with the color code #000000.
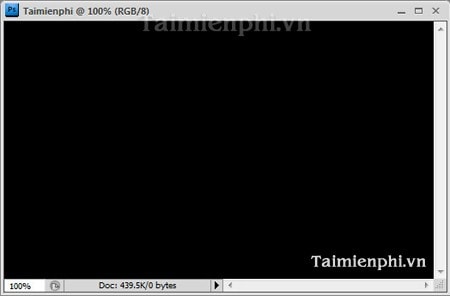
New image file created
Step 2 : Select the Text tool (shortcut key T ) to type any text, choosing the font, size, and color.
For example: Font: Arial, size: 45, white with color code #ffffff
Step 3 : Duplicate the text layer by clicking Layer --> Duplicate Layer on the toolbar .
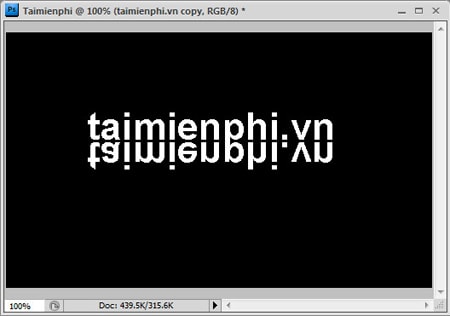
Step 4 : Select the duplicated layer , press Ctrl+T to adjust its position, then right-click and select Flip Vertical to rotate the new layer from its original position.
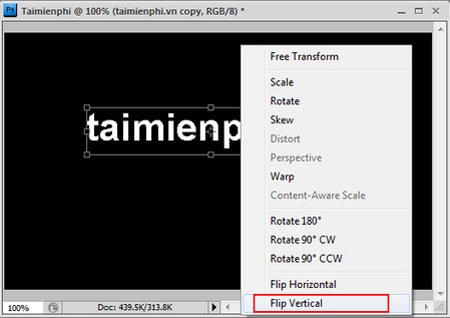
The layer after being reversed.
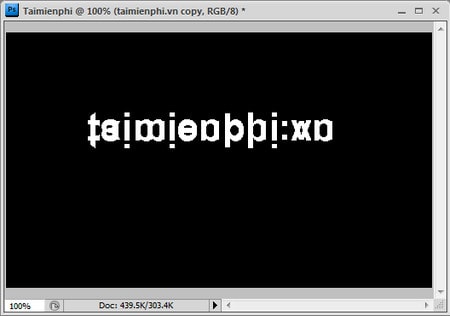
Step 5 : Use the Move Tool (V) to move the newly adjusted layer below the original layer.
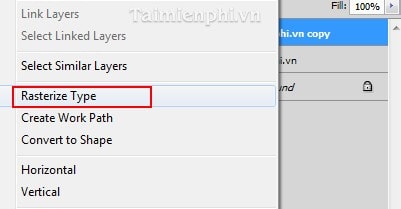
Step 6 : Right-click on the layer you just edited and select Rasterize Type to change it to Graphic.
Step 7 : Select the Add Vector mask icon to create a mask on top of this layer.

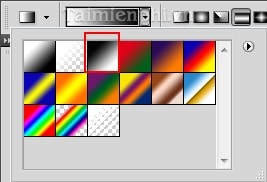
Step 8 : Select the Add Vertor mask area of the copied layer, then select the Gradient Tool (G) to fill the text with color.
Choose a gradient style as shown below.
Hold and drag the mouse on this layer from top to bottom. Note that you must drag it straight for the text to look nice.
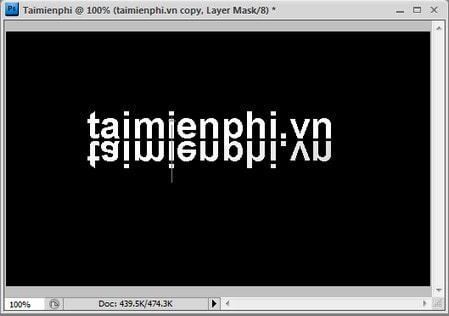
The text after it has been dragged down
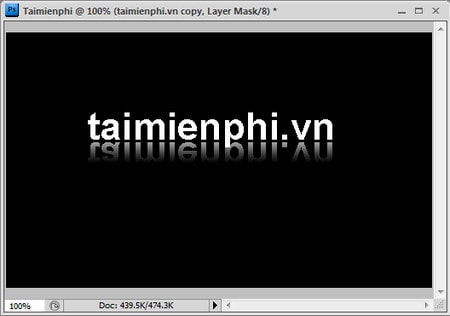
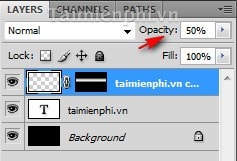
Step 9 : Adjust the opacity of the newly created layer to around 50% for a more natural-looking image.
Step 10 : Once completed, press Ctrl+Shift+E to combine the layers with the original background image, and save the image in your desired format.
This is the finished image.

While the above steps may seem difficult at first glance due to the many required steps, they are actually the simplest operations.
Shadow effects in Photoshop make text and images look more realistic and professional. Additionally, you can create 3D embossed text, text lighting effects, or glowing text to design eye-catching banners and logos. These effects not only make text look more vibrant but also suit many different design styles. If you don't have Photoshop installed, you can use alternative software like GIMP or Photopea to create similar effects.
Was this article helpful?
Your feedback helps us improve.
Related Articles
 How to create beautiful shadow effects in Photoshop2 minutes read
 How to create text shadow in Photoshop5 minutes read
 How to create stunning 3D pop-out effects in Photoshop8 minutes read
 How to create a shadow border in Photoshop11 minutes read
 Tutorial for creating 3D photo effects in Photoshop (Part 1)5 minutes read
 How to create a mirror shadow in Photoshop3 minutes read
Reader Comments 0
Sign in with email or Google to join the discussion.