Get familiar with Corel Draw - Lesson 2: Rulers, nets and lines
 The ruler used to determine the position of the object or the pointer.
The ruler consists of vertical and horizontal ruler. The vertical ruler shows the cursor position corresponding to the X axis on the property bar, the horizontal ruler shows the cursor corresponding to the Y axis on the property bar.

Figure 1
Rulers
By default, the Corel program is always displayed.
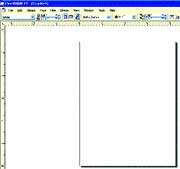
To turn on or off the ruler select View - Rulers (Figure 1)
The ruler used to determine the position of the object or the pointer.

Figure 2
The ruler consists of vertical and horizontal ruler. The vertical ruler shows the cursor position corresponding to the X axis on the property bar, the horizontal ruler shows the cursor corresponding to the Y axis on the property bar.
Corel defaults to the lower left corner of the drawing page with the coordinates (0,0) (Figure 2).

Figure 3
The unit of measure is the default unit of Drawing Unit. To change the unit of measurement click on the downward arrow in the Drawing Unit (Figure 3).
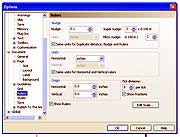
To set the properties for the Tool - Options ruler (Figure 4).

Figure 4
- Units: determine the measurement unit of the ruler. If you choose Sam units for Horizontal and Vertical rulers, the unit of measurement in the Horizontal cell is used for both rulers and vice versa will choose two different units for two rulers.
- Origin: locate the origin (0,0) for the ruler.
- Show Rulers: turn off the ruler.
- Tick Division: division intervals.
- Edit Scale: Open the Drawing Scale dialog box to determine the drawing rate.
Grid (Grid)
Grids are horizontal and vertical lines but cannot be displayed when printing. To display the grid select View - Grid.

Figure 5
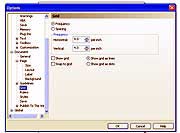
To set the properties for the Tool - Options ruler (Figure 5).
- Frequency: set the number of grid lines appear vertically and horizontally.
- Spacing: set the distance between two grid lines.
- Show Grid: turn off the grid.
- Snap To Grid: turn off the capture mode with grid lines.
- Show Grid as lines: select the grid as the lines.
- Show Grid as dots: select the grid as consecutive points.
Lines (Guidelines)

Figure 6
The alignment will help determine the exact location of objects during drawing. To show the selection line, View - Guidelines. Create a drawing line by clicking on the pull-down ruler on the drawing page. Delete the curve by clicking on the path (the path changes to red) and press Delete.
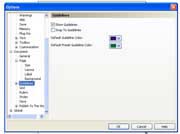
To set the properties for the Tool - Options ruler (Figure 6).
- Show Guidelines: turn off the line.
- Snap To Guidelines: Turn off the capture mode with the alignment.
- Default Guidelines Color: the default color of the line.
Lam Khe