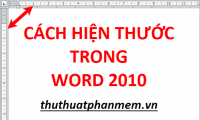
How to use the Ruler ruler bar in Word
The Ruler ruler bar in Word is used to align the margins and to the beginning of the paragraph for the text, to help users get more standard content, better layout.
Table of Contents
During word processing on Word, using the Ruler ruler bar will make it easier for users to align the margins, leaving the beginning of the paragraph more accurately. Users can use it to align the image, text or any kind of content in Word.
In particular, when printing text, the ruler bar will help display exactly as well as on-screen layout for users to know, which can be adjusted if not found reasonable. The following article will guide you how to use the entire Ruler ruler bar on Word.
- How to adjust the size of Word table cells equally
- Complete guide for Word 2016 (Part 6): Using Indents and Tabs
- Instructions for deleting table paths in Word
Instructions for using Word ruler
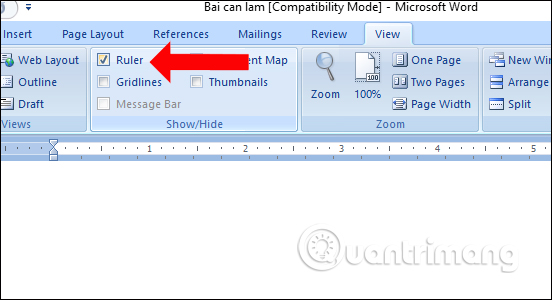
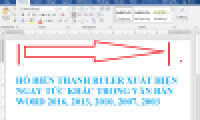
1. Display ruler bar
By default, this bar will not be enabled in Word, but users must manually activate. Or if accidentally the size bar is hidden, you need to show it again to use.
We will need to access the View menu and then tick the Ruler .
The Ruler ruler bar has two parts, the horizontal Ruler can be displayed in both Web Layout and Draft modes, but the vertical Ruler is not.
The detailed implementation of the reference in the article How to display the Ruler ruler in Micorosoft Word.
2. Visit the Page Setup
After the ruler bar appears, users can take advantage of it to quickly perform some operations.
Double-click the gray area on the ruler to open the Page Setup page setup window.
At the Page Setup interface, the user will be adjusted to the layout for the document. At the Margins tab will be used to adjust the upper, lower, left, and right margins. The Gutter section is the distance to the binding of the document and is left blank. Orientation will be used to adjust the horizontal and vertical modes of paper size.
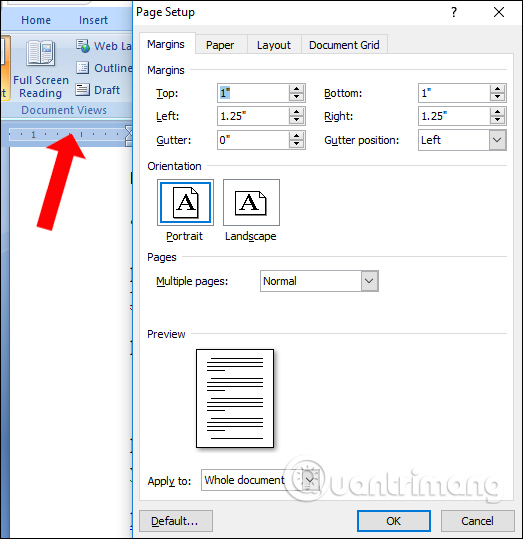
The Paper section is used to adjust the size and size of paper when printing documents. The Paper size section, the default paper size in Word is Letter with size 215.9 x 279.4mm. Your alignment options will also appear on the ruler.

3. Change the alignment on the ruler
The ruler bar will have 2 different areas, the area is in the middle of white, the two sides will be gray. The gray area is the margin that you have set, and the white area shows the text area. The gray area will begin with the number indicating the margin that the user has aligned in Page Setup to 0, then start again from 0 in the white area.
To change the distance that aligns the margin at the ruler, hover between the gray and white ruler areas at the margin you want to edit and drag right or left, up or down.
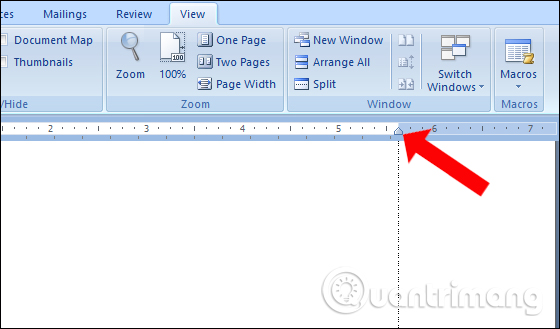
If the user uses the default paper size of 8.5 x 11 inches, the horizontal ruler will start from 1, then return to 0 when the left margin is left, continue to 7.5 for the remaining horizontal area. The vertical ruler will also start from 1 for 1 inch margin, return to 0 when the margin is gone and run to number 10 for the remaining vertical.
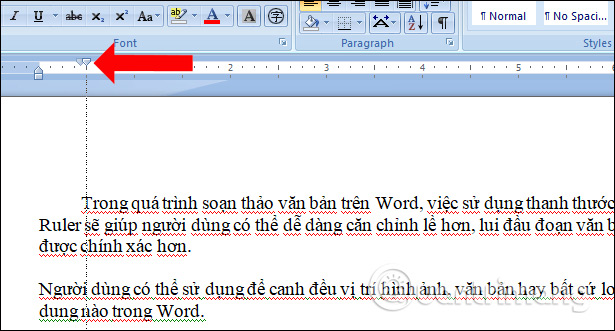
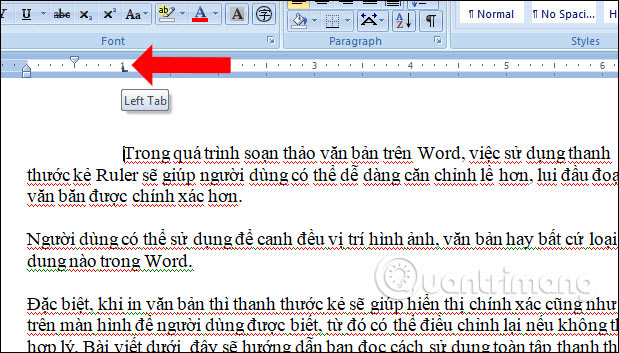
4. Set the beginning and end of the line on the ruler
On the ruler bar you can adjust the beginning and end of lines for the first line of text, with 3 different alignment sections.
The bottom rectangular mold is used to adjust the left margin, back to the beginning of the paragraph. When the user pulls the bottom mold, the other 2 landmarks will also follow.
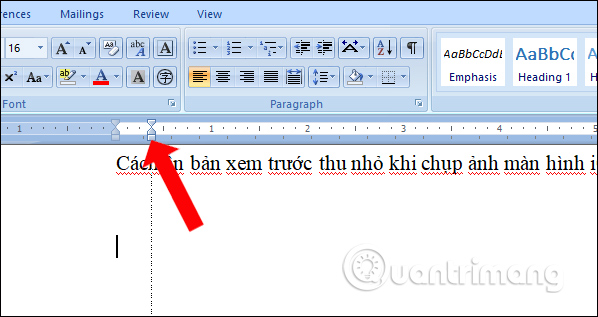
The middle dragging line will reverse the line for the remaining lines, except the first line.
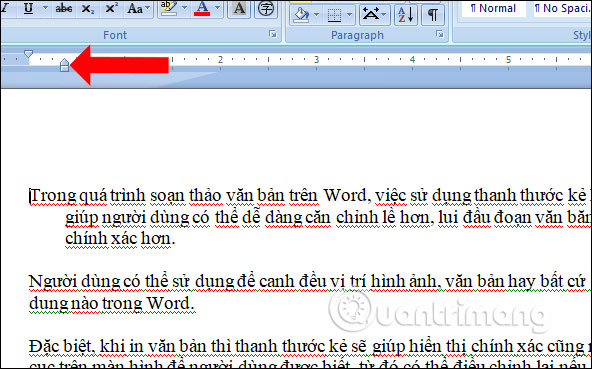
The dragging line is at the top to reverse the line, aligning the left margin for the first line in the paragraph.
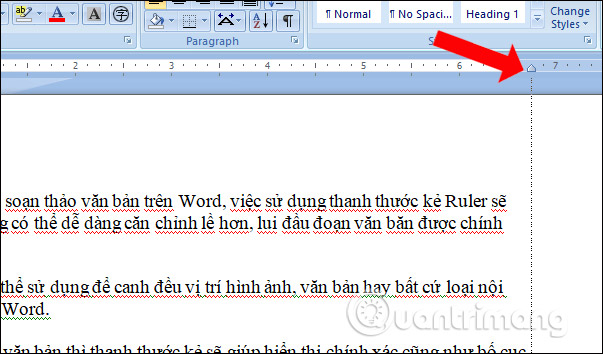
In the white right area, there is an additional milestone to align right for the whole paragraph.
5. Add tab stops in Word
The tab stop in Word is where the text cursor will jump until you press the Tab button on the keyboard. When placing a mouse game at 1 point and pressing Tab, the cursor will jump 8 characters.
The tab stops at the top left corner of the document right above the vertical ruler.
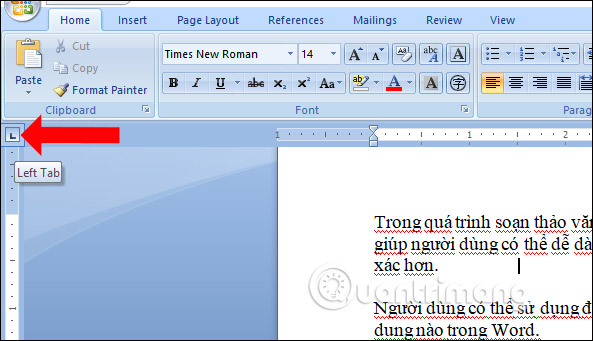
When we click on this tab stops there will be different types like:
- Left (Left): This is the custom Tab Stop default. Left-aligned text starts from the tab stop set.
- Center: Centered text around the tab stop is set.
- Right (Right): Text is right-aligned, ending at the tab stop is set.
- Decimal Number (Decimal): Arrange the decimal numbers in line with each other.
- Bar Tab: This tab type will add a straight line at the place where it is placed. You can use it to divide vertical columns in cases where there is no need for tables.

To insert the Tab Stop, click on the place you want to place on the horizontal white area. You can then place the mouse pointer in the first letter of the first line and then press the Tab button. Immediately the word will be placed in the correct position where the Tab Stop is placed.
Also when double-clicking on the Stop Tab will display the size setting table to customize as you like.

Normally the Ruler ruler bar will only be used to align the margin accordingly. However, if the user exploits more features of the Ruler bar on Word, it will be more helpful in text editing.
See more:
- How to scroll bar scrolls horizontally and vertically in Word and Excel
How to horizontally rotate any page of paper in Word- Enter the serial number and the automatic initial character MS Word
I wish you all success!
Was this article helpful?
Your feedback helps us improve.
Related Articles
 How to display Ruler ruler bar in Micorosoft Word 2010, Word 2003, 2007, 2013 and Word 20163 minutes read
 How to display the Ruler bar in Word versions4 minutes read
 How to display the ruler on the computer screen6 minutes read
 How to show the ruler in Word 2010 and the rule bar in Word 20102 minutes read
 How to quickly display the Ruler in Word using keyboard shortcuts.5 minutes read
 Find the hidden Ruler bar in Word very quickly4 minutes read
Reader Comments 0
Sign in with email or Google to join the discussion.