Create and use automated macros in Word 2010
Many people may not know about the benefits of macros when running automatically in Word 2010. These are Word commands stored in a file and executed when used, like a small program. For example, if you create a lot of work document scripts, you can create a macro yourself.
A macro is a command that executes a job script. Creating a macro is the recording of a set of user processing operations (Record Macro) then saving as a set of commands and placing in a " MacroName ". The recorded language (representing work in macros) in MS Office is VB (not VB.NET). When you need to do the same job as you did, just run the MacroName (press ALT + F8 ) to redo a script. The macros automatically provide the words given by different circumstances, listed by name, which are:
- AutoNew - When you create a new document
- Autoclose - Whenever you close a document
- AutoExec - Whenever you start Word
- AutoExit - Whenever you exit Word
- AutoOpen - Whenever you open a new document
To use macros, you must first create them and they are created the same way as any other macro in Word, by recording the actions you want to make the macro.
To start, click the View tab on the main interface of Word 2010, Then, click the Macros section drop-down button on the right.

Click the Record Macro item to start creating your macro.

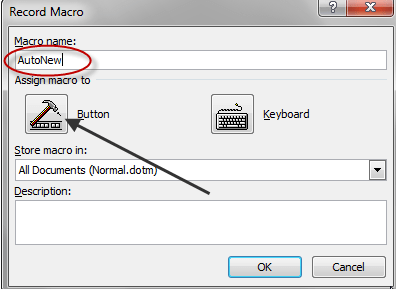
Before you can start, in the Record interface Macro you name the Macro automatically at the Macro name entry. If you want your new macro to run whenever you create a new document, name it AutoNew and select the Hammer button in the Assign macro big box . This commands Word to assign macros to a button on the Quick Access Toolbar , because you can then run macros at other times.

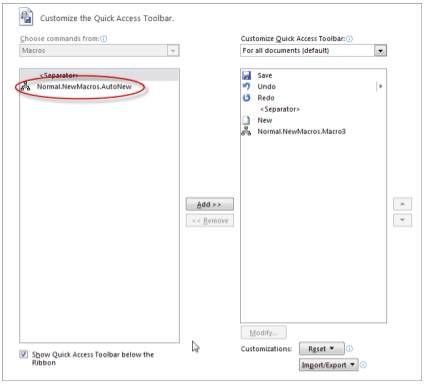
Next, you will get the interface of Customize the Quick Access Toolbar . That's the interface that allows you to assign the macro you are creating, then double-click on Normal.NewMacros.AutoNew section of your macro to assign and click the Ok button.
Next you return to the Word document, the cursor will now look like a cassette tape, which means it will record your actions.

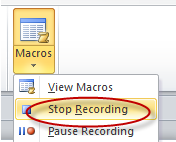
When you're done, press the drop-down button again in the original Macros section at the View tab again, select Stop Recording , to finish creating the macro.

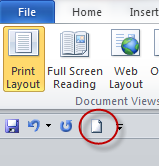
Now, try again by clicking on the New Document icon (or File, New and Blank Document) to start a new document.

When Word opens the new document it will automatically run the macro, you will see the generated content will be formatted and the titles added in the item you created when setting up the macro.
In the same setting, you can use other automated macros to run automatically when you start, exit, or open a new document to make your work easier in Word.