Table of Contents
This guide provides a practical overview of Instructions on How to Create and Use Macros in Excel Create Macros, Save, including its main features, benefits, limitations, and important considerations.

Below the article guides you how to create and use macros, save macros in Excel, invite you to follow along.
First, if your Excel file does not display the Developer tab, then display the Developer tab on the Ribbon as follows:
1. Select File -> Options.

2. In the Excel Options window, select Customize Ribbons , then check the box in the box before Developer and click OK .

Method 1: Create a Macro using the Record Macro
Step 1 : In Excel file, select the cell to perform the operations, next select Developer -> Record Macro .

Step 2: Appears a Record Macro table, enter the name of your macro in the Macro name (write without spaces), you can also describe your macro in the Description section. You can also set shortcuts in the Shortcut key box. Then click OK to start recording operations in Excel.
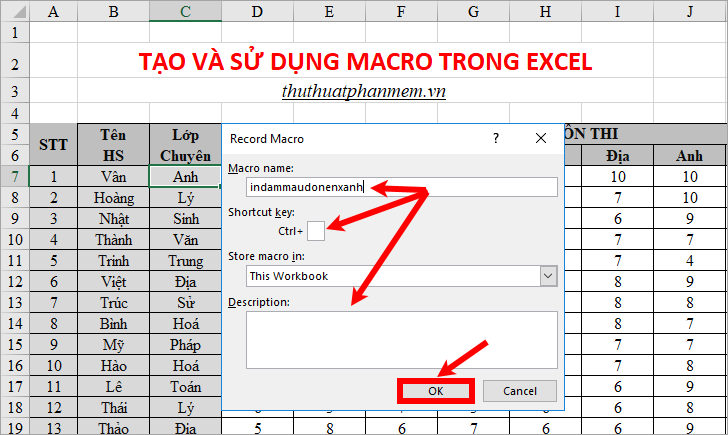
Step 3: You start to perform the operations you want to create macros, for example, you perform some alignment operations such as center alignment, bold printing, coloring, and background shading for text.
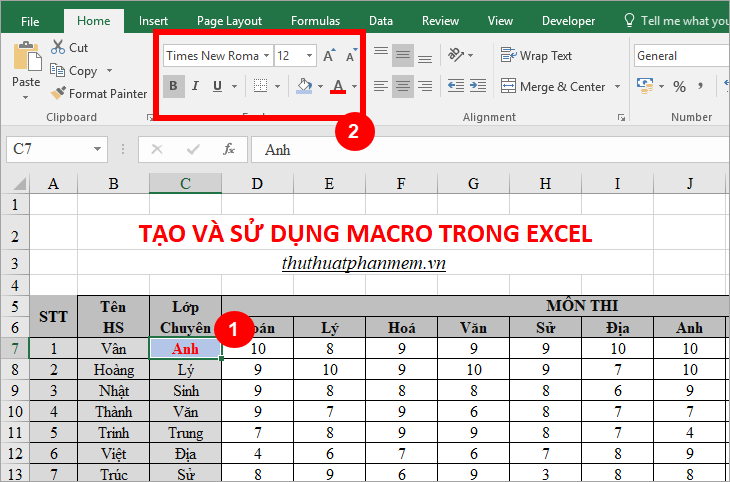
Step 4: After you finish manipulating and want to stop recording macros, you select the Developer tab -> Stop Recording.
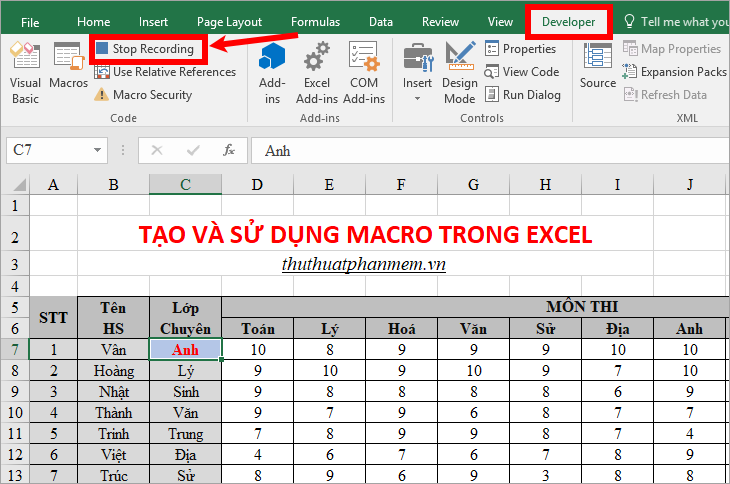
So you've created the simple Macro already, if you want to create other macros, then you do the same.
Step 5: Use the created macro.
Select a cell in Excel where you need to use macros, then select the Developer -> Macros tab .
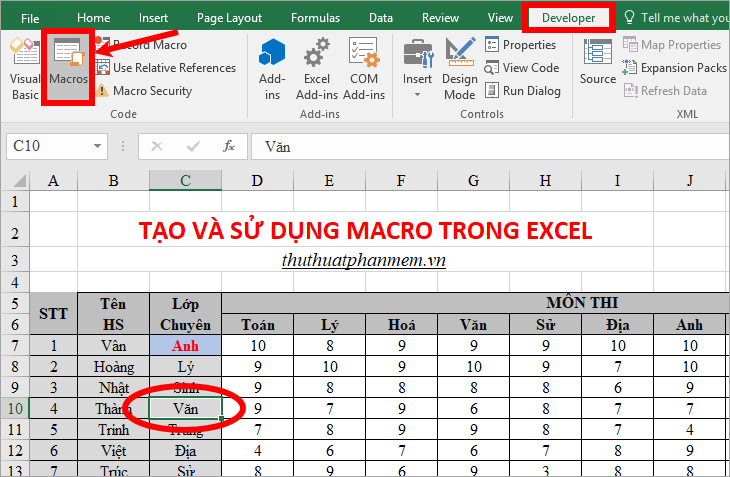
The Macro dialog box appears, select the macro name you want to use and select Run to run the macro.

So immediately the data box you choose will be performing the manipulation of macros that you manipulated during macro creation.

Method 2: Create Macros using Visual Basic code
Step 1: Select Developer -> Macros or press Alt + F8.

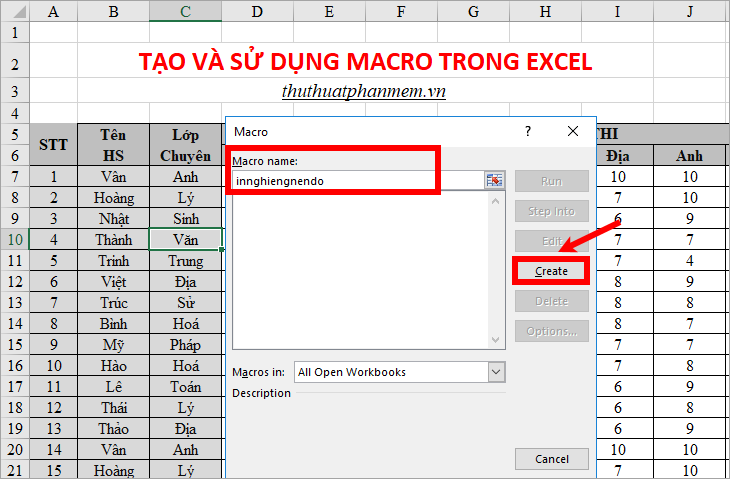
Step 2 : The Macro dialog box appears, enter a name for the macro in the Macro name section (write immediately, without accents) and click Create .
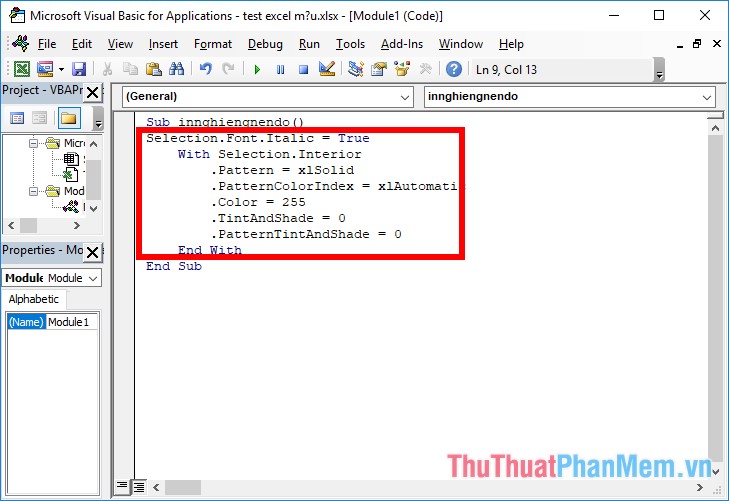
Step 3 : In Sub sub tenmacro (). End Sub you write Visual Basic code, if you are unsure the code you can search for suitable code online, then copy and paste the code into the middle of the section Sub. End This sub . Then close the Visual Basic window.
For example, there is a simple code below to help you italicize and fill in a red background.
Step 4: Use the Macro
You can use macros similar to the way above is to select the cell to run the Macro and click Developer -> Macros tab .
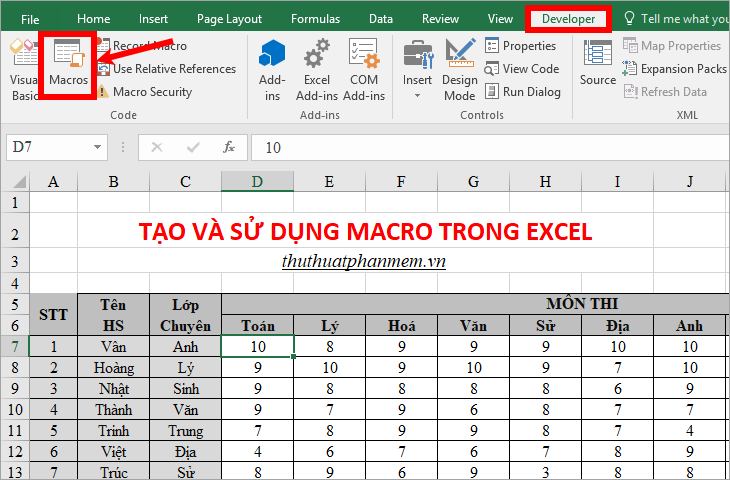
The Macro dialog box appears, select the macro name to use and select Run .
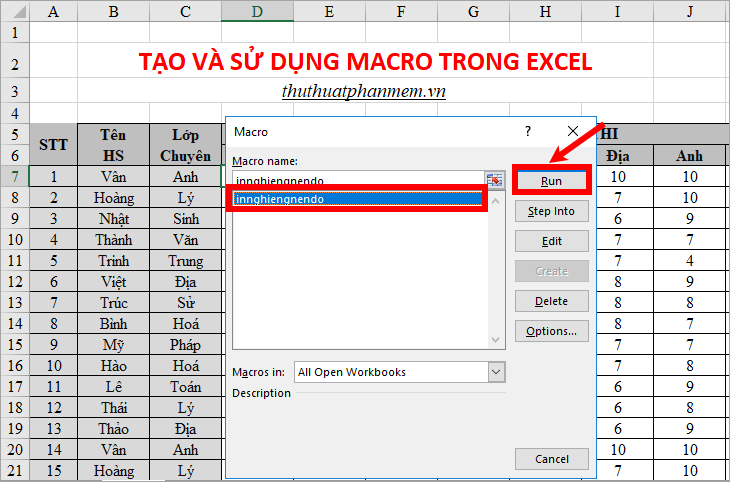
So the macro will run and execute exactly the code that Visual Basic you enter.
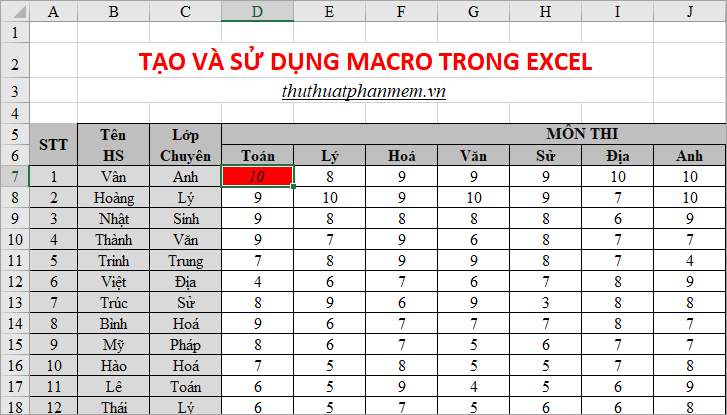
Step 5: Set up keyboard shortcuts to use macros.
If at the time of creating macros, but you have not set a shortcut, you can set the shortcut again by in the Macro dialog box, select the macro name to set the shortcut and select Options .
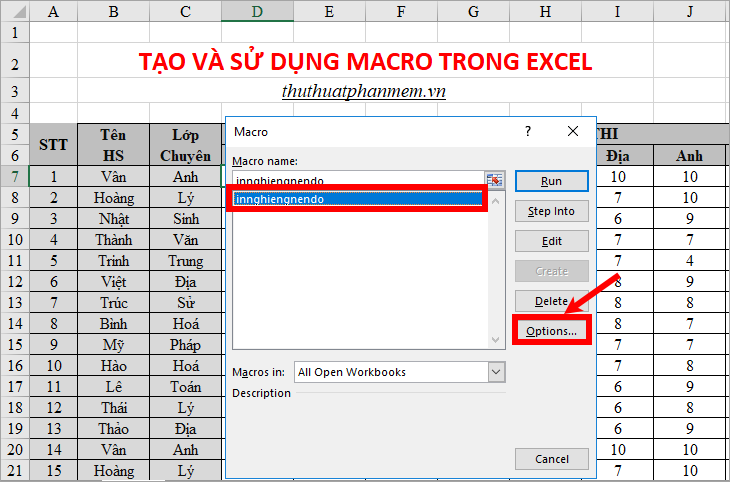
Macro Options appears , enter the characters in the white box next to Ctrl and click OK to save the shortcut.
Note: you must not enter the numeric keys but only the characters.

So instead of having to choose Macros -> Macro name -> Run , you can use the shortcut you just set to use macros.
Step 6: Save the Macro
Select File -> Save As ( F12 key ). The Save As window appears, select a location to save the file, name the file, then in the Save as type section, select Excel Macro-Enabled Workbook and select Save to save the Excel file and macro.

So you know how to create and use macros in Excel and how to save macros in Excel. To know how to turn on, turn off, delete macros in Excel, you can refer to the article How to turn on, turn off, delete macros in Excel.
If you know how to use macros proficiently, you will work with Excel faster, greatly reducing Excel processing time. Good luck!
FAQ
What should I know about Instructions on How to Create and Use Macros in Excel Create Macros, Save?
Focus on the key features, requirements, limitations, and practical use cases explained in this guide.
How do I get the best results with Instructions on How to Create and Use Macros in Excel Create Macros, Save?
Follow the recommended steps, use current software or information, confirm compatibility, and review settings before major changes.
Are there any risks or limitations?
Potential limitations depend on compatibility, data quality, cost, privacy, support, and how the product or method is used.
Related Articles
 MS Excel 2007 - Lesson 7: Create Macros in Excel 20072 minutes read
 How to Creating Macros in Excel: Step-by-Step Guide3 minutes read
 How to Use Macros in Excel7 minutes read
 The Easiest Way to Use Macros in Excel8 minutes read
 A Macro in Excel: What It Is and How to Create and Run It4 minutes read
 How to Delete Macros in Excel, Quickly Disable Macros3 minutes read
Reader Comments 0
Sign in with email or Google to join the discussion.