5 steps to fix 100% Full Disk error on Windows
Your computer hangs, lags, doesn't do anything even after reinstalling Windows, and when checking Task Manager, it's Full 100% Disk. The following article will help you thoroughly solve this situation optimally and most effectively, help you troubleshoot the problem of full computer hard drive.
Table of Contents
Your computer hangs, lags, doesn't do anything even after reinstalling Windows, and when checking Task Manager, it's Full 100% Disk. The following article will help you thoroughly solve this situation optimally and most effectively, help you troubleshoot the problem of full computer hard drive.
See the 100% Full Disk error correction tips on Windows 8 / 8.1
1. Handle the Troubleshooting section:
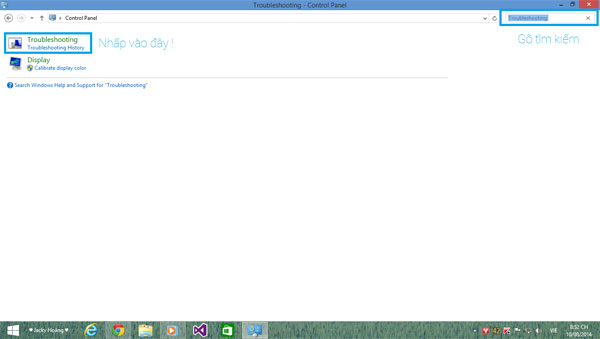
You go to Control Panel , type Troubleshooting in the search box and click on Items Troubleshooting .
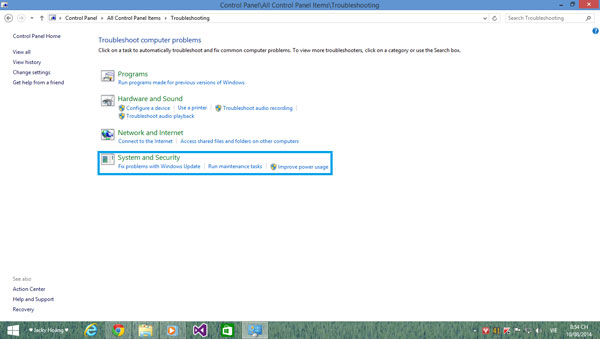
The window appears, click System and Security .
New window will appear, select System Maintenance .

The message appears, click Next .

Then let it work when the Systam Maintenance message appears , click on the item Try troubleshooting as an administrator .

And wait for it to run until the word Close is clicked.
2. Turn off Maintenance:
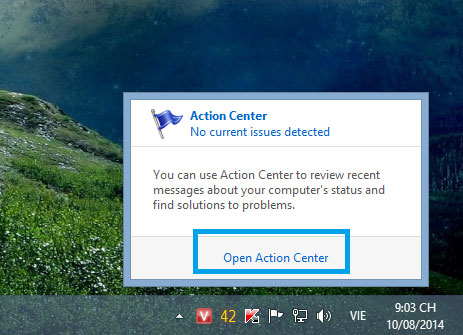
Open Action Center by left clicking on the flag under Taskbar in the lower right corner, select Open Action Center .
Next, click on the arrow for direction as shown to show more details of the Maintenance setup, select Setting .
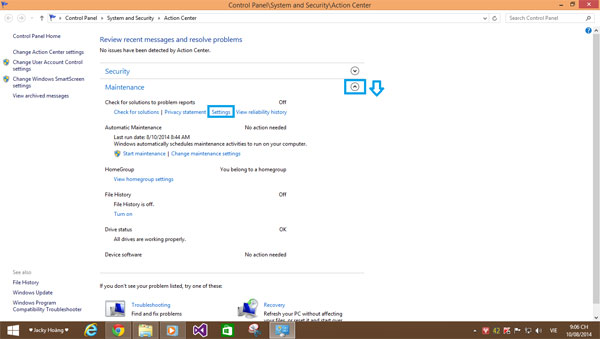
Then, click Never check for solutions (not recommended)
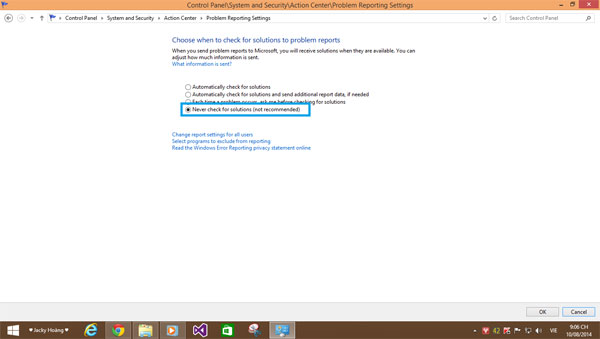
Select OK .
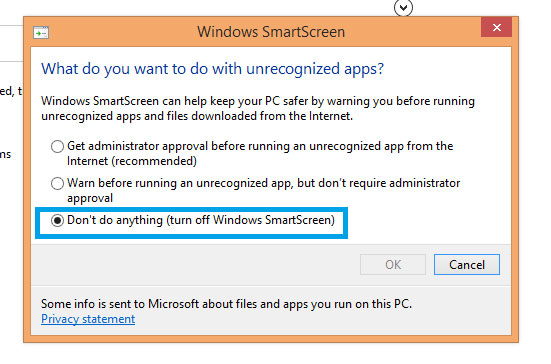
3. Turn off Windows SmartScreen:
As well as turn off Maintenance , go to Action Center , then look at the left column under Change Windows SmartScreen Settings , click on this item.
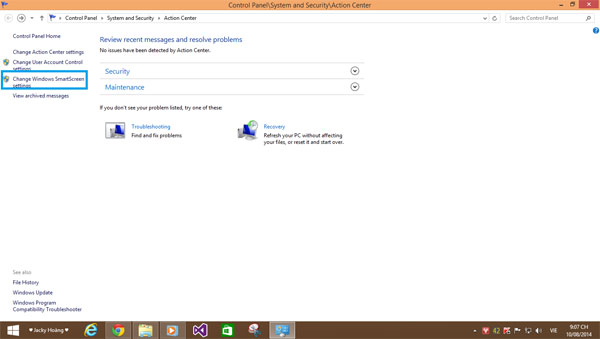
Then choose Don't do anything (turn off Windows SmartScreen)
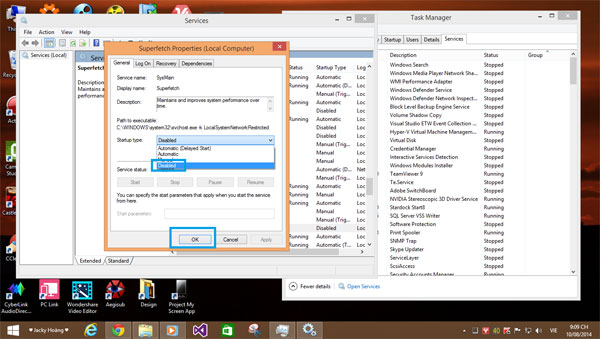
4. Turn off Service Super fetch:
Open Task Manager (or use shortcut key combination Ctrl + Shift + Esc ). Switch to the Service tab, select Open Service . The Services window appears, find the Super fetch service (press S and then search for convenience).
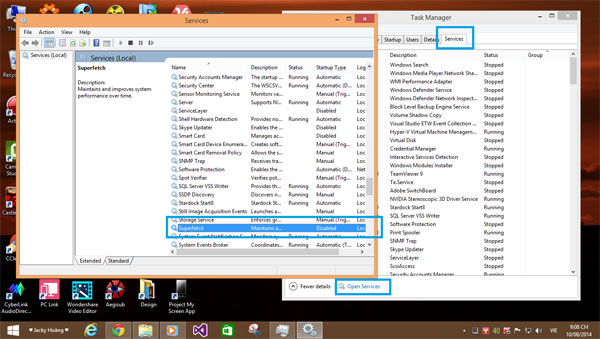
Double click on Super fetch service, select Disable then OK -> Apply .
5. Turn off the Windows Search Service:
Still in Services , find Window Search (press W then find).

Then do the same as the Super fetch .
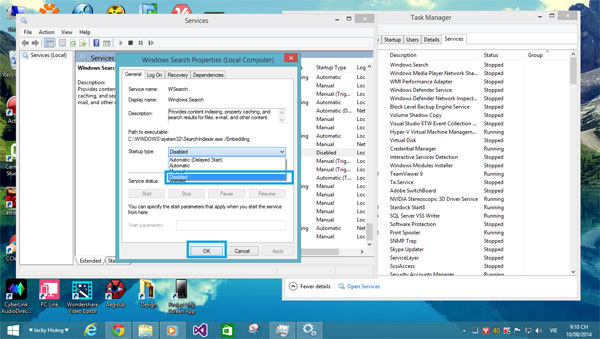
Press OK -> Apply to save the changes.
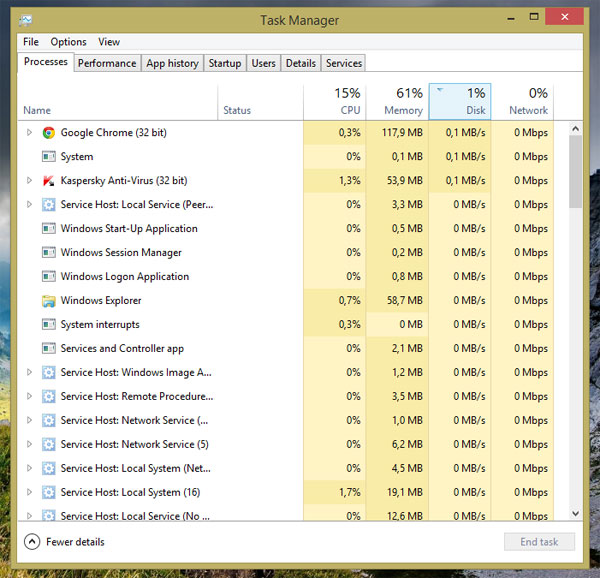
After doing 5 ways, restart your computer, turn on Task Manager and check if you still have Full 100% Disk.
Note: Some software or 100% Disk currently does the steps because the software may be viurs, then the software scans the system so 100% is not worrying, waiting for the scan is finished .
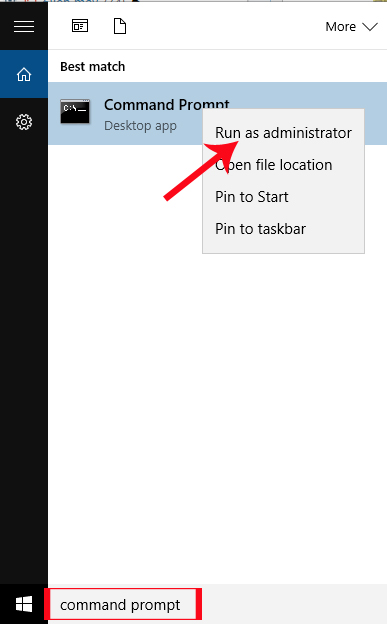
6. Full Disk error on the latest Windows 10 version (KB3201845):
First of all in the search bar on Windows, we type the keyword command prompt , then right click command prompt select Run as admin , type WPR-cancel . Finally press Enter to finish.
Good luck!
Was this article helpful?
Your feedback helps us improve.
Related Articles
 Fix 100% Full Disk error on Windows with the following 14 tips9 minutes read
 12 steps to fix Full Disk error 100% on Windows 1011 minutes read
 How to create disk full BAT file repair Windows 106 minutes read
 Instructions for fixing 100% Full Disk error on Windows 102 minutes read
 Fix Full Disk error 100%, 99% on Windows20 minutes read
 Instructions on 3 ways to fix Full Disk error 100% on Windows most effectively3 minutes read
Reader Comments 0
Sign in with email or Google to join the discussion.