9 Ways to Fix 100% Full Disk Error on Windows 10, 8.1, 7
You feel frustrated because you cannot fix the Full disk 100% error. Let's refer to and try to apply these 9 ways to fix this error with Hoang Ha PC.
Table of Contents
1. Turn off background apps running in the system
One of the reasons for this error is that software and applications run in the background while the computer is running. There are many apps with large capacity, so running them will consume a lot of computer performance . This leads to the computer operating slowly or freezing even if you do not use many programs. To fix this situation, follow these steps to turn off those apps:
Step 1: Go to Start menu and select Settings

Step 2: In the Settings panel , select Privacy

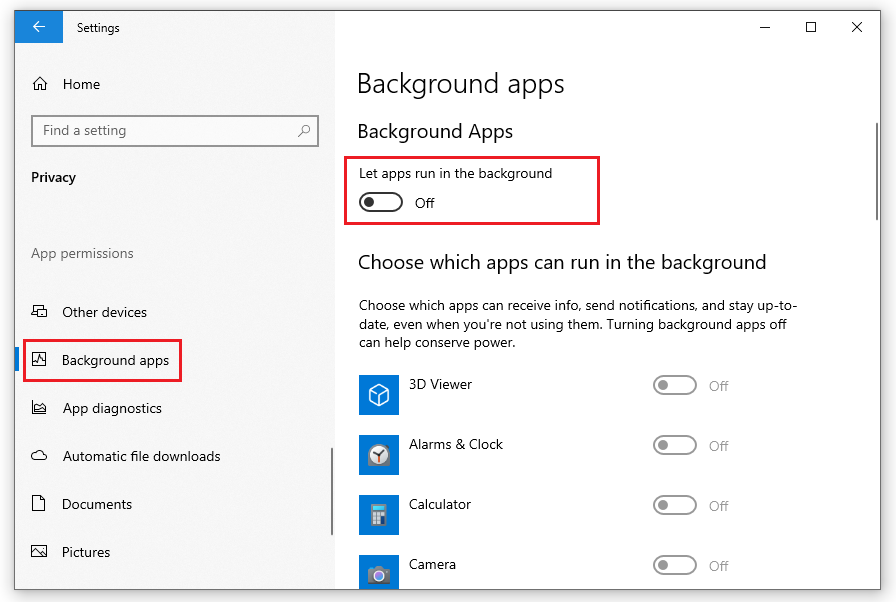
Step 3: Go to the Privacy menu , left-click and select Background apps. Finally, at the line " Let apps run in the background", drag the lever to the Off icon .
2. Update Windows
One of the most effective ways to fix the 100% Full disk error on Windows is to update Windows. This error can occur when the computer's Windows version is not updated or the version you updated has errors. Please follow the following procedure to fix the error.
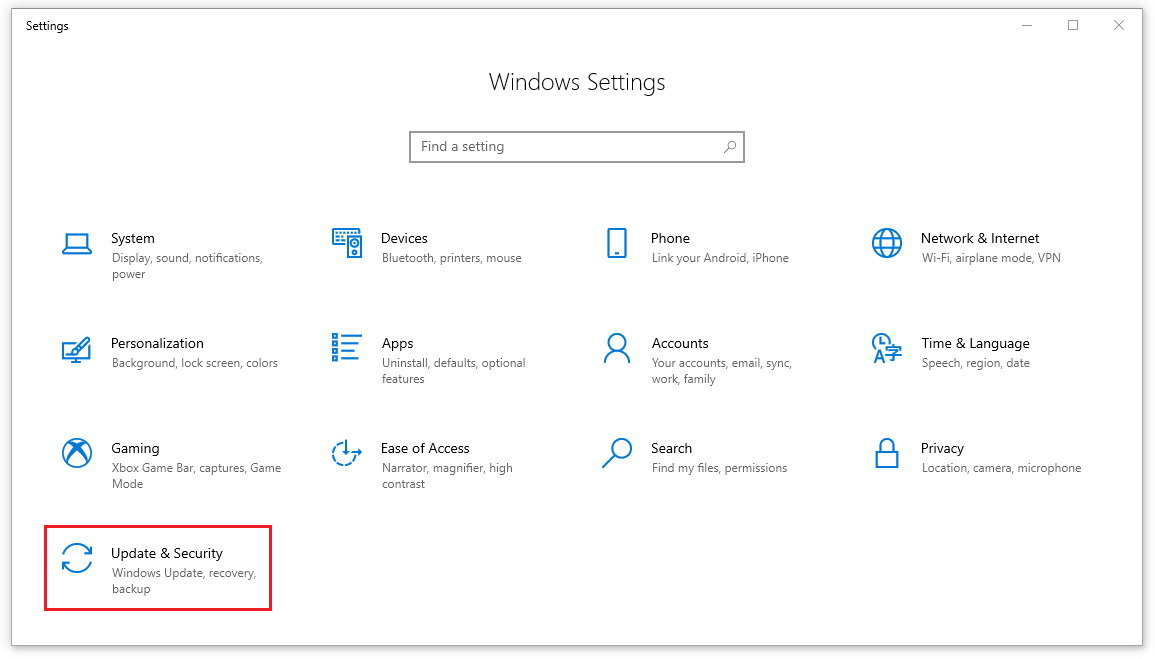
Step 1: Click the Start button => select Settings => a window appears, select Update & security.
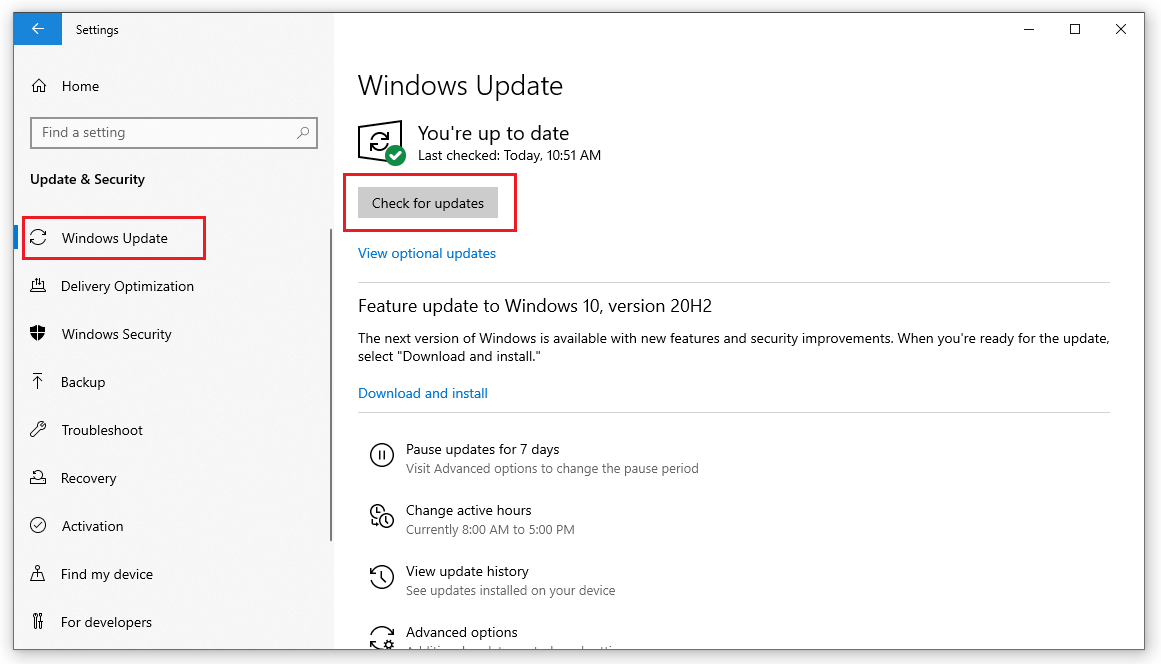
Step 2: A new window appears, select Windows Update => and click Check for updates to let Windows find the latest update .
Step 3: Wait…. Yes, your job is that simple, let the operating system take care of the rest.
Windows will download the Update and automatically install it on your computer. However, the downside of this method is that it takes a long time because the download speed is slow. However, this is still a good way.
3. Fix Full disk 100% error on Windows by handling Troubleshooting
One of the reasons for the Full disk 100% error is Troubleshooting . Follow these steps to fix the Full disk 100% error on Windows.
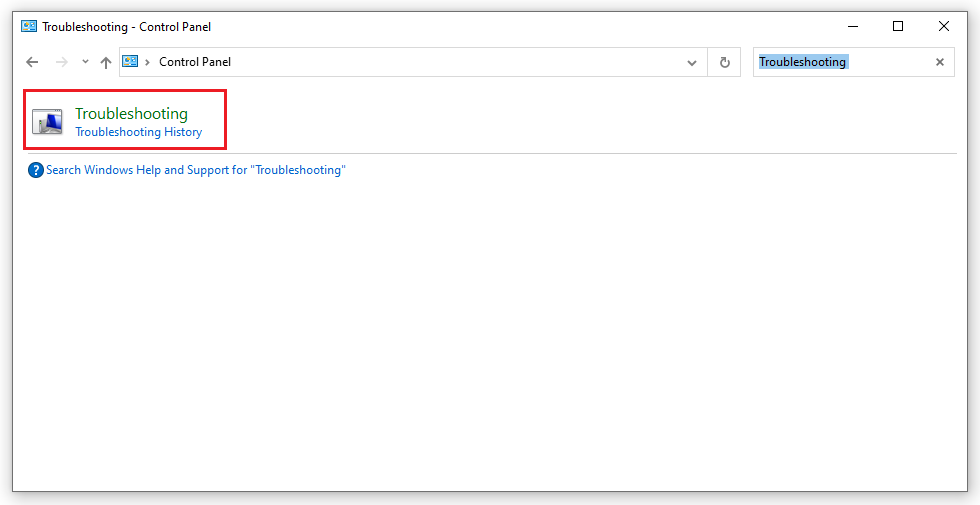
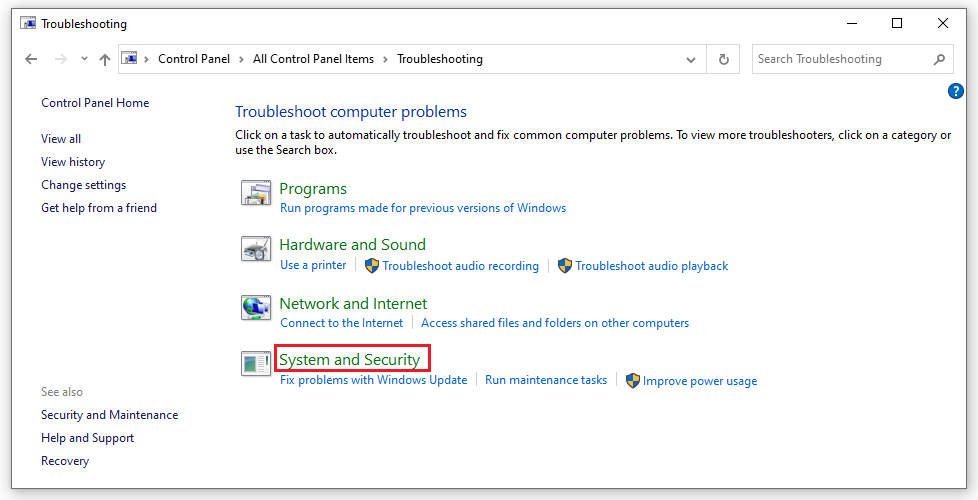
Step 1: Click on the Control Panel icon and type Troubleshooting in the Search box to quickly search for it.
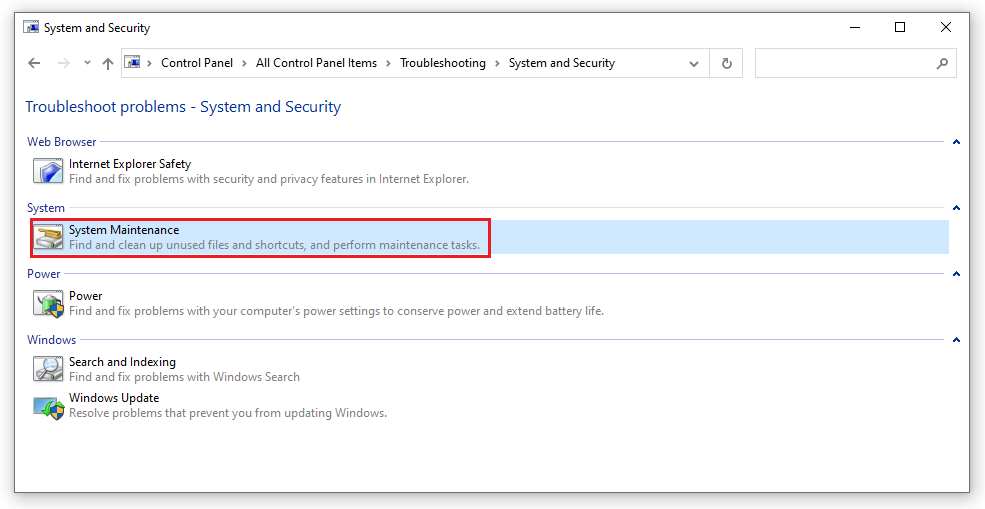
Step 2: In the Troubleshooting menu , double-click System and Security .
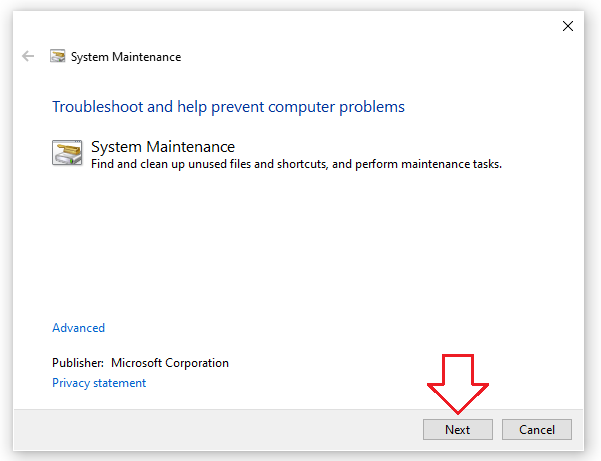
Step 3: A new window appears, click on System Maintenance
Step 4: Then, continue to click on the Next option .
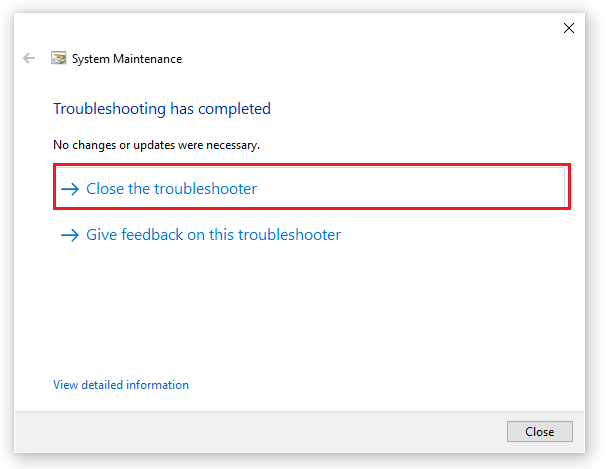
Step 5: Next, the main window of System Maintenance appears, click on ' Try troubleshooting as an administrator '. Finally, wait until it is done and click Close .
4. Turn off Maintenance function
One of the ways to fix Full disk 100% error on Windows is to turn off Maintenance function .
First, select Control Panel and click on System and Security .
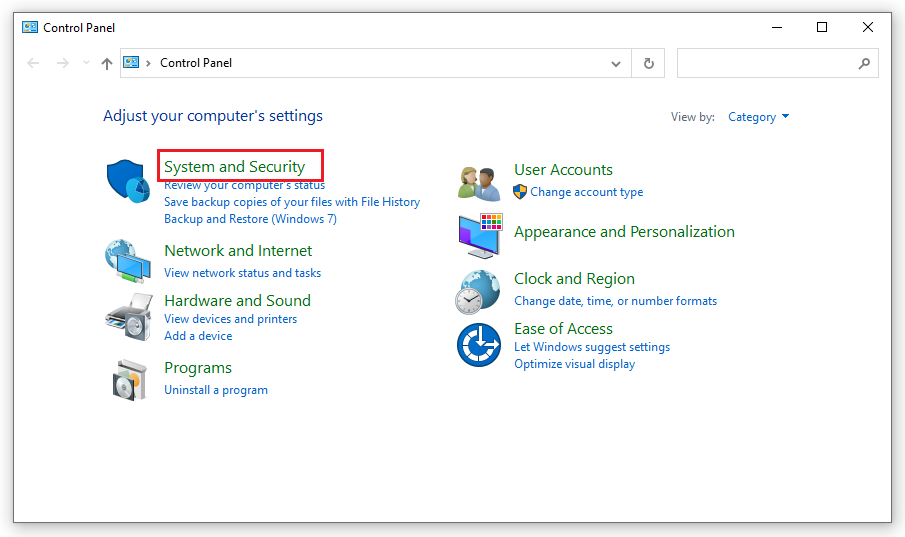
Next, in this window, left-click and select Security and Maintenance .
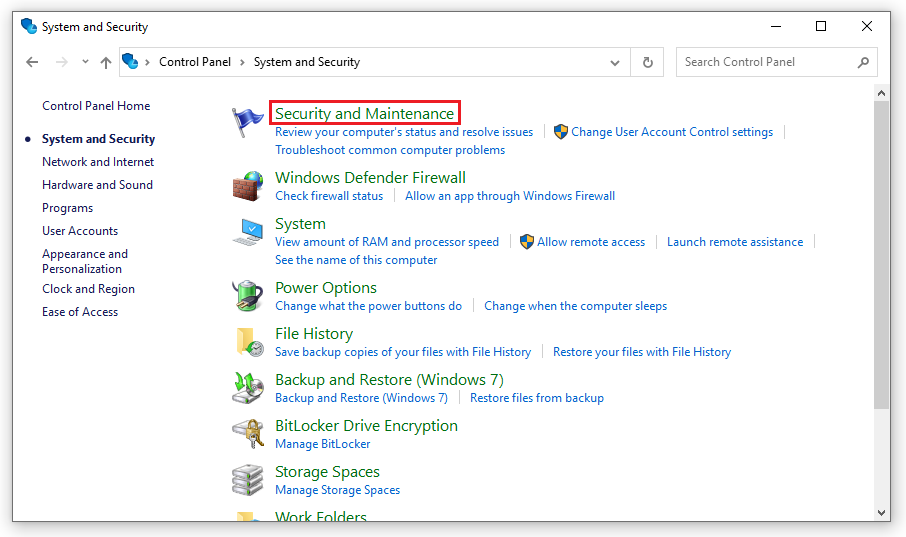
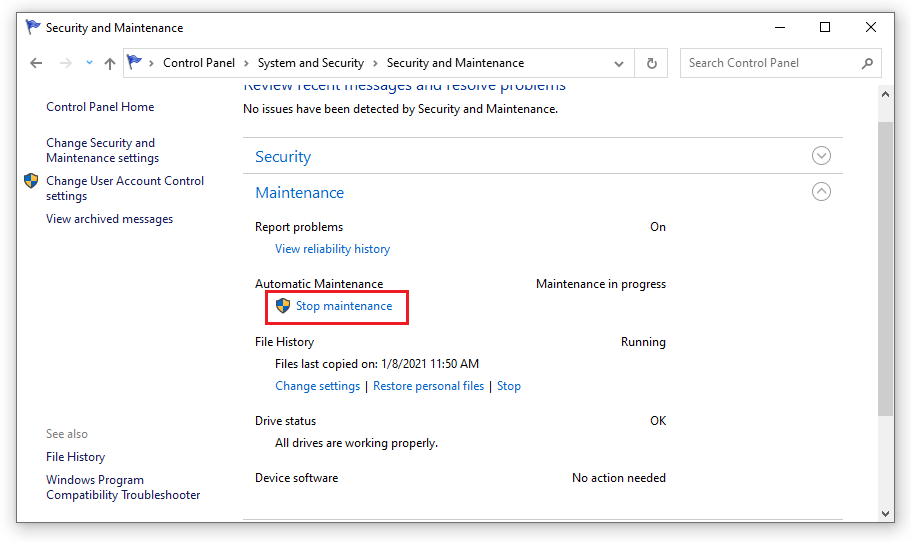
Finally, under Automatic Maintenance , click Stop Maintenance .
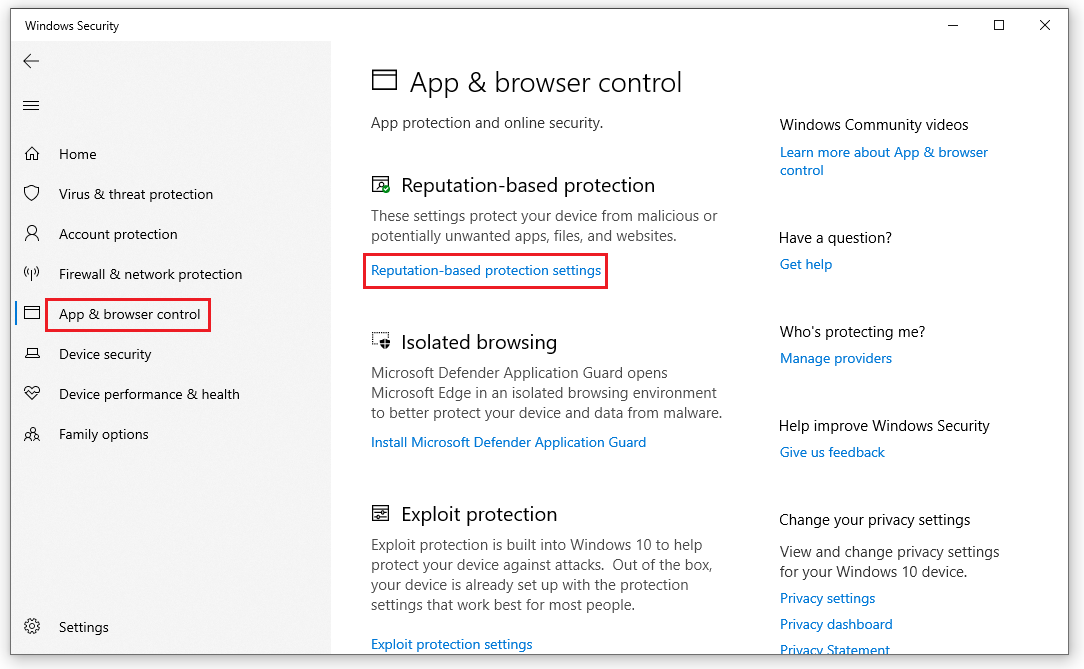
5. Disable Windows SmartScreen - fix Full disk 100% error on Windows
Windows SmartScreen is an application available on your computer. With the feature to help prevent malicious software, applications, and viruses for the computer. Although its purpose is quite good, sometimes continuously doing this also makes the computer slow or freeze because it consumes a lot of performance. To limit this, you should disable Windows SmartScreen to fix the Full disk 10% error on Windows .
Step 1: Go to Windows Start bar , search for ' Windows Defender Security Center '
Step 2: Select ' App & browser control ' in the Windows Defender Security Center toolbar to continue.
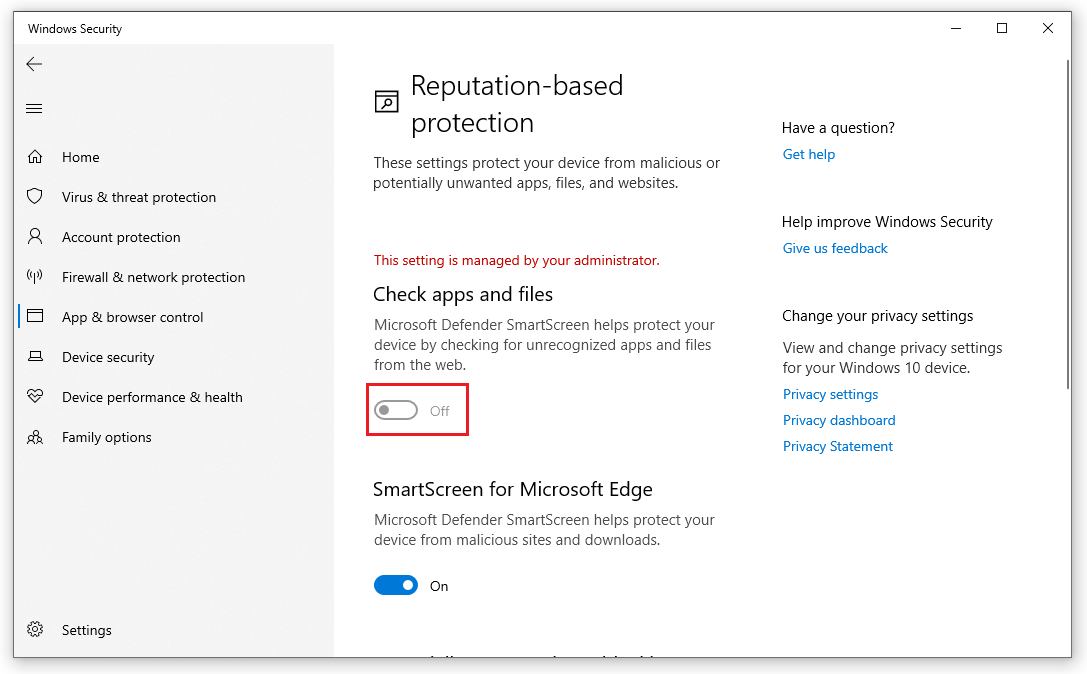
Step 3: In the ' Check apps and files ' section, select ' OFF ' to turn off the windows 10 smartscreen . You can turn off the smartscreen for 2 more applications, Microsoft Edge and Windows Store , in the same way.
6. Use Ccleaner cleaning software - Fix common Full disk 100% error on Windows
One of the basic ways to fix the Full disk 100% error on Windows is to clean up your computer regularly. Ccleaner software is a reputable and widely used cleaning software. You should download the software and activate it to improve your computer's speed and capacity.
7. Defragment your hard drive
After being used for a while, the computer will encounter hard drive fragmentation. This is also one of the causes of the Full disk 100% error . You can fix this error by using the features in Windows to defragment the hard drive. First, click on the This PC icon. Then, select any partition and click on Manager. Next, click on Optimize .
Finally, the Optimize Drives window will appear. Here, select the partition you want to defragment and select Optimize .
See the article on how to defragment your hard drive: https://hoanghapc.vn/chong-phan-manh-o-cung
8. Disable Service Superfetch
To disable the Superfetch Service function, you need to press the key combination Ctrl + ALT + Del to open Task Manage . When the Task Manage window appears, select the Service tab and click Open Service to activate it. After the Services window opens, search for and select Superfetch . Finally, select Disable in the Startup Type section.
9. Fix 100% Full disk error on Windows by setting more virtual RAM for the computer
Virtual Memory helps the computer to transfer capacity from the hard drive to RAM to have more storage capacity. However, if it is installed automatically, it will sometimes cause Full disk 100% error . Please install it manually to get the most perfect virtual RAM.
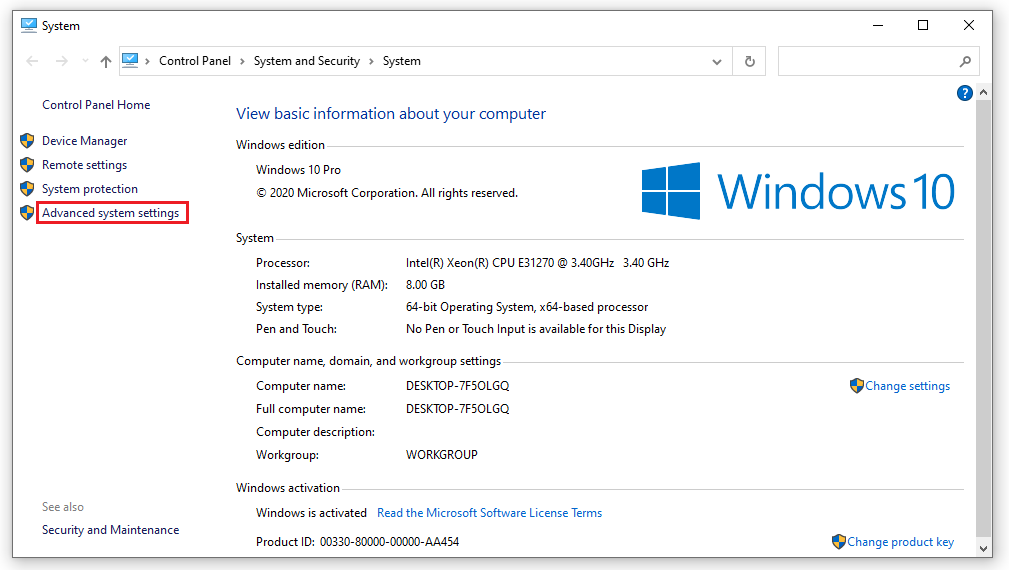
Step 1: Right click on This PC icon => select Properties .

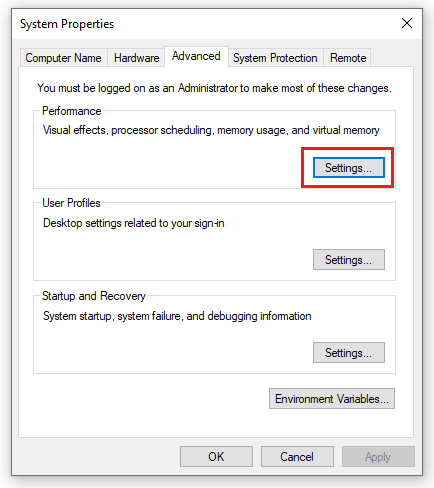
Step 2: Click Advanced system settings , and select the Advanced tab .
Then, click on Settings under Performance .
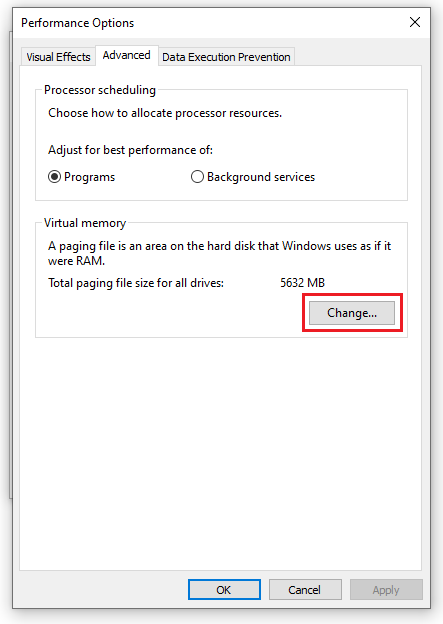
Step 3: The Performance Options window appears, select Change in the Virtual Memory section .
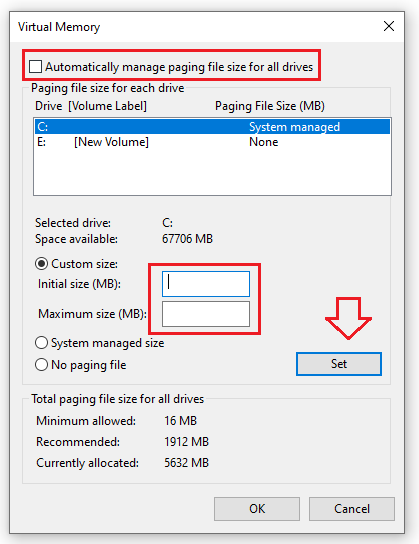
Step 4: If you still have the tick button in the box ' Automatically manage paging file size for all drives ', click on that box to turn it off. Next, proceed to fill in the boxes under Custom Size and click on Set . Finally, after completing, click OK .
Was this article helpful?
Your feedback helps us improve.
Related Articles
 Instructions on 3 ways to fix Full Disk error 100% on Windows most effectively3 minutes read
 Fix 100% Full Disk error on Windows with the following 14 tips9 minutes read
 How to create disk full BAT file repair Windows 106 minutes read
 12 steps to fix Full Disk error 100% on Windows 1011 minutes read
 5 steps to fix 100% Full Disk error on Windows3 minutes read
 Instructions for fixing 100% Full Disk error on Windows 102 minutes read
Reader Comments 0
Sign in with email or Google to join the discussion.