3 ways to insert non-marginal text in Word
Usually you think that adding marginal text is a function for publishing software, but Word itself can do this.
Table of Contents
Usually you think that adding marginal text is a function for publishing software, but Word itself can do this.
You can use the text indentation feature with negative parameters to let the text at the top of the left margin then continue to move inside the document. Here are three ways to insert marginal text using the tools available in Word.
Use indentation feature:
The first method for displaying marginal text is the easiest - you only need to apply indentation with negative parameters as follows:
Select text.
In the Paragraph group of the Home tab, click the small arrow in the bottom right corner to launch the Paragraph dialog box. In Word 2003, select Format -> Paragraph .
If necessary, click on the Indents and Spacing tab.
In the Indention area, type a negative value for the Left item, such as -2.3 cm . Note that this value must be negative and depending on the unit used in the document is centimeters or inches, but select the appropriate number.
Click OK.


If you apply this format regularly, you can create a Style for the document. This method is easy to implement, but only applies to short-length text. If used on long text, it will overflow to the right of the page margins into the document. Therefore it is no longer limited to outside the page margins. To fix this, you can use the Text Box as shown below.
Use Text Box:
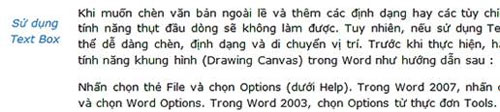
When you want to insert marginal text and add special formats or customizations, indentation will not work. However, if you use Text Box, you can easily insert, format and move positions. Before doing so, disable the Drawing Canvas feature in Word as follows:
Click the File tab and select Options ( under Help ). In Word 2007 , click the Office button and select Word Options .
For Word 2003 , select Options from the Tools menu .
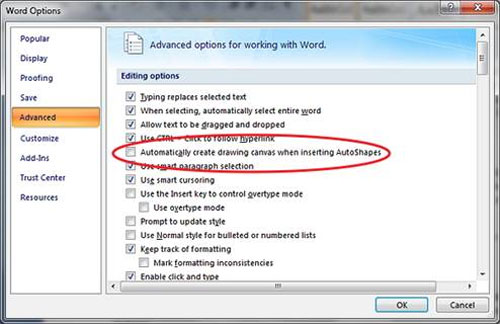
Click the Advanced tab in the left pane. In Word 2003 , select the General tab .
In the Editing Options area, uncheck the Automatically Create Drawing Canvas When Inserting AutoShapes option . For Word 2003, it is in the General Options area.
Click OK.
When disabling the feature, you can use all kinds of drawing tools, and it won't be annoying to see placeholders for drawings. Now, we will add the words ' Use Text Box ' outside the left margin of the page by following these steps:
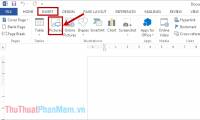
Click Insert and select Text Box in the Text group. Then, select the Draw Text Box from the list of library options for the Text Box to drop down. In Word 2003 , select Text Box from the Drawing toolbar. If you don't see this toolbar, select View -> Toolbars -> Drawing.
Use the mouse to move and draw a Text Box with the same approximate size at the edge of the page. Note that you should insert the Text Box with the same height as the text you want to insert to be able to center later.
Type the words ' Use Text Box ' in the Text Box just created.
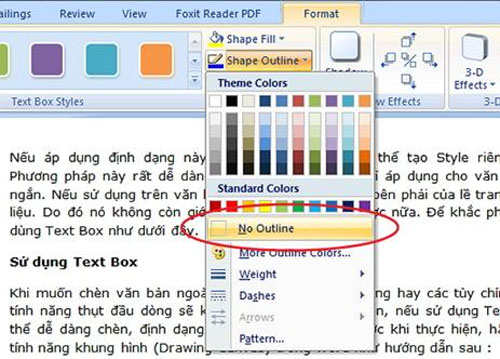
In the Format tab ( when you select the Text Box just created ), select No Outline from the Shape Outline drop-down menu in the Shape Styles group ( for Word 2007, located in the Text Box Styles group ). In Word 2003 , right-click the Text Box and select Format Text Box . In the dialog that appears, select the Colors and Lines tab. In the Color drop-down list, select No Line.
Next, format the text in the Text Box at your own discretion, such as italics and centering, with the text appearing green.
In the Print Layout view, Word displays text more clearly. You can move Text Box or apply almost any format you like.
Use Header:
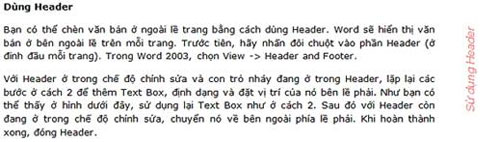
You can insert text outside the margin by using Header. Word displays text outside the margins on each page. First, double-click the Header section ( at the top of each page ) to open the Header edit area. For Word 2003, select View -> Header and Footer.
With the Header in edit mode and the blinking cursor in Header, repeat steps 2 to add a Text Box, and format it. Then with the Header still in edit mode, move the Text Box to the outside on the right. When finished, close the Header.
In this case, you may not want to display this Text Box on all pages, but this way using the Header so it must do so. To edit the Text Box content, you will have to reopen the Header editing area and perform the operation - remember, the text box really belongs to Header, regardless of where you place it.
Was this article helpful?
Your feedback helps us improve.
Related Articles
 Insert text anywhere in Word3 minutes read
 How to insert text into images on Word4 minutes read
 Insert text into pictures with Word2 minutes read
 How to use the Insert key to insert copied text in Word?2 minutes read
 How to create text wallpaper in Word5 minutes read
 Word 2013 Complete Guide (Part 18): How to insert Text Box and WordArt11 minutes read
Reader Comments 0
Sign in with email or Google to join the discussion.