Table of Contents
Learning how to insert text box in word simply, anyone can do it doesn't have to be complicated. This updated guide presents a clear workflow, practical checks, and troubleshooting advice you can use while completing the process.
Key Takeaways
- Follow the steps to insert a textbox in word.
- Follow the recommended steps in order to avoid common mistakes with insert text box in word simply, anyone can do it.
- Review compatibility, settings, or requirements before making changes.
How to Insert a Textbox in Word
Note: Free Download Instructions are performed on Word 2016.
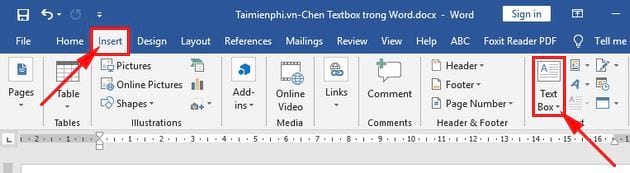
Step 1: Open the Word file where you want to insert the Text Box -> then open the Insert tab -> select Text Box.
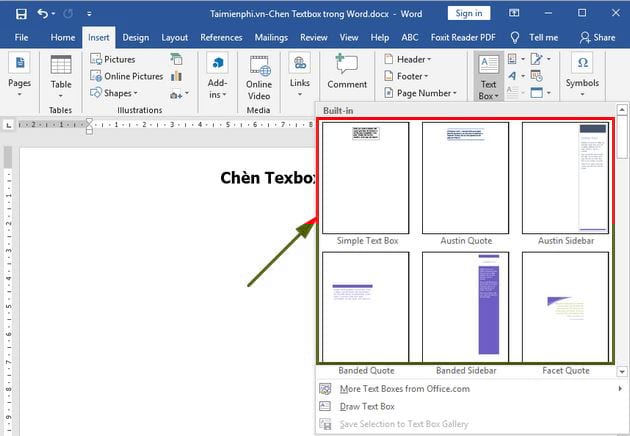
A dialog box appears -> you can choose a pre-formatted Text Box style such as Simple Text Box, Austin Quote, Austin Sidebar after you select Text Box. Then you select Draw Text Box to customize it to your liking if none of Word's pre-formatted styles match the content of the work you need to use.
Step 2: After you choose the format for the Textbox, the Word application immediately displays the format and sample content inside -> you just need to enter the content for the Textbox.

Step 3: You edit the TextBox.
- You want to shrink or enlarge the Textbox border -> you drag the mouse to the corners or middle of the Textbox border and enlarge or reduce as desired.

- If you want to move the Textbox to a different position than the default position -> move the mouse to one of the edges of the Textbox border and drag to the desired position.

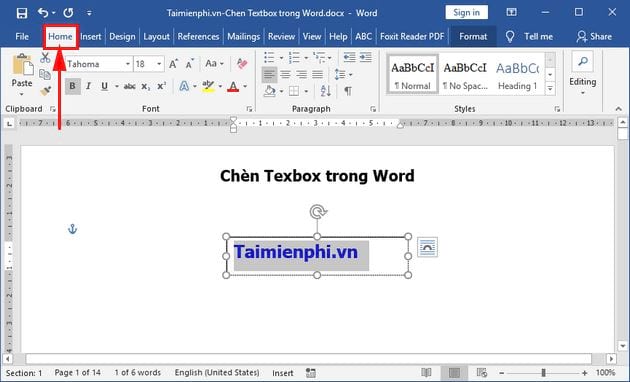
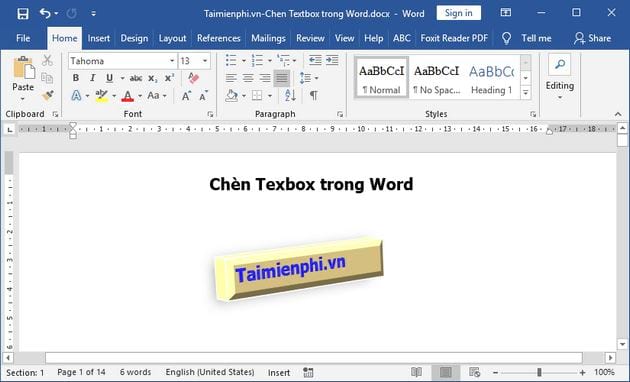
You edit the font, color, and size by going back to the Home tab and editing as usual. For instance, the image below after you edit:
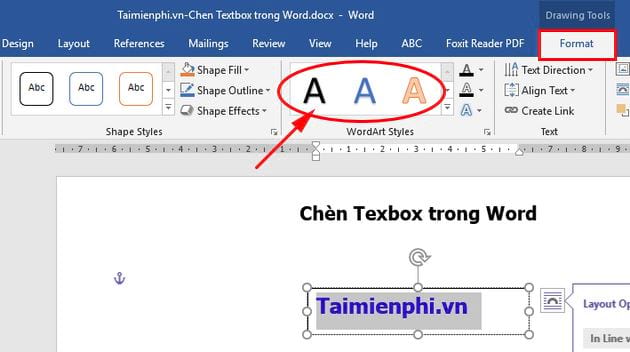
You can also insert WordArt Styles: If you want to stylize the font instead of the fonts in Font -> you select the Format tab in the Drawing Tools section (this section appears when you create a Textbox ). Then, you select the font style in the WordArt Styles section.
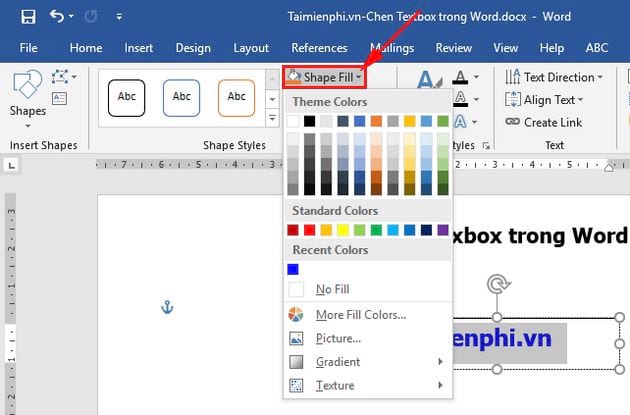
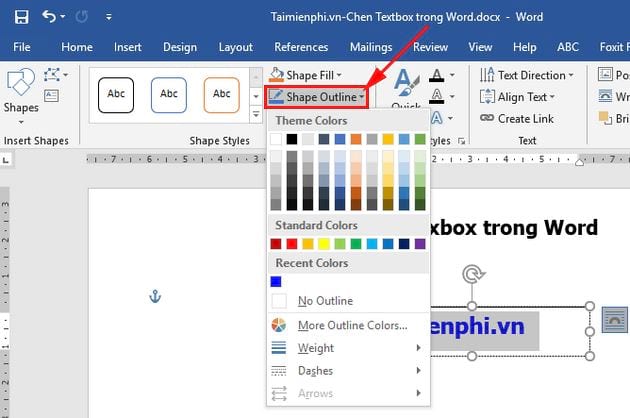
- Next, you choose the shape and color for the Textbox in the Shape Styles section of Drawing Tools. In Shape Styles, you have 3 options:
+ Shape Fill: fill color for the background of the shape.
+ Shape Outline: Create outline and outline color for shape.
+ Shape Effects: create effects for shapes.

Final result after inserting the modified, edited Texbox:
The above article has guided you on how to insert Text Box to create charts, diagrams or artistic text, making the presentation text more professional. Using Text Box helps you be flexible in designing content, especially when making reports and presentations.
In addition, if you are using other versions of Word such as Word 2003, 2007, 2010 or 2013, you can refer to detailed instructions on inserting Text boxes in Word on this guide. These tips makes it easier to work faster and make the most of Word's features.
Final Thoughts
The most reliable way to handle insert text box in word simply, anyone can do it is to follow the process in order, verify each important setting, and test the result before moving on. Use the guidance above as a practical reference, then adjust the details for your device, software version, or specific goal.
FAQ
What should I check before I insert text box in word simply, anyone can do it?
Use the latest available software, confirm that your device meets the requirements, and make sure you have the necessary permissions, account access, or backup before changing anything.
Why might I be unable to insert text box in word simply, anyone can do it?
Common causes include outdated software, missing permissions, incompatible settings, incomplete setup steps, or a temporary network problem. Recheck the process from the beginning and restart the app or device if needed.
Is it safe to insert text box in word simply, anyone can do it?
It is generally safe when you use official tools, review every permission, and back up important data before making system-level or account-level changes.
Related Articles
 How to Insert Text into Images on Word: Insert Text into Word Image5 minutes read
 Insert Text Into Pictures with Word3 minutes read
 How to Use the Insert Key to Insert Copied Text in Word?2 minutes read
 How to Create Text Wallpaper in Word: Insert Word Background6 minutes read
 Word 2013 Complete Guide (Part 18): How to Insert Text Box and11 minutes read
 Insert Images into Text Content: Add Photos to Word10 minutes read
Reader Comments 0
Sign in with email or Google to join the discussion.