Write Blog with Microsoft Word 2013
Microsoft Word can be used to publish blog posts to current popular blog source codes, since Office 2007 version. This feature is still maintained and developed to Office 2013 version, and has It is considered a complete replacement for Windows Live Writer.
The following is a guide to create and publish a blog post in Word 2013.
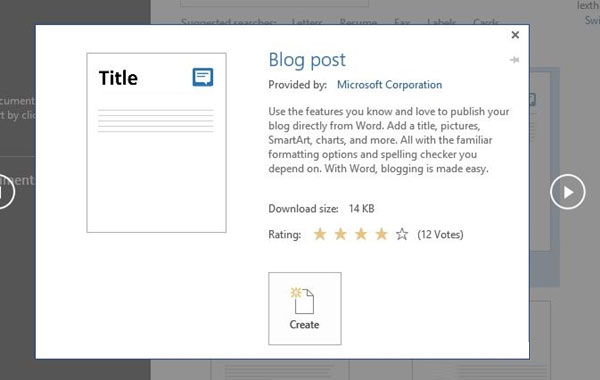
Start the Word 2013 application, at the application's Startscreen screen, select the "Blog post" template .

A small window will appear with some information about the selected Blog post template. Click "Create" and wait a few seconds for Office to download the template.

After the download is complete, the post editor interface will appear. And in the middle of the screen will be the login window, please proceed to log in to the blog account you own.

Surprisingly, the number of blog platforms supported by Word 2013, here the writer chooses Wordpress platform as an example. Then click "Next" to go to the next step.

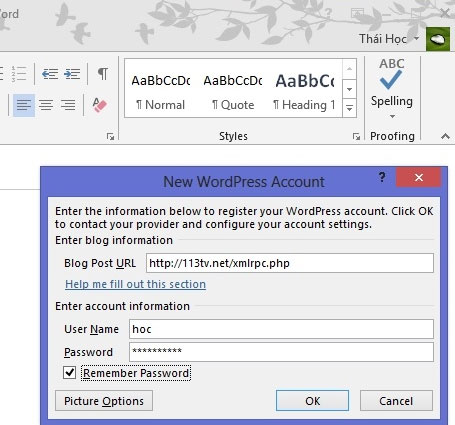
The window to enter the connection information to your blog page will appear, now complete the information as required.

After you have successfully connected, you will be unlocked the editing interface. Now let's blogging!

After writing, click on the "Public" option and select the command you need. If you want to save drafts, select " Public as Draft " or publish directly to the blog page with the "Public" command. Since this is a sample article, the author chose "Public as Draft".

And this is the result.

Interestingly, your article will be retained in the same format as it was in Word 2013.

Pretty cool, isn't it?
You should read it
- ★ Word 2013 Complete Guide (Part 7): Text printing operations
- ★ Word 2013 full-text tutorial (Part 12): How to break pages, paragraph breaks
- ★ Create a new Word file, open the file in Word 2013
- ★ Word 2013 Complete Tutorial (Part 9): Use Line and Paragraph Spacing
- ★ Word 2013 Complete Guide (Part 10): Bullets, Numbering, Multilevel list in Microsoft Word