Table of Contents
This guide provides a practical overview of Insert and Edit Charts in Word, including its main features, benefits, limitations, and important considerations.
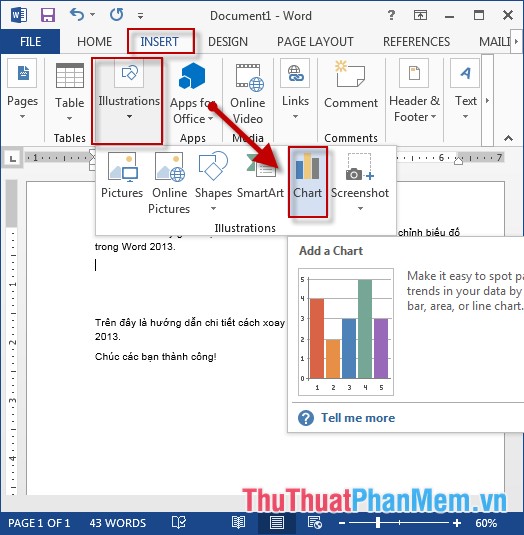
Step 1: Go to the Insert tab -> illustration -> Chart:
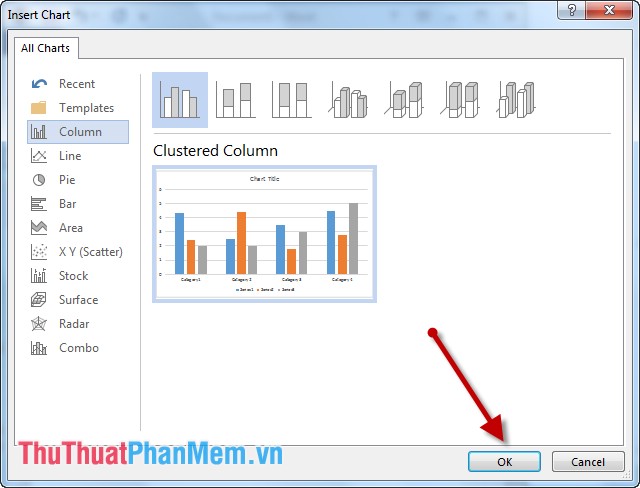
Step 2: The Insert Chart dialog box appears, select the type of chart you want to draw -> click OK:
Step 3: Enter data for the data sheet used to draw the chart, you can customize the data fields:
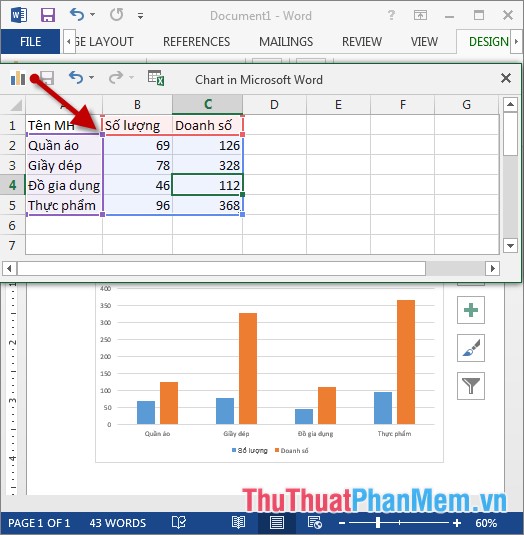
Step 4: After entering data, the chart has been drawn, editing the title for the chart:

Step 5: Click on the chart, select Design -> Quick Styles to quickly select the styles for the chart:

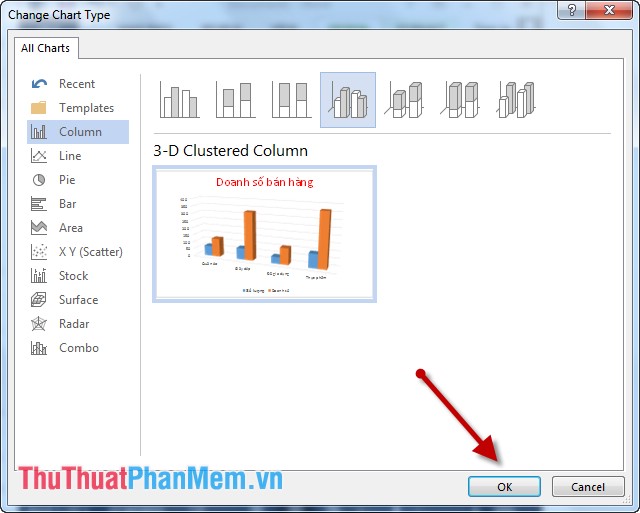
Step 6: Or click on Type -> Change Chart Type to change the chart type:
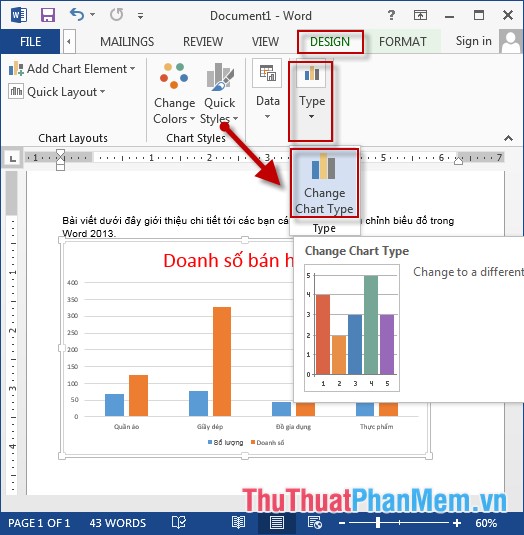
Step 7: A dialog box appears -> select the type of chart you want to replace -> click OK:
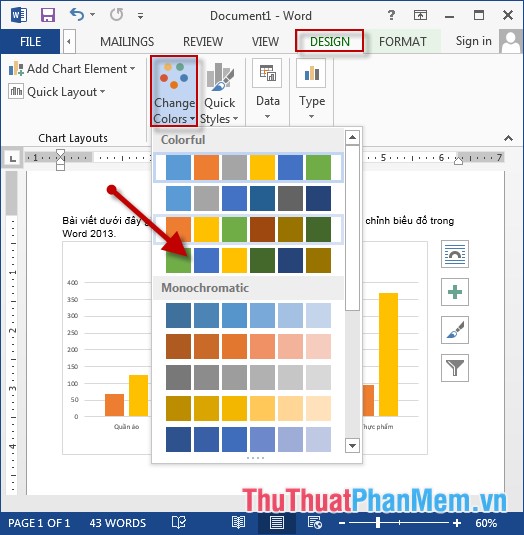
Step 8: Change the color for the chart -> click Change Color -> select the color you want to change:
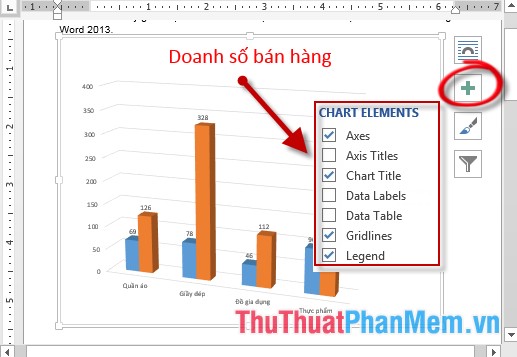
In addition, you can edit the chart using the available tool:
- Click on the chart -> select the Chart Element icon -> select the elements that you want to display more on the chart, for example, select Data Labels -> numeric values displayed on the columns:
- Click the Style icon to re-select the style and color for the chart:
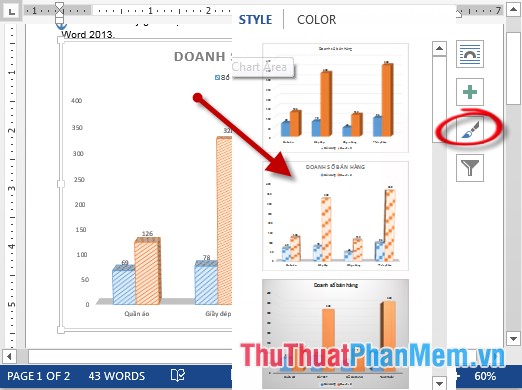
- The results have been plotted showing figures:
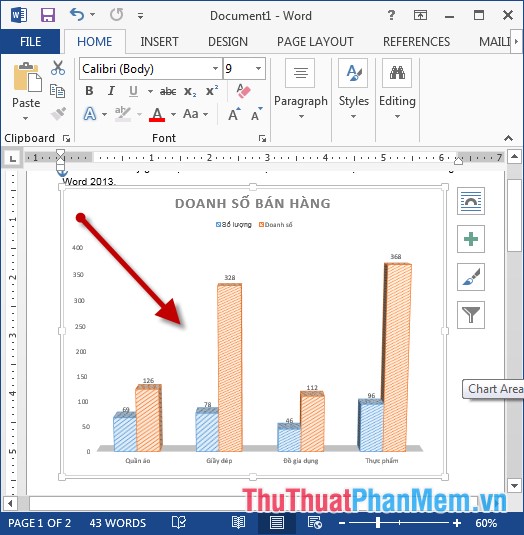
The above is a detailed guide on how to insert and edit charts in Word.
Good luck!
FAQ
What should I know about Insert and Edit Charts in Word?
Focus on the key features, requirements, limitations, and practical use cases explained in this guide.
How do I get the best results with Insert and Edit Charts in Word?
Follow the recommended steps, use current software or information, confirm compatibility, and review settings before major changes.
Are there any risks or limitations?
Potential limitations depend on compatibility, data quality, cost, privacy, support, and how the product or method is used.
Related Articles
 Create and Insert Word 2016 Charts: Create Chart in Word 20166 minutes read
 Insert and Edit Charts in Excel3 minutes read
 Instructions for Inserting, Drawing and Creating Charts in Word 20074 minutes read
 Insert and Edit Drawings in Word3 minutes read
 Insert and Edit Word Art in Word2 minutes read
 The Most Detailed Instructions on Drawing, Creating, and Inserting Charts in5 minutes read
Reader Comments 0
Sign in with email or Google to join the discussion.