Restore Word and Excel files that unfortunately have not been saved
What if your data file disappears? Just a few simple steps through the article below will help you solve the problem
1. Restore Excel 2010 and 2016 files that were not promptly saved on Windows
1.1 Restore Excel 2016 files that have not been saved
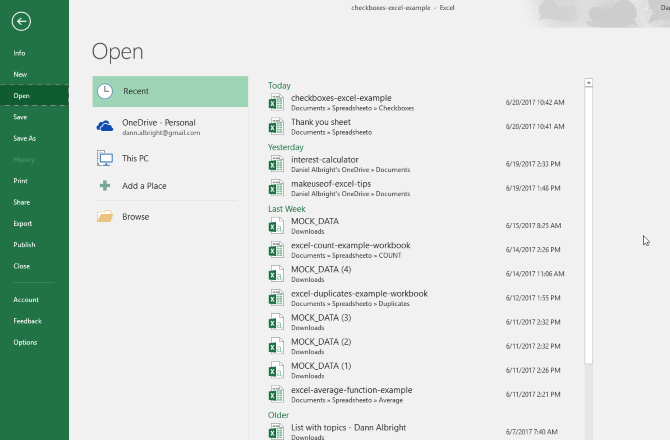
To recover accidentally closed Excel files before saving, follow these steps:
Step 1 : Go to File> Open> Recent - Select Recent in Excel 2016
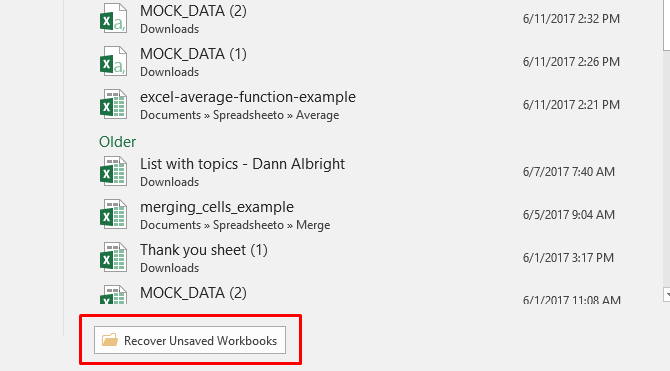
Step 2: Scroll down to the bottom of the screen> click Recover Unsaved Workbooks
Select Recover Unsaved Workbooks
Step 3: You will see the files are automatically saved in this section:
Unsaved Excel files will be located here

Just open the file you need, then save it.
1.2.Restore Excel 2010 that has not been saved
Microsoft has "secretly" equipped a great feature for its Office productivity suite by helping users RESTORE UNCHANGED TEXT.And to use this feature, you need to follow the following sequence:
- Your Microsoft Office must have AutoSave and AutoRecover active.
- Open the Office application you need to use.
- Select the File tab.
- Select Recent
For Word 2010, choose Recover Unsaved Documents , for Excel 2010 choose Recover Unsaved Workbooks and PowerPoint 2010 is Recover Unsaved Presentations:
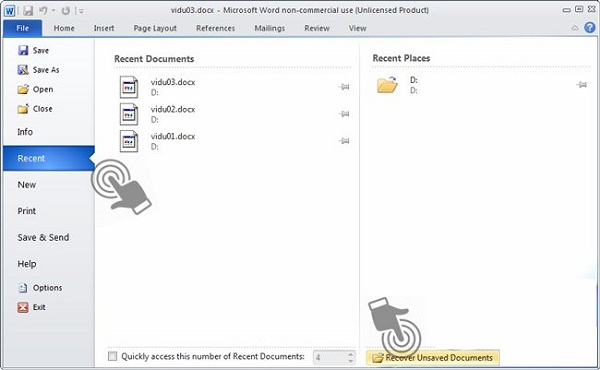
When using this feature, the folder containing the drafts - Draft of the text file is displayed.You find the right file to use and select Open , when you find the data file you need, then Save As to your working directory on your computer.Note that the folder that stores the draft file has a different address, depending on the operating system:
On Windows Vista / 7/8:
C: UsersUser_NameAppDataLocalMicrosoftOfficeUnsavedFiles
Windows XP:
C: DocumentsandSettingsUser_NameLocalSettingsApplicationDataMicrosoftOfficeUnsavedFiles
Another note is that you absolutely should not change the path to save this draft file of Microsoft Office, and usually these draft files will be saved within a maximum of 4 days from the time of creation.
2. Restore unsaved Excel files on mac OS
To restore unsaved, overwritten Excel files on mac OS you can also do the same way on Windows.Alternatively, there is a way to get Excel files on Mac OS as follows:
Open Finder> Macintosh HD.If you don't see Macintosh HD (or another name for your hard drive), go to Finder> Preferences and select Hard disk in the Show these items in sidebar section.
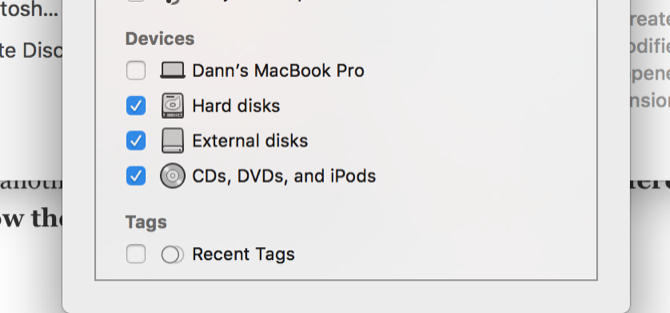
Show drives on Mac
Typically, the path will be as follows: Users> [name_name_khoan]> Library> Application Support> Microsoft> Office> Office 2011 AutoRecovery
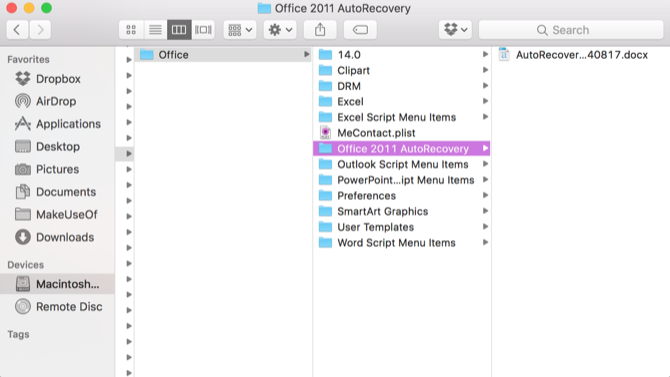
Open the folder to save Excel files on Mac
If you do not see the Library in your user directory, you will need to show the hidden file.First, enter the following command in terminal:defaults write com.apple.finder AppleShowAllFiles YES
Then Option + right-click on the Finder icon and select Relaunch.
You can use the terminal to make this process easier by typing the following command to open the appropriate directory:
open / Users / [name_name] / Library / Application Support / Microsoft / Office / Office 2011 AutoRecovery
Depending on the version of Office, the destination folders may differ.
If you are having trouble finding AutoRecovery files, try searching your version of Office to see where they are saved.Once you've found the files you need, just double click to open them and save them immediately.
Note that Excel only holds this AutoRecovery file for a limited time, so it's best to practice the habit of pressing Ctrl + S as soon as you stop typing.
3. Set up AutoSave and AutoRecover in Office
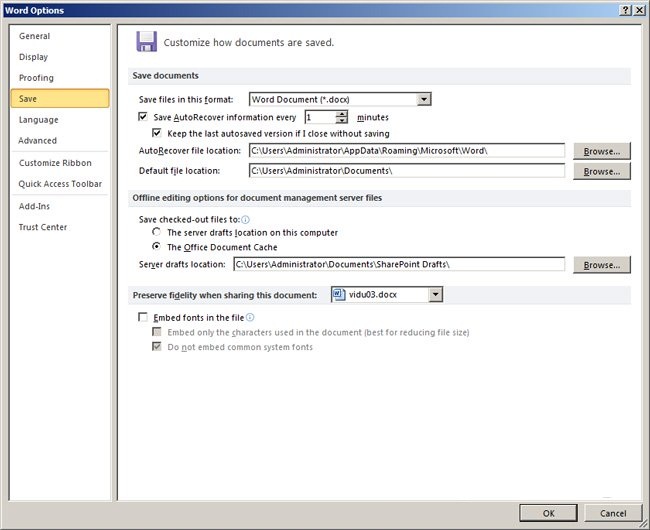
To enable or customize these features, follow the selection step
File> Word Options> Save - select Options

Remember to check both boxes: Save AutoRecover . and enter the number of minutes (the time Office will save your text without having to press Ctrl + S) and Keep the last autosaved version if i close without saving (save the last self-save if you close the window before saving the file).
In AutoRecover file location, select the location you want to save the file that the application automatically saves.
