7 great Microsoft Word tricks should not be ignored
With its extremely advanced features, it helps users to have processing operations, much faster than manual operations. However, it will still be fast and extremely good with 7 Microsoft Word tips that you especially should not ignore
1. Translate a paragraph into another language with Bing Translator
Inability to translate as much and flexibly as Google Translate or other translation software, however, Word has built-in Bing automatic translator when users want to translate a short paragraph.
The steps are as follows:
Step 1: At the text content to be translated, we click the Review tab on the Riboon bar.
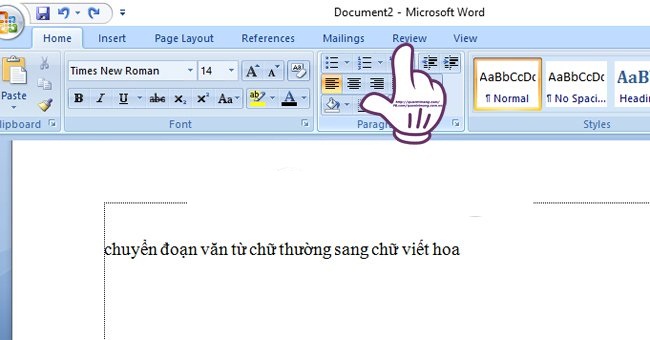
Step 2: Then you select Translate .

If using Word 2013, click Translate and select Translate Document.
Step 3:Right at the right interface appears column translated text.Here, we can choose the translation language for the text in From and To.For example, I choose to translate from Vietnamese into English.

Step 4: After selecting the language, click the blue arrow to start the translation. Immediately after that, Word will notify you if you want to continue the translation process when translating on the website. Click Yes .

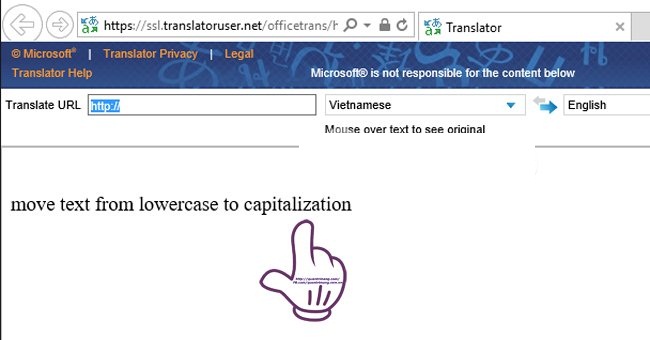
Step 5:We will be taken to the translation site, accompanied by the text content after being translated into the English language.
2. Quickly insert the current date or time in Word
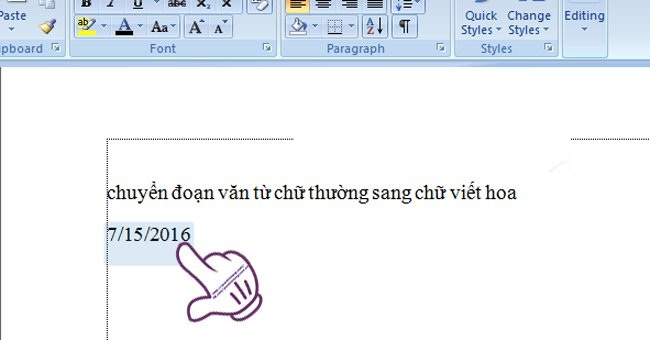
Only with the following simple key combination you can completely quickly insert the current date or time in Word as follows:
- To insert the current date into your text, press Shift + Alt + D
- If you want to insert the current time, perform the key combination Shift + Alt + T
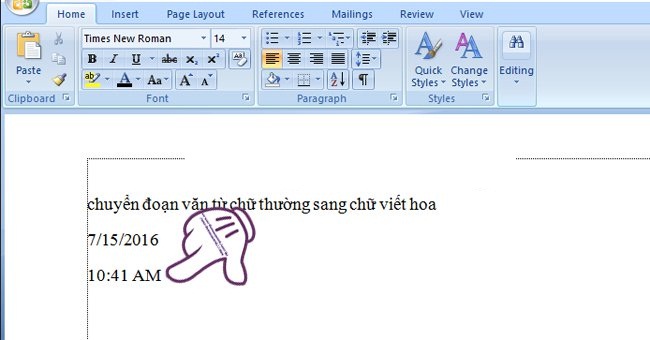
If you want the next day to open the document and show the date and time of that day, just click the Update button just above the date and time you inserted.
3. Quickly convert lower case text to uppercase
Some people forget to type capital letters or just capitalize the first letter when typing, often deleting and turning on Capslock to retype or highlight and switch to Vn font. , but encountered a font error.
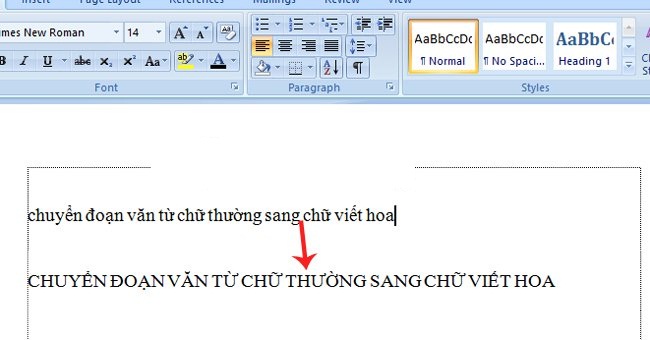
It is very time consuming and inefficient.In this case, you just need to highlight the text to convert to uppercase and press Shift + F3 , the text will immediately switch to capitalize the first letter.
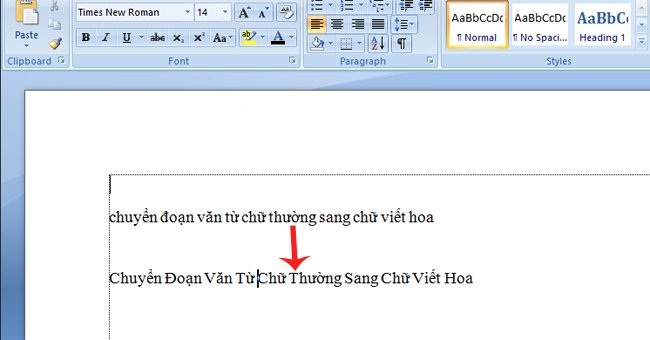
If you want to capitalize the whole paragraph, continue to press Shift + F3
4. Screenshoot feature (Applied on Word 2013)
Normally to insert a certain image, or insert a screenshot, we still do it manually: Insert then Picture to take the image available in the machine and insert the content.If the screenshot is, you must go through the save operation with image editing tool available on the device.
However, Word 2013 has shortened this operation with the Screenshot feature.That is, the user can select the windows running on Windows, and then insert the text content.
Step 1: Click the Insert tab and select Screenshoot.
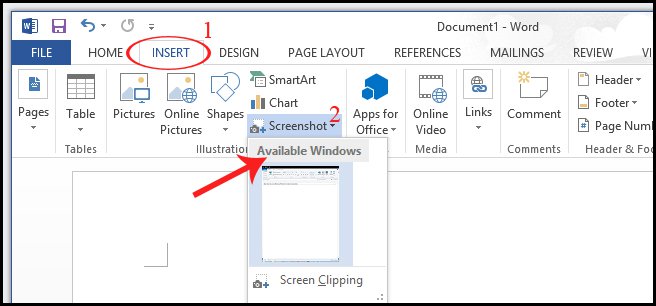
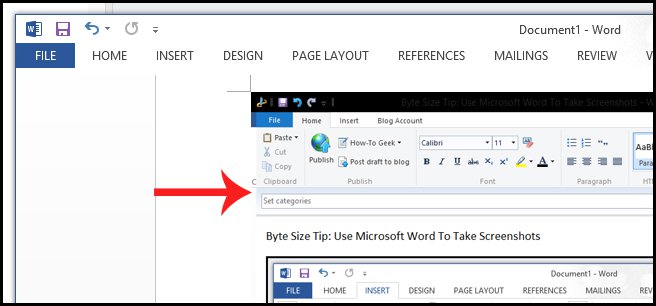
Step 2:Immediately after that will appear screen images of programs on Windows.If you want to choose to insert certain screenshots, just click.Immediately the image will be inserted at the text content.
5. Hide content in secret Word documents
In Excel we have quick actions to hide rows and columns, then in Word you can also hide content completely in text with only 2 steps:
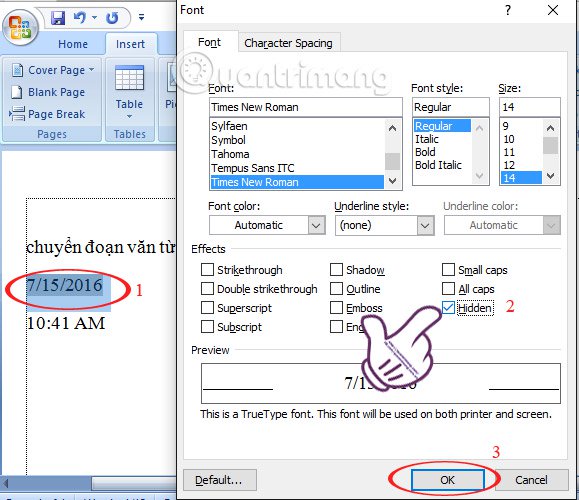
Step 1: Highlight the text you want to hide and press Ctrl + D. Then the interface window Font appears . Select the Hidden item and click OK to hide that paragraph.
Step 2:You see the text content has been hidden and does not have any extra spaces in the content.
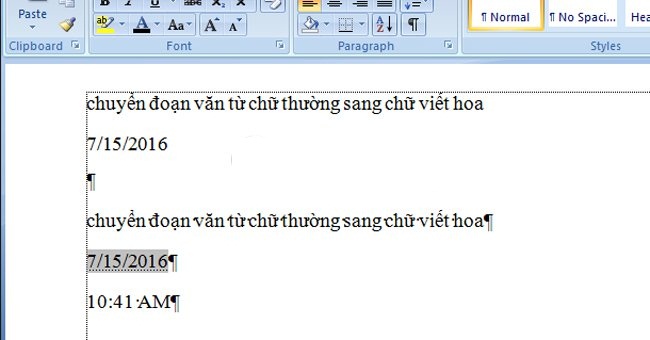
To redisplay the text, press Ctrl + Shift + 8 .The hidden text still appears in its original location.
6. Edit PDF files (Applied on Word 2013)
In Word 2013, we can open the PDF in Word and then edit it like a normal Word document.This will allow you to edit the content, which is not possible with the PDF viewer with Adobe Acrobat Reader .
7. Check backward compatibility with old documents (Applied on Word 2010 onwards)
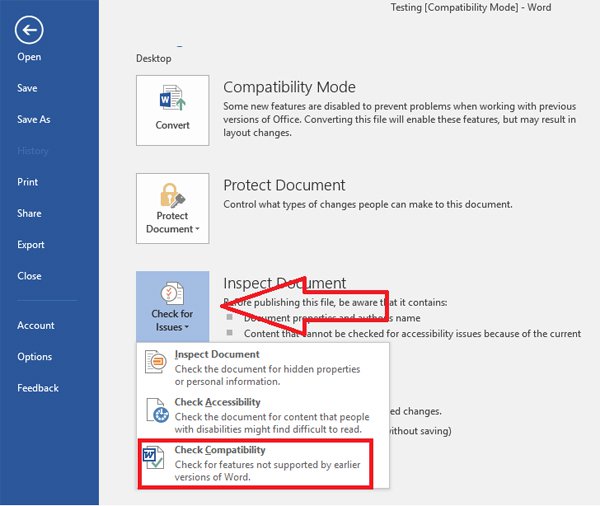
If the user wants to check whether the text content has a font error, or can be viewed with older versions of Word, follow the path: File > Info > Inspect Document > Check Compatibility .
Note, some of the quick actions below apply to versions from Word 2010 onwards