Not displaying all content in Excel when printing, super easy fix
Not displaying all the content in Excel when printing is a situation many people encounter when doing it. TipsMake will help you fix it quickly with simple and effective tips..
We don't always work with documents like Excel, Word. online. There are many cases where you need to print these documents to store and share with others, especially for office workers. Nowadays, printing documents is not too complicated, there are even countless types of simple, compact printers that many people buy and use at home. But printing operations don't always go smoothly. Some users have encountered the problem of not displaying all content in Excel when printing. If you are also annoyed about this problem, learn how to fix it in detail in the next section.
Immediately fix the error of not displaying all content in Excel when printing
There are many cases where Excel cannot print all the content. It could be because you didn't print properly, the file was hidden so the print was missing, for example. Or Excel doesn't display all the content so it can't be printed. Depending on the specific situation you are experiencing, apply the tricks you need.
Instructions to fix the error of not displaying all content in Excel when printing
There are 3 ways for you to fix the error of not printing the entire page in Excel: adjusting the Excel table to fit the page. Or reset the parameters for the printed page and adjust the printing mode. As follows:
How to adjust Excel table to fit paper size
- Step 1: In the Excel document you want to print, click View on the toolbar > Select Page Break Preview.
- Step 2: Align the width and length of the columns to fit on a printed page.
- Step 3: Continue clicking View > Click Normal to complete.

How to adjust Excel table printing mode
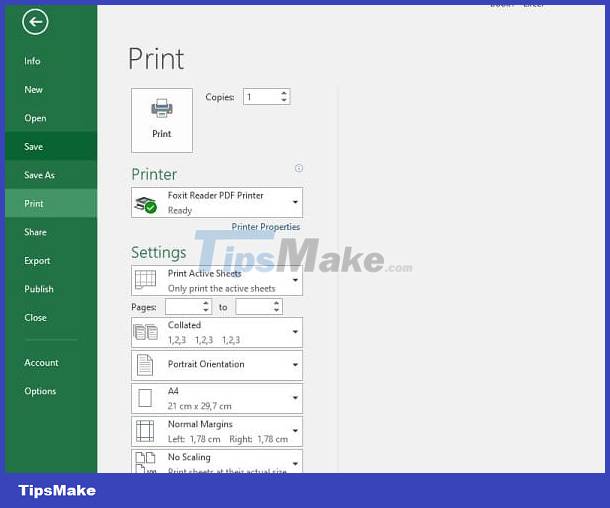
- Step 1: In Excel you want to print > Click the File tab > Select Print.
- Step 2: Adjust the modes in the Print dialog box displayed accordingly.
How to set print page parameters for Excel
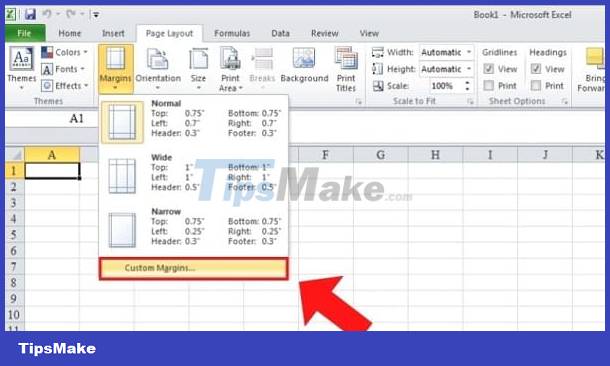
- Margins - align margins: On the Excel page you need to print, click Page Layout > Click Margins (margin alignment) > Click on the Custom Margins line > Adjust parameters and then click OK.
- Adjust the page size (Size): Click the Page Layout tab > Select Size > Select the paper size to print.
- Select the area to be printed (Print Area): First, highlight the text area to be printed > Then select Page Layout > Click Print Area > Click Set Print Area.
- Set up print page titles (Print Titles): Continue to Page Layout > Select Print Titles > You need to select Row to repeat at top or Columns to repeat at left > Ok.
- Adjust the printed page orientation (horizontal or vertical): Go to Page Layout > Click to open Orientation > Click to select Portrait (vertical) or Landscape (horizontal) depending on your needs.

Fix not displaying all content in Excel
In case Excel does not display all the text, users can use the mouse to fix the error quickly and effectively. However, the disadvantage of this method is that it is difficult to align evenly and there are not many choices in size.
- If you want to adjust the height: You just need to move the mouse to the separation between the two lines > Then, click twice to make the line taller until all the data inside appears.
- If you want to adjust the width: Users need to move the mouse to the separation between the two columns > Continue to click twice to make the column expand and display all the data inside.
If you want to use keyboard shortcuts, do the following:
- Adjust height: Press the key combination Alt + H > Press the O key > Press the A key. (Alt + H is used to select the Home tab on the menu bar, O is to select format and A is to auto-align row height adjustment). Note, you need to hold down the Alt key throughout the entire process > Then press the H > O > A keys in order.
- Adjust the width: Press the key combination Alt + H > Press the O key > Press the I key (I is to automatically align the column width). You also hold down Alt throughout the process and press the keys H > O > I in turn.
Fix error of Excel file with hidden content
Here's how users can unhide a worksheet:
- Step 1: On the Excel page that is having trouble > Click the View tab > Click Unhide in the Windows section.
- Step 2: Continue pressing OK to confirm the operation and recheck for errors.

TipsMake has shared how to fix the error of not displaying all content in Excel when printing. Hopefully these tips will help you overcome this problem!