Printing 1-sided documents, printing 2-sided documents with Excel, Word is no longer strange to any user. However, in the printing process, there will be many different needs and errors, for example, you want to print an Excel file on only 1 A4 page.
Usually Excel files with large and long data tables will be split into 2 pages when printed. Some people will find it difficult to follow the content when switching to a new page. So how to print an Excel file displayed on 1 side of A4 paper?
How to Print Excel File Displayed on 1 A4 Page
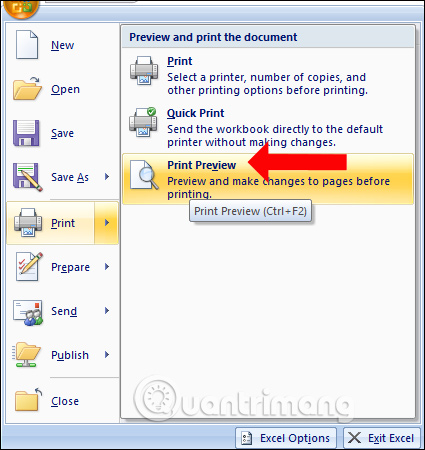
There are many different ways to customize an Excel document to print on 1 side of A4. But first, you need to review the Excel file to review all the printed pages. Click on the Office icon, select Print, select Print Preview .
Then, switch the Excel file view to Page Layout. This mode will help users know how the document will look when printed on paper and from there adjust the columns and rows to fit neatly on a spreadsheet. Click the Review tab and select Page Layout below.

To customize the content of the Excel print page, follow some of the ways below.
Method 1: Switch to Landscape Printing
When you review a Word document in zoomed-out mode and find that the spreadsheet is wide horizontally, it may be more appropriate to switch to Landscape mode. This will allow the rows and columns to fit on the same page without splitting onto another page.
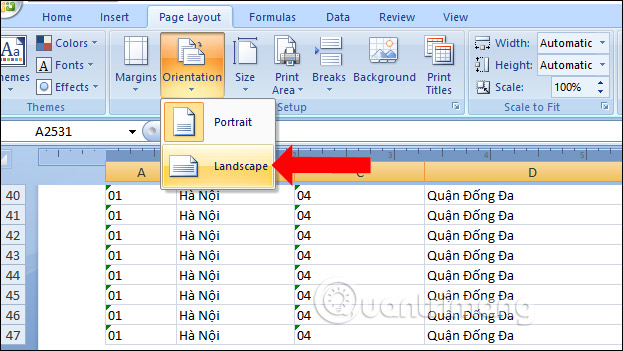
Click on the Page Layout tab , then select Orientation and choose Portrait or Landscape. Depending on the layout and length of the spreadsheet, choose one of the two Excel printing orientations accordingly.
Method 2: Delete or Hide Rows and Columns
Please review the statistics table on Excel and check any unnecessary information that appears in the document, then you can delete or hide that content. This also helps save space on Excel to narrow the printed content to only 1 A4 page.
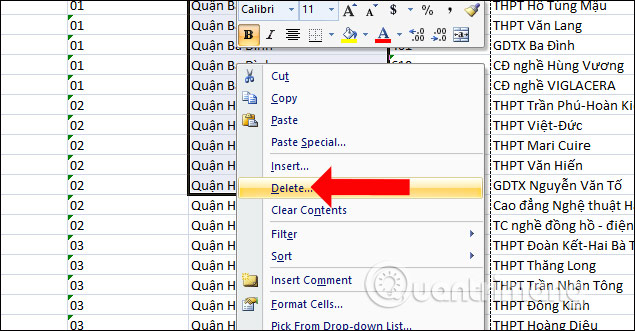
Highlight the content in the column you want to delete data from, then right-click and select Delete .
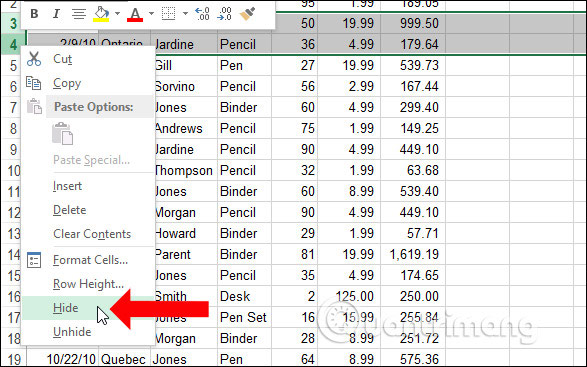
If you want to hide data in a column or row in Excel, also highlight the content in the column, right-click and select Hide .
With Excel 2007, there is no Hide option in the right-click menu, so users need to remove them. For detailed instructions on how to hide columns and rows on Excel, please refer to the article Ways to hide data on Excel.
Method 3: Break Excel Worksheet
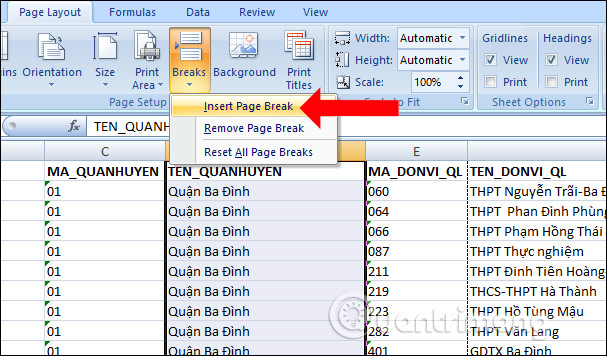
It may be that when printing the document pages are connected together, so it will be difficult to adjust the printed content on a page. Click on the Page Layout tab, select Breaks, then select Insert Page Break , or you can click Insert > Page Breaks.
When you break the page like this, Excel will know where you want to split the page.
Method 4: Change the Print Area on Excel
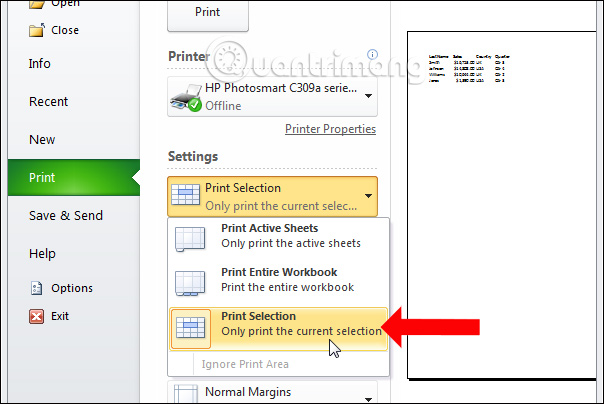
During the printing process, you do not want to print the entire content, but you can choose to print certain content. First, highlight the data area to print and then click File, select Print. Then look to the right of the Print Selection section and select Only print the current selection .
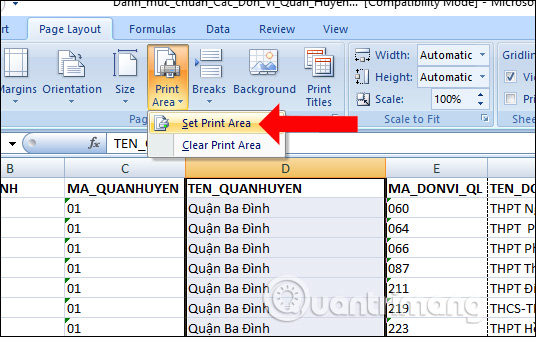
Or you can click on Page Layout > Print Area > Set Print Area to select the highlighted data area to print this area only. For detailed instructions, please refer to the article How to print a selected area in Microsoft Excel.
Method 5: Adjust the Print Page Margins
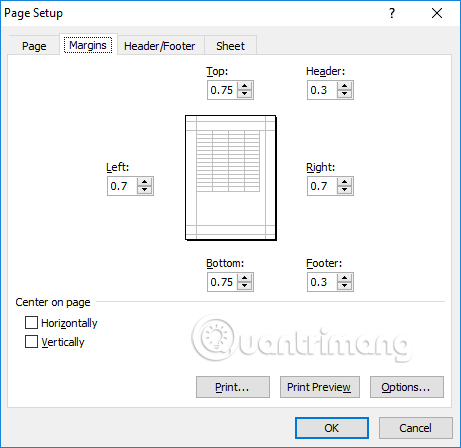
Editing the print page margins is also a way for users to print content on Excel on only one page. Click on the Page Layout tab , then in the Page Setup group, click on the arrow icon .
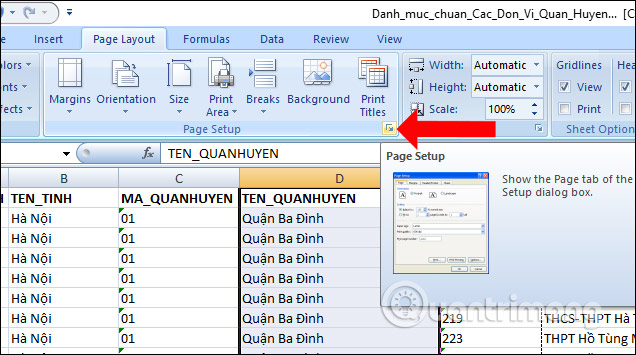
A new dialog box appears, click on the Margins tab and adjust the margins on each side to fit the content in only one side of an A4 page.
Method 6: Change Column Width
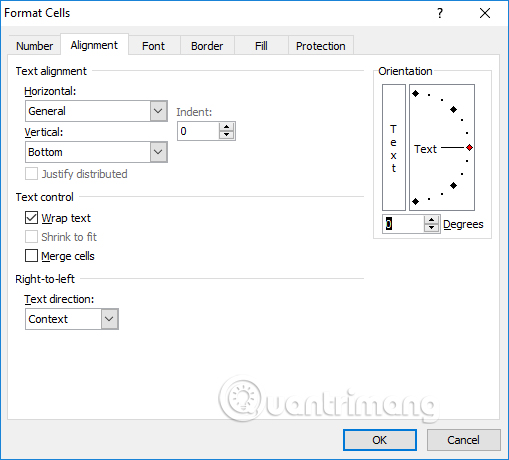
If the content in a line or cell has many characters, Excel will automatically expand the cell size to enter the content. If so, we can adjust the width in the column to shrink the table size to print the document in an A4 paper page.
Right-click on Format Cells and select Alignment . Then check Wrap Text to adjust the width of the columns by dragging the margin.
Method 7: Adjust the Table Size
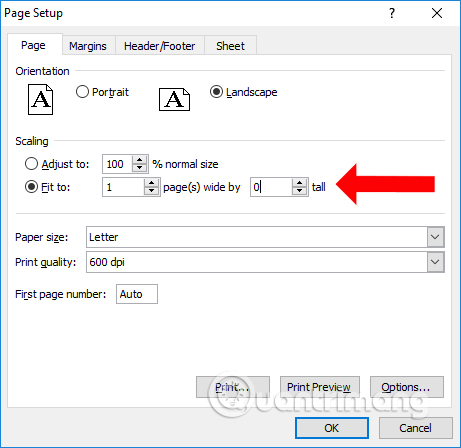
We click on the arrow icon in the Page Setup group , then in the Page section, click on Fit to , then enter the number in the page(s) wide by and tall sections .
If the user wants to print the spreadsheet to fit within the width of the page, at page(s) wide by enter 1 and at tall enter 0.
So with some of the above methods, you can adjust the Excel document to fit 1 A4 page when printing. You can customize accordingly to get the document you need to print.




Reader Comments 0
Sign in with email or Google to join the discussion.