How to create an Excel table, insert a table in Excel
One way to present content on Word or Excel or PowerPoint is to create a table and then enter the data into the table. Creating tables on Word, or inserting tables into Excel, can help users understand the problem more quickly, especially data for content that we don't need to present much.
To insert a table into Excel, we can use many different ways, in which the most basic way is to insert the Insert tab and go to the Table item to draw the table. After adding the table to Excel, users can also adjust the layout of the table, add rows, add columns or reduce rows, depending on the content requirements. The following article will guide you how to create a table on Excel.
- Instructions for deleting table paths in Word
- Instructions for creating tables, deleting tables in Google Docs
- Instructions for inserting an image into an Excel spreadsheet
1. How to create a table in Excel:
We will guide you to read some ways to insert tables on Excel.
Method 1: Create the default table with Insert Table
This is the fastest, traditional, fastest way to create tables on most text editing tools, including Excel.
Step 1:
We black out the content available in the table, or create a new table without inserting content. Then, click on the Insert tab above and then select Table . Or you can press Ctrl + T shortcut to manipulate faster when processing to insert multiple tables.

Step 2:
Soon the Create Table dialog box appears to let users customize the table creation area. By default Excel will follow the data area you have zoned. Otherwise the user can change the data area to create the table.
- If the selected table data range includes the table header, you check the box before My table has headers.
- If the selected data range does not include the table header, you uncheck the box before My table has headers.
At the beginning of the columns of the table will appear with the default title names such as Column 1, Column 2 . you can change the title as desired.
Click OK to proceed with creating the table.

The final result in Excel table will be created as shown below.

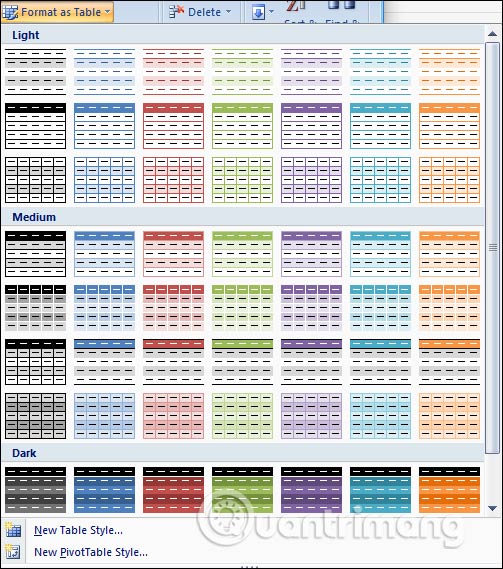
Method 2: Create an Excel table customized with Format as Table
In addition to creating the default Insert Table table, we can also use the Format as Table option to create Excel tables.
Step 1:
We black out the data area you want to create the table and then select the Home tab , click on Format as table .

Step 2:
Appears different styles of tables with many colors. We click on a table that we want to use in Excel.

Step 3:
The Create Table dialog box appears. We also follow the steps above if the table has a title added, then click OK .

The Excel table will immediately be created in the same manner that the user selected earlier.

Method 3: Create tables by Border
In fact, this is how to create borders for content, but also helps you create tables on Excel. If the user does not have multiple table type requests such as color for the table, or cells, this method can be used.
We also highlight the content in the lesson and select the Border icon. Click on the All Borders icon to create a table of contents.

2. Edit tables in Excel:
Once the table has been created, users can proceed to edit the table with a number of options.
Step 1:
Black out any box in the table that will appear in the Table Tools section, click on the Design item.

Step 2:
In Table Style Options , users will have custom items including:
- Header Row: the first line of the table to record information.
- Totol Row: the last line of the table to calculate the sum of the numbers.
- Banded Row: alternate colors and groups of cells.
- First column: displays a special format for the first column of the table.
- Last Column: displays a special format for the last column of the table.
- Banded Column: alternate color for columns.
Some options have been defaulted. If you want to use any option, check the box to uncheck it to not use it.

For example, I chose the Last Column and the last column in the table to be highlighted to create highlights in the table.

With the above article, we know how to create a table in Excel in different ways, along with customizing the table style with some options in Table Styles. If you want to choose more colors for the table, then choose to do it with Format as Table, but if it is simple, you only need to do it in ways 1 and 3.
See more:
- Summary of expensive shortcuts in Microsoft Excel
- How to print text and data in Microsoft Excel
- How to combine 2 columns Full name in Excel does not lose content
I wish you all success!