Table of Contents
Macromedia Flash - Create Text Running in Banner covers the essential facts behind the topic, including what changed, why it mattered, and how it affected users.
Macromedia Flash Overview
Step 1 Create a new flash file. Press Ctrl + J on the keyboard (Document Properties) and set the size of the file to your liking. Choose any background color you like. Select Frame rate of Flash to 32 and click OK.
Step 2 Select the Text Tool (T) and enter the text you want to advertise.
Step 3 Select the text you just created, go to the Align Panel (Ctrl + K) on the right side of the screen and take the following steps: - Make sure the To button of the Align / Distribute section is selected - Click the Align horizontal center button ( center horizontal). - Click on the Align vertical center button.
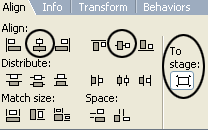
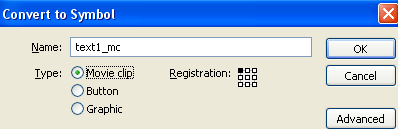
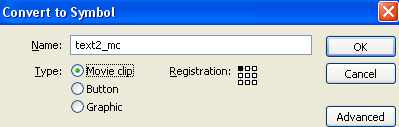
So you've finished editing that text in the middle of the file. Step 4 Still select the text, press F8 key (Convert to Symbol) to convert that text into a Movie Clip Symbol.
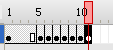
Step 5 Click on frame 5 and press F6 key on the keyboard. Then press F6 key six times on the next frame (see picture below).
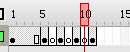
Step 6 Go back on frame 6 and press Delete key on the keyboard. Perform that operation on frame 8 and frame 10
Step 7 Go back on frame 1, select the Freee Transform Tool (Q), press and hold the Shift key, and drag the text that has been drawn a bit (the following).
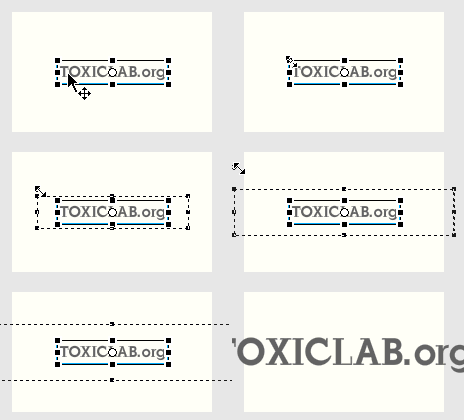
Step 8 Grab the Selection Tool (V) and click on the text that has been converted to a Movie Clip that has been pulled up a bit. After that, go to the Properties Panel (Ctrl + F3). On the right side, you will see the Color menu. Select Alpha and drag the contrast to 0%.

Step 9 Click again on frame 1 and go back to the Properties Panel (Ctrl + F3). Then set the options as follows:
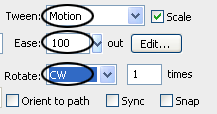
Step 10 Click on frame 40 and press F6 key. Still on frame 40 and press F6 key to continue 6 more times. Step 11 Go back on frame 41 and press Delete key on the keyboard. Do this again on frame 43 and 45. Step 12 Click on frame 50 and press F6 key. Repeat steps 7 and 8 on frame 50. Step 13 Go back on frame 46 and repeat step 9. Step 14 Grab the Selection Tool (V) and double click on layer 1, rename it to text 1. After that, create a new layer above the text 1 layer and name it text 2. Step 15 Click on frame 50, both layer text 2, press F6 key. Use the Text Tool (A) and enter another text. Step 16 Select the text you just created, repeat step 3 to align it. Step 17 Still select text 2, press F8 key (Convert to Symbol) to convert the text into a Movie Clip Symbol.
Step 18 Click on frame 55 and frame 85, press F6 key in turn Step 19 Go back on frame 55 and place the text as shown in the following image
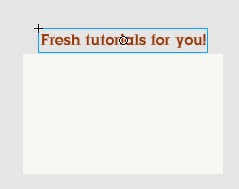
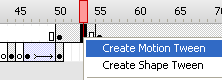
Step 20 Right-click anywhere on the gray area between frame 50 and 55 on the timeline and choose Create Motion Tween from the menu that appears.
Step 21 Click on frame 85 and press F6 key 6 more times. Step 22 Go back on frame 86 and press Delete key on the keyboard. Do this again on frame 88 and 90. Step 23 Click on frame 95 and press F6 key. Then reset the text to the position shown below
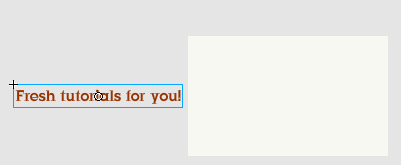
Step 24 Right-click again anywhere on the gray area between frame 91 and 95 on the timeline and choose Create Motion Tween from the menu that appears. Ctrl + Enter to see the final product. You can download the original file here.
FAQ
What is the main topic of Macromedia Flash - Create Text Running in Banner?
Macromedia Flash - Create Text Running in Banner covers the essential facts behind the topic, including what changed, why it mattered, and how it affected users.
Why is Macromedia Flash important?
Macromedia Flash Overview Step 1 Create a new flash file.
What should readers remember about Macromedia Flash?
Press Ctrl + J on the keyboard (Document Properties) and set the size of the file to your liking.
Related Articles
 Macromedia Flash - Create Banner Text Effect5 minutes read
 Macromedia Flash - Text Display Effect5 minutes read
 Macromedia Flash - Complete Flash Banner Design4 minutes read
 Macromedia Flash - Running Text Effect2 minutes read
 Macromedia Flash - Create Premium Banners with Flash: Tao5 minutes read
 Macromedia Flash - Create a Snow Effect3 minutes read
Reader Comments 0
Sign in with email or Google to join the discussion.