Table of Contents
This article examines Step and explains the main developments, practical implications, and context readers should understand.
Step Overview
Step 1 Create a new Flash file and set Width and Height to 300px. Frame rate set to 45fps (Frame number per second) Step 2 Double click on layer 1 and rename it to Background. Set the background color to # B8FECA or whatever color you like. Step 3 Add a new layer and name it Object. Then create any object that you want it to run according to the click position. Step 4 Select the object you created (Ctrl + A) and press F8 on the keyboard ( Convert to Symbol ) to convert it into a Movie Clip.
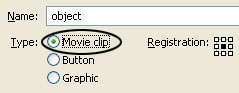
Step 5 Select Movie Clip ' Ob ject'> open Properties (Ctrl + F3) and enter the object content (as shown below).
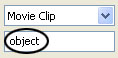
Step 6 Continue to select the object, open the Action Script (F9) and enter the following script content:
OnClipEvent (load) { friction = "0.18"; targetx = Random (300) +20; targety = Random (300) +20 } onClipEvent (enterFrame) { mouse_x = int (targetx-this._x); mouse_y = int (targety-this._y); if (mouse_x> 0 && mouse_y> 0) { quad = Number (4); } if (mouse_x0) { quad = Number (1); } if (mouse_xquad = Number (2); } if (mouse_x> 0 && mouse_y <0) { quad = Number (3); } abs_x = Math. Abs (mouse_x); abs_y = Math. Abs (mouse_y); tg = abs_y / abs_x; _root. Maths = Math. Atan (tg) * Number (180) /Math. PI; if (quad == 1) {angle = number (90) - number (_root. Maths)} if (quad == 2) {angle = number (90) + number (_root. Maths)} if (quad == 3) {angle = number (270) - number (_root. Maths)} if (quad == 4) {angle = number (270) + number (_root. Maths)} if (not _root. Done) {setProperty (_this, _rotation, angle); _root. Done = true} _root. Done = true} speedx = difx * friction; speedy = dify * friction; setProperty (this, _y, _root. Object._y + speedy); setProperty (this, _x, _root. Object._x + speedx); difx = int (targetx) -this._x; dify = int (targety) -this._y; }
Step 7 Add a new layer and name it Circle. Select the Oval Tool (O) - Fill Color: to colorless mode - Stroke color: choose the color you like - The contours of the circle: select the stroke or whatever you want


Step 8 Select the circle and press F8 to convert that circle into a Movie Clip
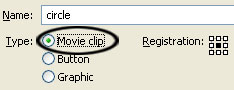
Step 9 Still select Movie Clip ' Circle '> Properties (Ctrl + F3) and enter the circle content for the part
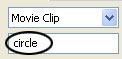
Step 10 Double-click on the Movie Clip ' Circle ' or right-click and choose Edit in Place. Step 11 Still select the circle> press F8 key to convert it to Movie Clip and name it circle_inside
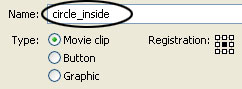
Step 12 Click Frame 10 and press F6 key. Then open Action Script and enter the following script:
GotoAndPlay (1);
Step 13 Return to Frame 1, open Properties - At Tween choose Motion - At Rotate choose CCW
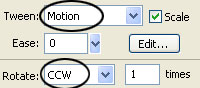

Step 14 Go back to the main scene (Scene 1), select the Circle layer, open Action Acript (F9) and enter the following script content:
OnClipEvent (load) { startDrag (this, true); _root. Drag = this; } onClipEvent (mouseDown) { _root. Difx = this._x- _root. Object._x; _root. Object. Targetx = this._x; _root. Dify = this._y- _root. Object._y; _root. Object. Targety = this._y; _root. Done = False }
Step 15 Add a new layer and name it Action Script. Open the Action Script panel (F9) and enter the following script:
Stop ();
And now you just need to check your results by pressing Ctrl + Enter or otherwise you can get the complete file here.
FAQ
What happened in Macromedia Flash - the Object Moves with the Mouse Click Position?
This article examines Step and explains the main developments, practical implications, and context readers should understand.
What factors influenced Step?
Step Overview Step 1 Create a new Flash file and set Width and Height to 300px.
What was the practical impact on users?
Frame rate set to 45fps (Frame number per second) Step 2 Double click on layer 1 and rename it to Background.
Related Articles
 Macromedia Flash - Dynamic Cursor Object: Step3 minutes read
 Macromedia Flash - Visual Effects Using Mouse Click: Hieu3 minutes read
 Macromedia Flash - Effects of Lighting on Photos4 minutes read
 Macromedia Flash - Create Menu Effects6 minutes read
 Macromedia Flash - Move Objects: Step3 minutes read
 The Basic Steps of Fixing Cursor Cursors Flutter in Windows8 minutes read
Reader Comments 0
Sign in with email or Google to join the discussion.