Table of Contents
Overview
This guide covers learn how to create a fade effect with in clear, practical terms. It covers the key concepts, recommended steps, common limitations, and useful checks so you can make a better-informed decision.
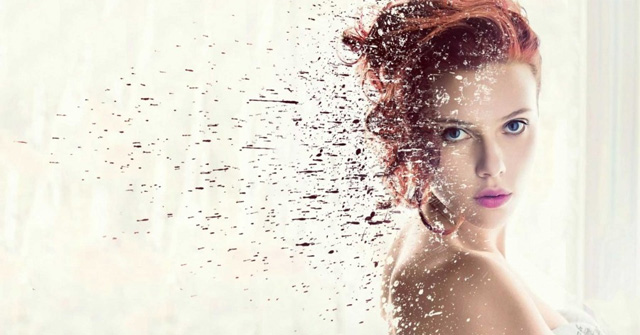
The Dispersion effect in Photoshop CS is relatively simple but can be tricky to get right. Basically, what you need to do is separate the subject from the background and create a copy of the subject layer. Then, 'morph' one of these subject layers using the Liquify tool to fill almost the entire frame.
The transformed layer is hidden from view and a combination of layer masks and splatter brushes is used to reveal the transformed object while hiding parts of the original object. The result is a feeling of the object being blown away by the wind.
Required Resources
Splatter Brush Image
Begin
Step 1: Open the image in Photoshop CS6/CC.
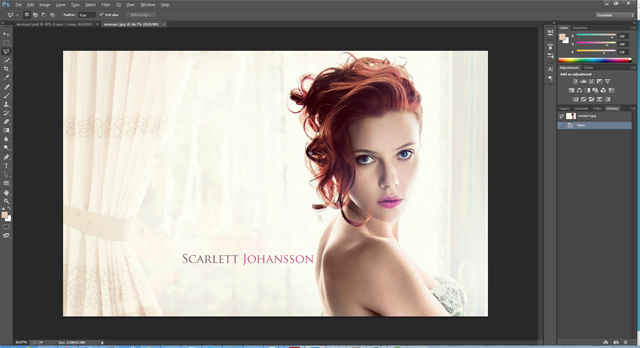
Step 2: In the Layers panel, double-click on the only layer (Background) to have Photoshop create a layer. This will allow you to hide the background later.

Step 3: With the New Layer screen, press OK to create the background conversion into a layer.
Remove background
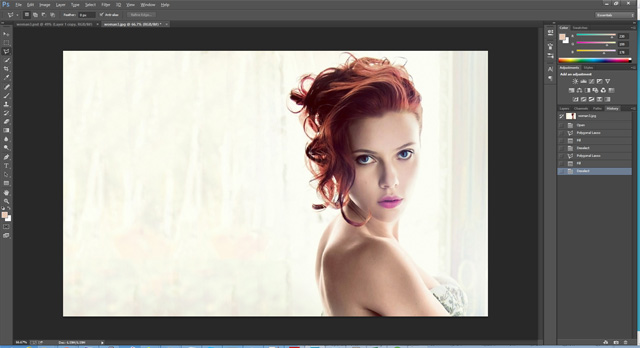
The first thing you need to do is remove the background by removing the text as well as the curtains.
Step 1: Use the Polygonal Lasso tool to select an area around the text.
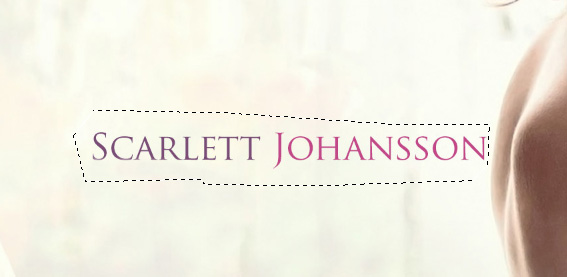
Step 2: With the text selected, press Shift + F5 or Edit > Fill from the menu to bring up the Fill box and select Content-Aware.
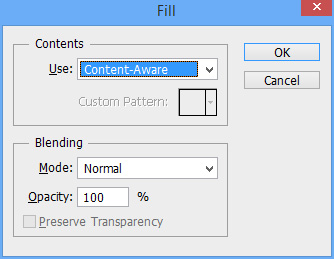
Step 3: Click OK.
Step 4: Repeat this process for the curtains by selecting them and using Content-Aware.
Isolate the object from the background
Step 1: Use the same Polygonal Lasso tool to carefully select around the model's body, when it comes to the hair area don't get too detailed, because we are not changing the background so you don't have to worry about making an accurate selection around the hair area.
Step 2: With the model selected, press Ctrl + J to create a new copy that includes only the selected area (the model).
Step 3: Hold down the Ctrl key, click on the new layer to load this layer as a selection.
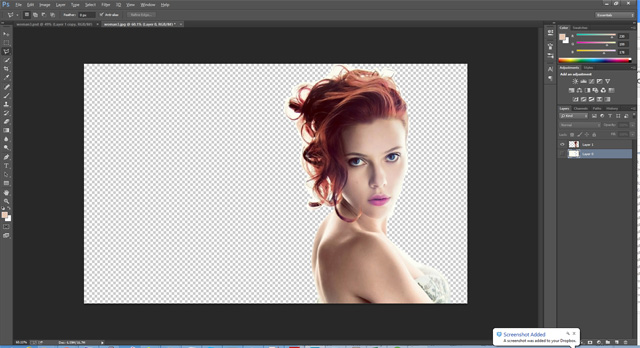
Step 4: Select the first layer and press Delete. This will remove the model from the background.
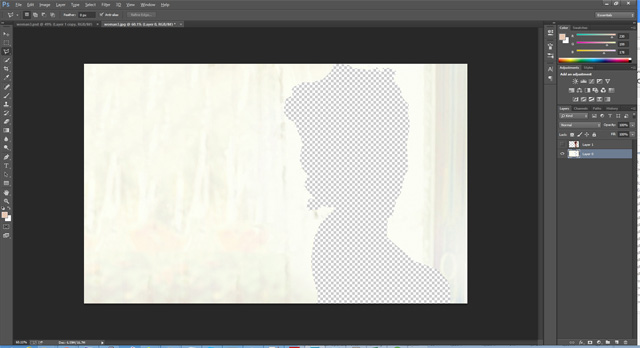
Step 5: After completing these steps we should be left with two layers, the top layer with the model and the bottom layer with the background with the model silhouette.
Remove the remaining background on the model's hair
At this point we have separated the model from the background but the original background is still present on the hair.
Step 1: Create a new layer between the background and the separated model image.
Step 2: Using the Fill tool ( Shift + F5 or Edit > Fill ), fill the new layer with black. This will help to clearly show the object to be worked on.
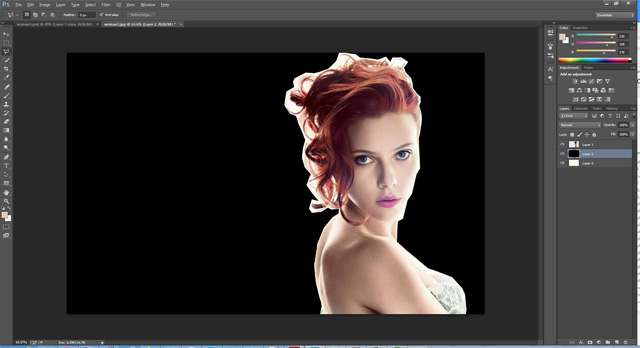
Step 3: Select the image of the separated object and then select the Background Eraser Tool.
Step 4: Get a white background sample by pressing Alt/Option and clicking on the white area between her hair.
Step 5: Finally paint the rest of the hair to remove the background color of the pattern.
Step 6: Repeat this process sampling new areas until most of the white background is removed and only the faint white hair remains.
Step 7: Use the normal eraser tool to remove as many of the faint white hairs as possible without touching the real hair. The final result doesn't need to be perfect since we're not changing the background.
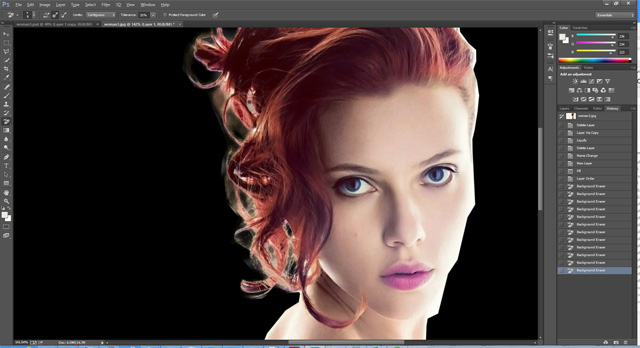
Step 8: Finally erase the black layer to see the original background.
Base coat
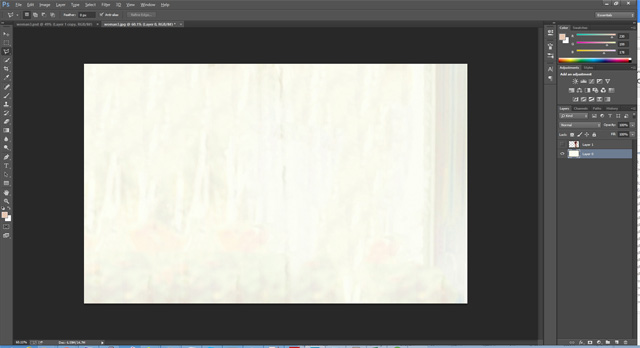
Step 1: Hide the model layer and show the background layer.
Step 2: Use the Polygonal Lasso tool to select around the missing area.
Step 3: Use the Content Aware tool ( File > Fill or Shift + F5 ), to fill in the missing area.
Step 4: Deselect the background by pressing Ctrl + D.
Transform the separated model image
Step 1: Select the separated model layer and press Ctrl + J to make a copy. Now we will have two copies of this layer.
Step 2: Click on the previously separated model layer (which will now be the middle layer).
Step 3: From the Filter menu, select Liquify to bring up the Liquify plugin.
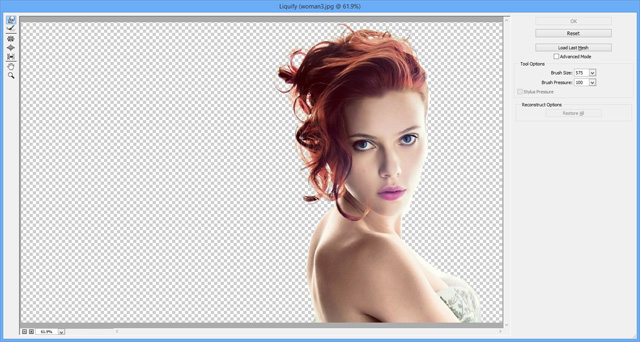
Step 4: Select a large brush size (slightly larger than the size of the model's head) and start pushing into the negative space of the image.
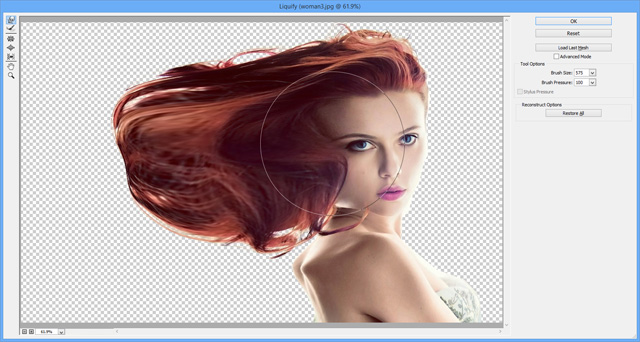
Step 6: When you are satisfied with this change, click OK to render the image.
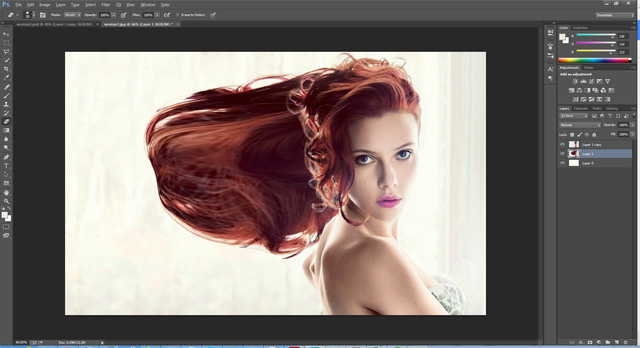
Step 7: With this layer selected hold down the Alt/Option key and press the Add Layer Mask button. Holding down Alt/Option will fill this layer with black, hiding it from view.
Step 8: Finally, select the top layer and create a mask but this time do not press Alt/Option so that the created mask layer is white.
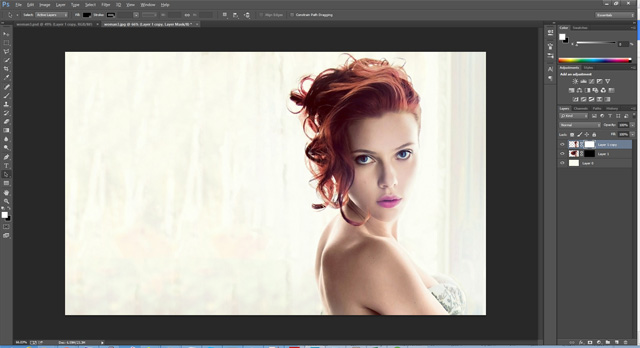
Create a fade effect for the top layer
Step 1: Select the top layer and make sure the mask layer is selected. If we don't highlight the mask in this layer then the actual image will not show up as expected.
Step 2: Select the Brush tool (B) from the tool panel and open the brush panel.
Step 3: If you don't have a splatter brush yet, click on the small gear icon on the top right and select Load Brushes. Browse to the downloaded ABR file.
Step 4: Choose one of these splatter brushes.
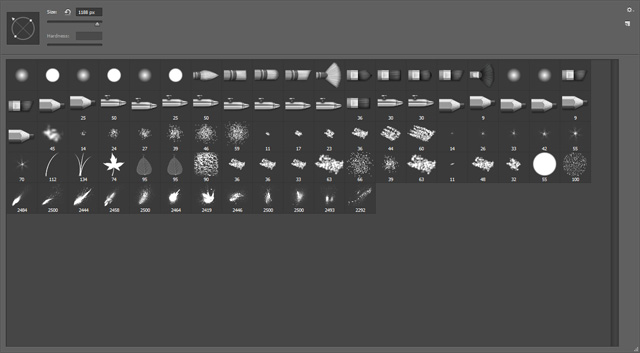
Step 5: Finally change the brush size and direction to match the desired spray pattern (horizontal from right to left).
Step 6: Make sure you are painting black on the mask layer, simply click around the head area before opening the brush pallet and changing the brush, size, rotation or all to create the most natural looking fade effect around the head.
Step 7: This part requires time and patience to achieve the desired effect.
Step 8: Pay special attention to the eyes and the right side of the face, because the effect goes to the left and barely touches the right side. If it goes too far over the right side of the face, you can pick a regular brush and repaint the layer mask with white over the areas where you don't want the effect to appear.
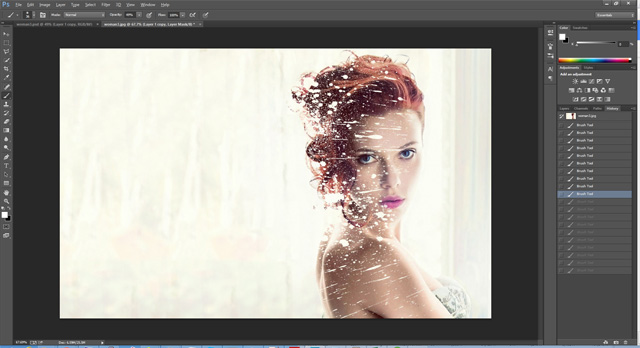
Create a fade effect for the transformation layer
The next step in this process is to repeat the same process above for the middle layer (the transform layer), but this time instead of painting with black to hide the layer we will paint with white to reveal the layer.
Step 1: Select the middle layer and the mask layer.
Step 2: Change the brush color to white and select the scatter brushes as in the previous section.
Step 3: Paint in the negative space to reveal parts of the transformed image. These areas will look like parts that have melted away from the top layer.
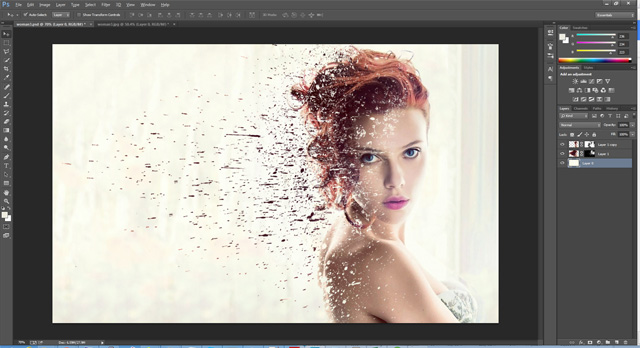
Some advice
It can take time and effort to get the desired effect, if you are not satisfied you can choose to mask with white/black and start the process again for that layer.
Final image:
You can also check out the previous parts of this CS6 tutorial series:
Key Takeaways
Use the guidance above as a practical reference for learn how to create a fade effect with. Check compatibility, follow the steps carefully, and verify important details with official documentation when software, security, accounts, health, or purchases are involved.
FAQ
What is the main point of this article?
This article explains learn how to create a fade effect with Photoshop CS6, including the central facts, context, practical implications, and details needed to understand the topic.
Why does this topic matter?
It may affect performance, cost, safety, convenience, purchasing decisions, or how people understand a broader development.
Could the information change over time?
Yes. Product details, software features, prices, policies, codes, and news developments can change, so verify time-sensitive information with official sources.
Related Articles
 5 Ways to Create Fade In/Fade Out Sound Effects on Smartphones6 minutes read
 How to Create Picture in Picture Effect in Photoshop13 minutes read
 How to Create Whirlpool Effect on Photoshop: Photoshop Effects4 minutes read
 How to Create an Orton Effect in Photoshop4 minutes read
 How to Use Photoshop CS6 (Part 4): Create a Fading Effect9 minutes read
 How to Create Poster Effect for Photos in Photoshop11 minutes read
Reader Comments 0
Sign in with email or Google to join the discussion.